Dragon Quest 3 Remake: Zoma\'s Citadel Walkthrough
Quick Links
- How to Reach Zoma's Citadel in Dragon Quest 3 Remake
- Zoma's Citadel 1F Walkthrough – Dragon Quest 3 Remake
- Zoma's Citadel B1 Walkthrough – Dragon Quest 3 Remake
- Zoma's Citadel B2 Walkthrough – Dragon Quest 3 Remake
- Zoma's Citadel B3 Walkthrough – Dragon Quest 3 Remake
- Zoma's Citadel B4 Walkthrough – Dragon Quest 3 Remake
- How to Defeat Zoma in Dragon Quest 3 Remake
- Every Monster in Zoma's Citadel – Dragon Quest 3 Remake
After conquering countless quests and dungeons in Dragon Quest 3 Remake, your final challenge awaits: Zoma's Citadel. This formidable dungeon demands mastery of all your acquired skills, presenting the toughest test in the game's main story. This guide provides a complete walkthrough, including treasure locations.
How to Reach Zoma's Citadel in Dragon Quest 3 Remake
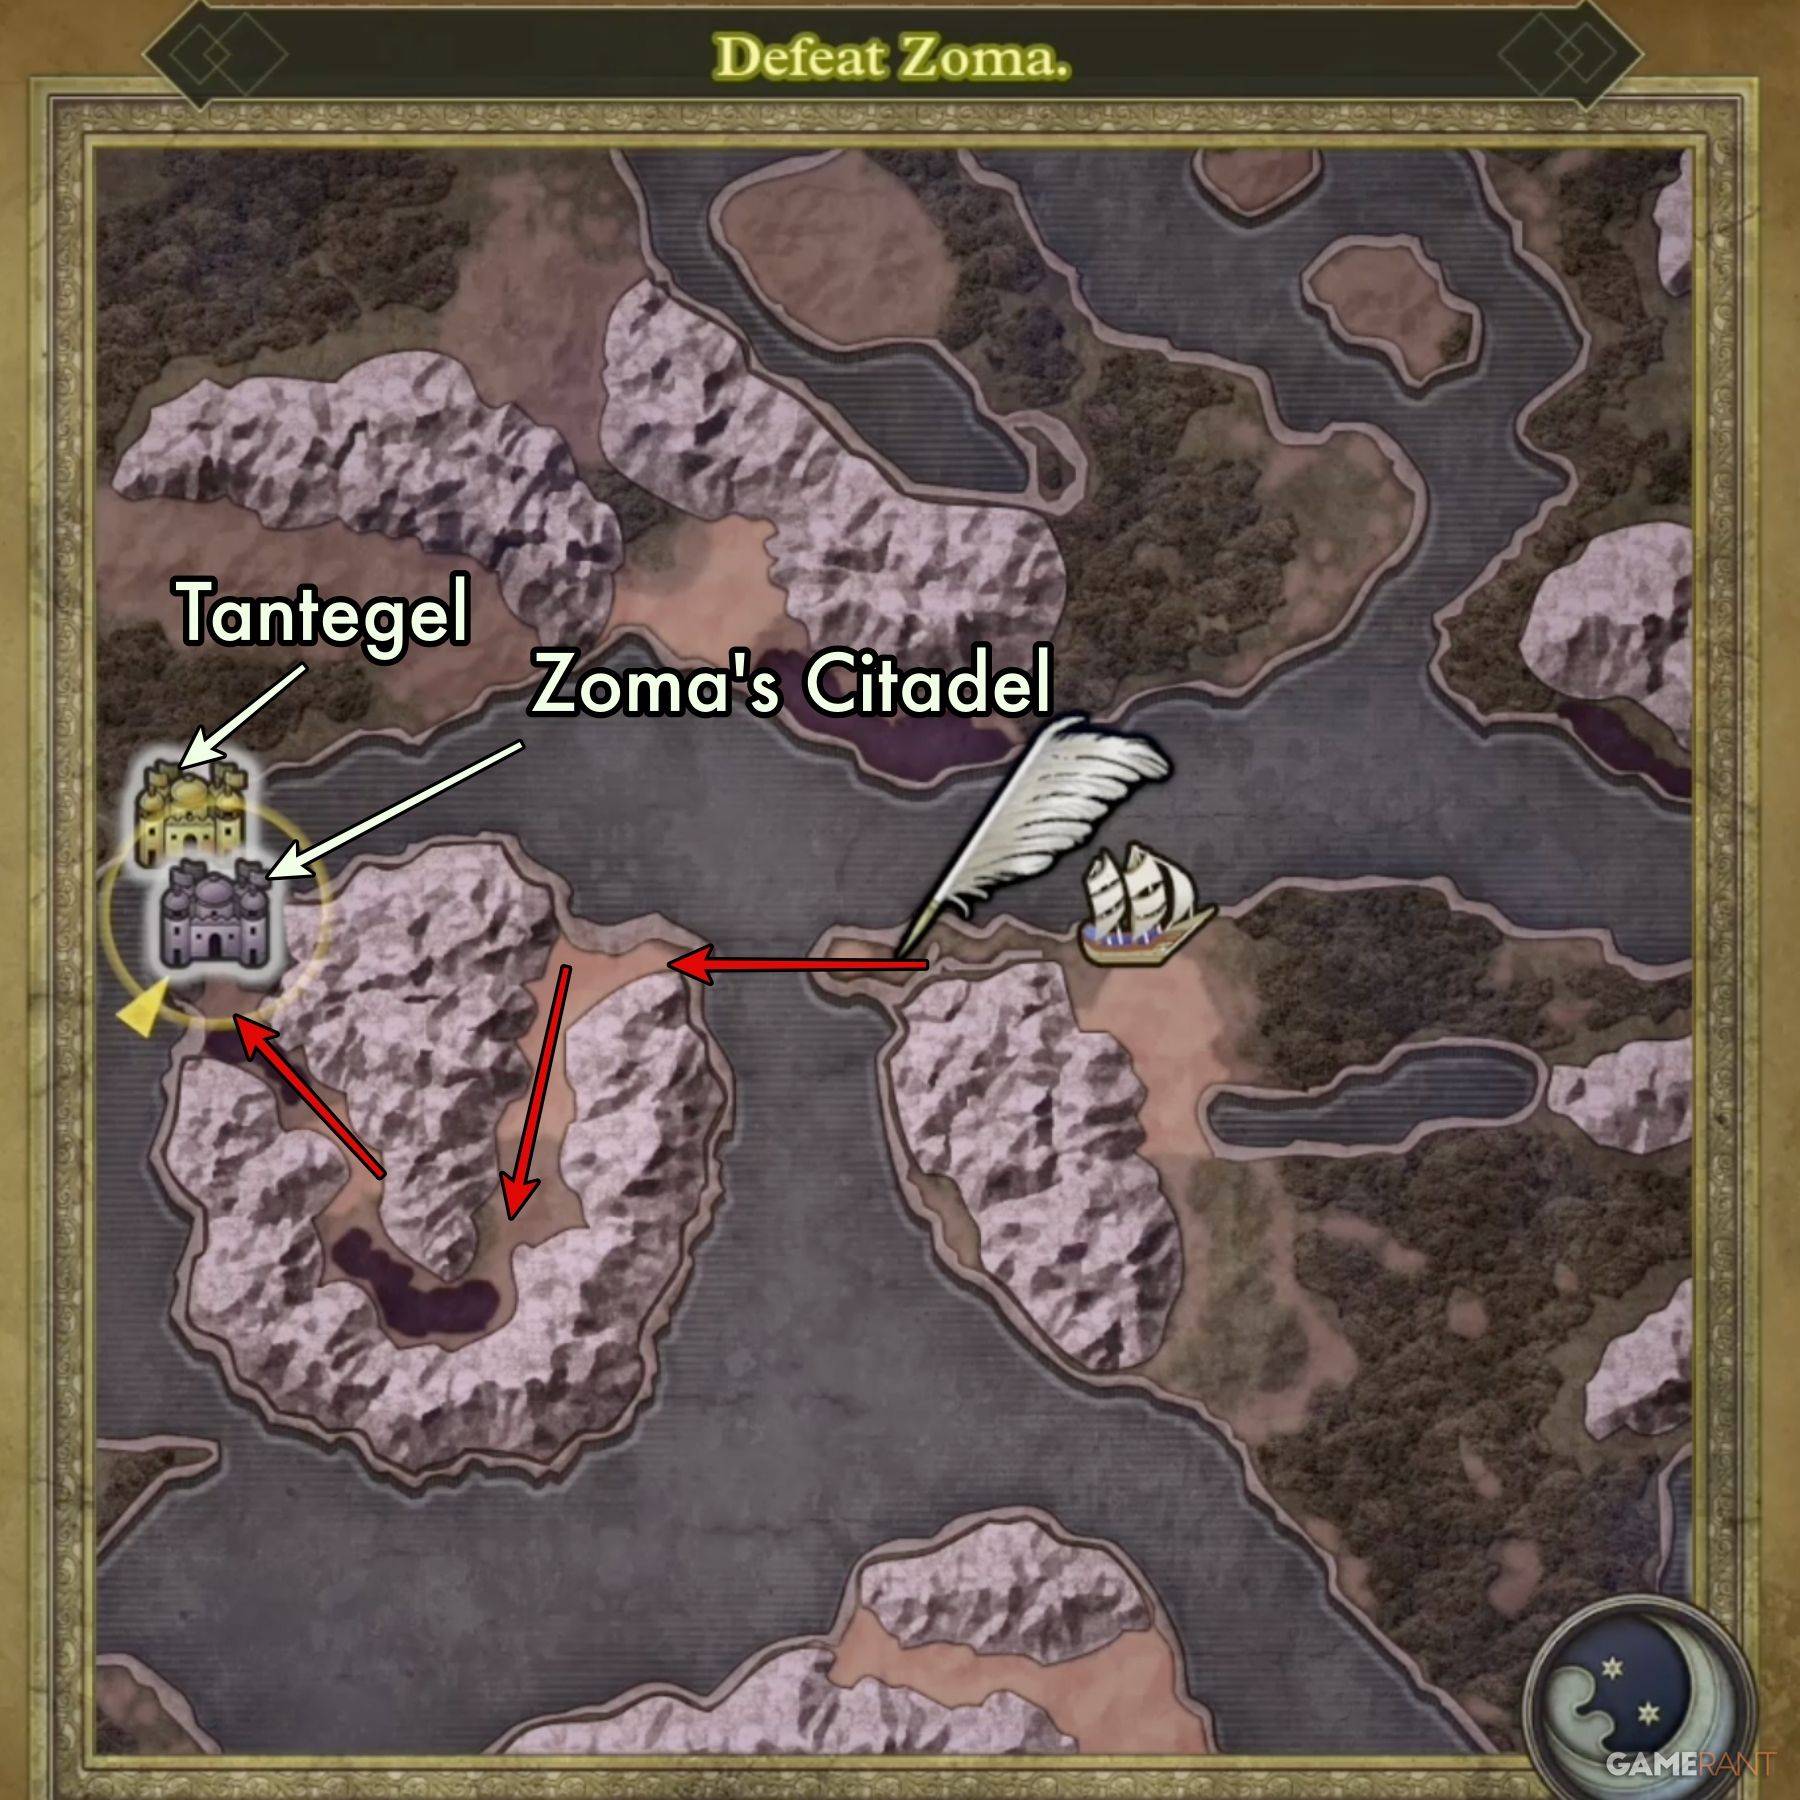 Defeating Archfiend Baramos plunges you into Alefgard's perpetual darkness. Zoma's Citadel, your ultimate destination, requires completing the Rainbow Drop quest.
The Rainbow Drop consists of:
- Sunstone – Found in Tantegel Castle
- Staff of Rain – Found in the Shrine of the Spirit
- Sacred Amulet – Received from Rubiss after rescuing her atop the Tower of Rubiss (requires the Faerie Flute)
Combine these items to create the Rainbow Drop, summoning the Rainbow Bridge to Zoma's Citadel.
Zoma's Citadel 1F Walkthrough – Dragon Quest 3 Remake
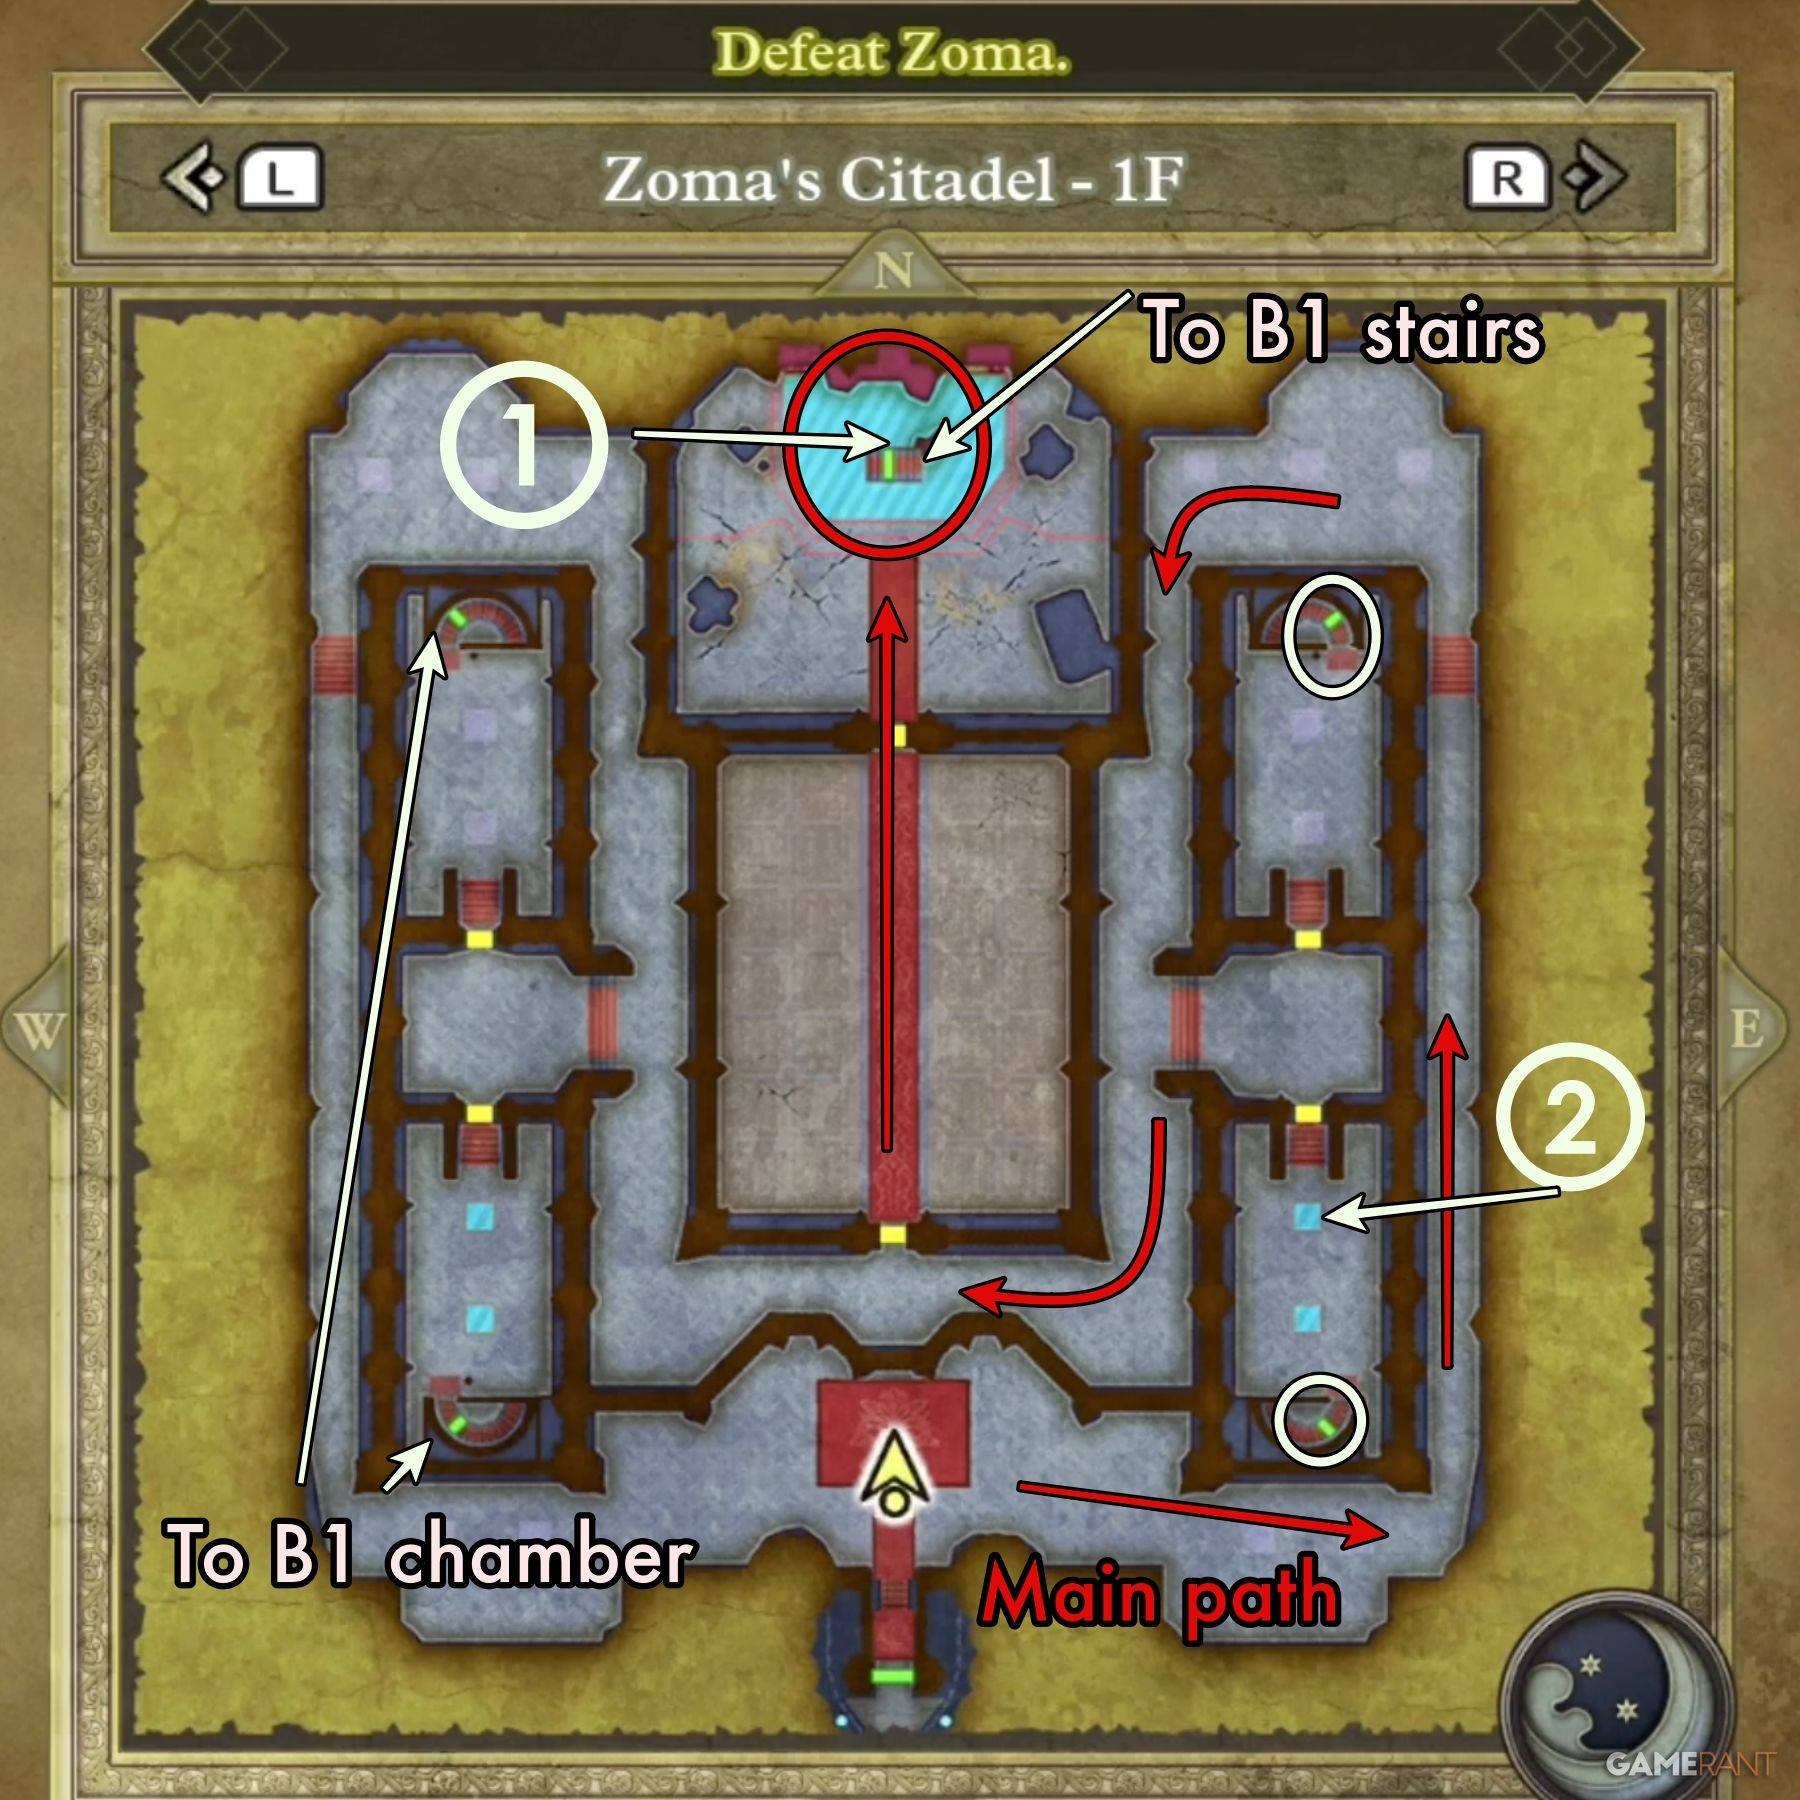 ### 1F Main Path:
Reach the throne in the northern wall's center; it will shift, revealing a hidden passage. Navigate the east or west side of the chamber, then return to the central chamber's door (see map). Side chambers contain treasure. Prepare for a Living Statue onslaught in the central chamber—treat them as formidable boss encounters.
All Treasure on Zoma's Citadel 1F:
- Treasure 1 (Buried): Mini Medal – behind the throne.
- Treasure 2 (Buried): Seed of Magic – near the electrified panel.
Zoma's Citadel B1 Walkthrough – Dragon Quest 3 Remake
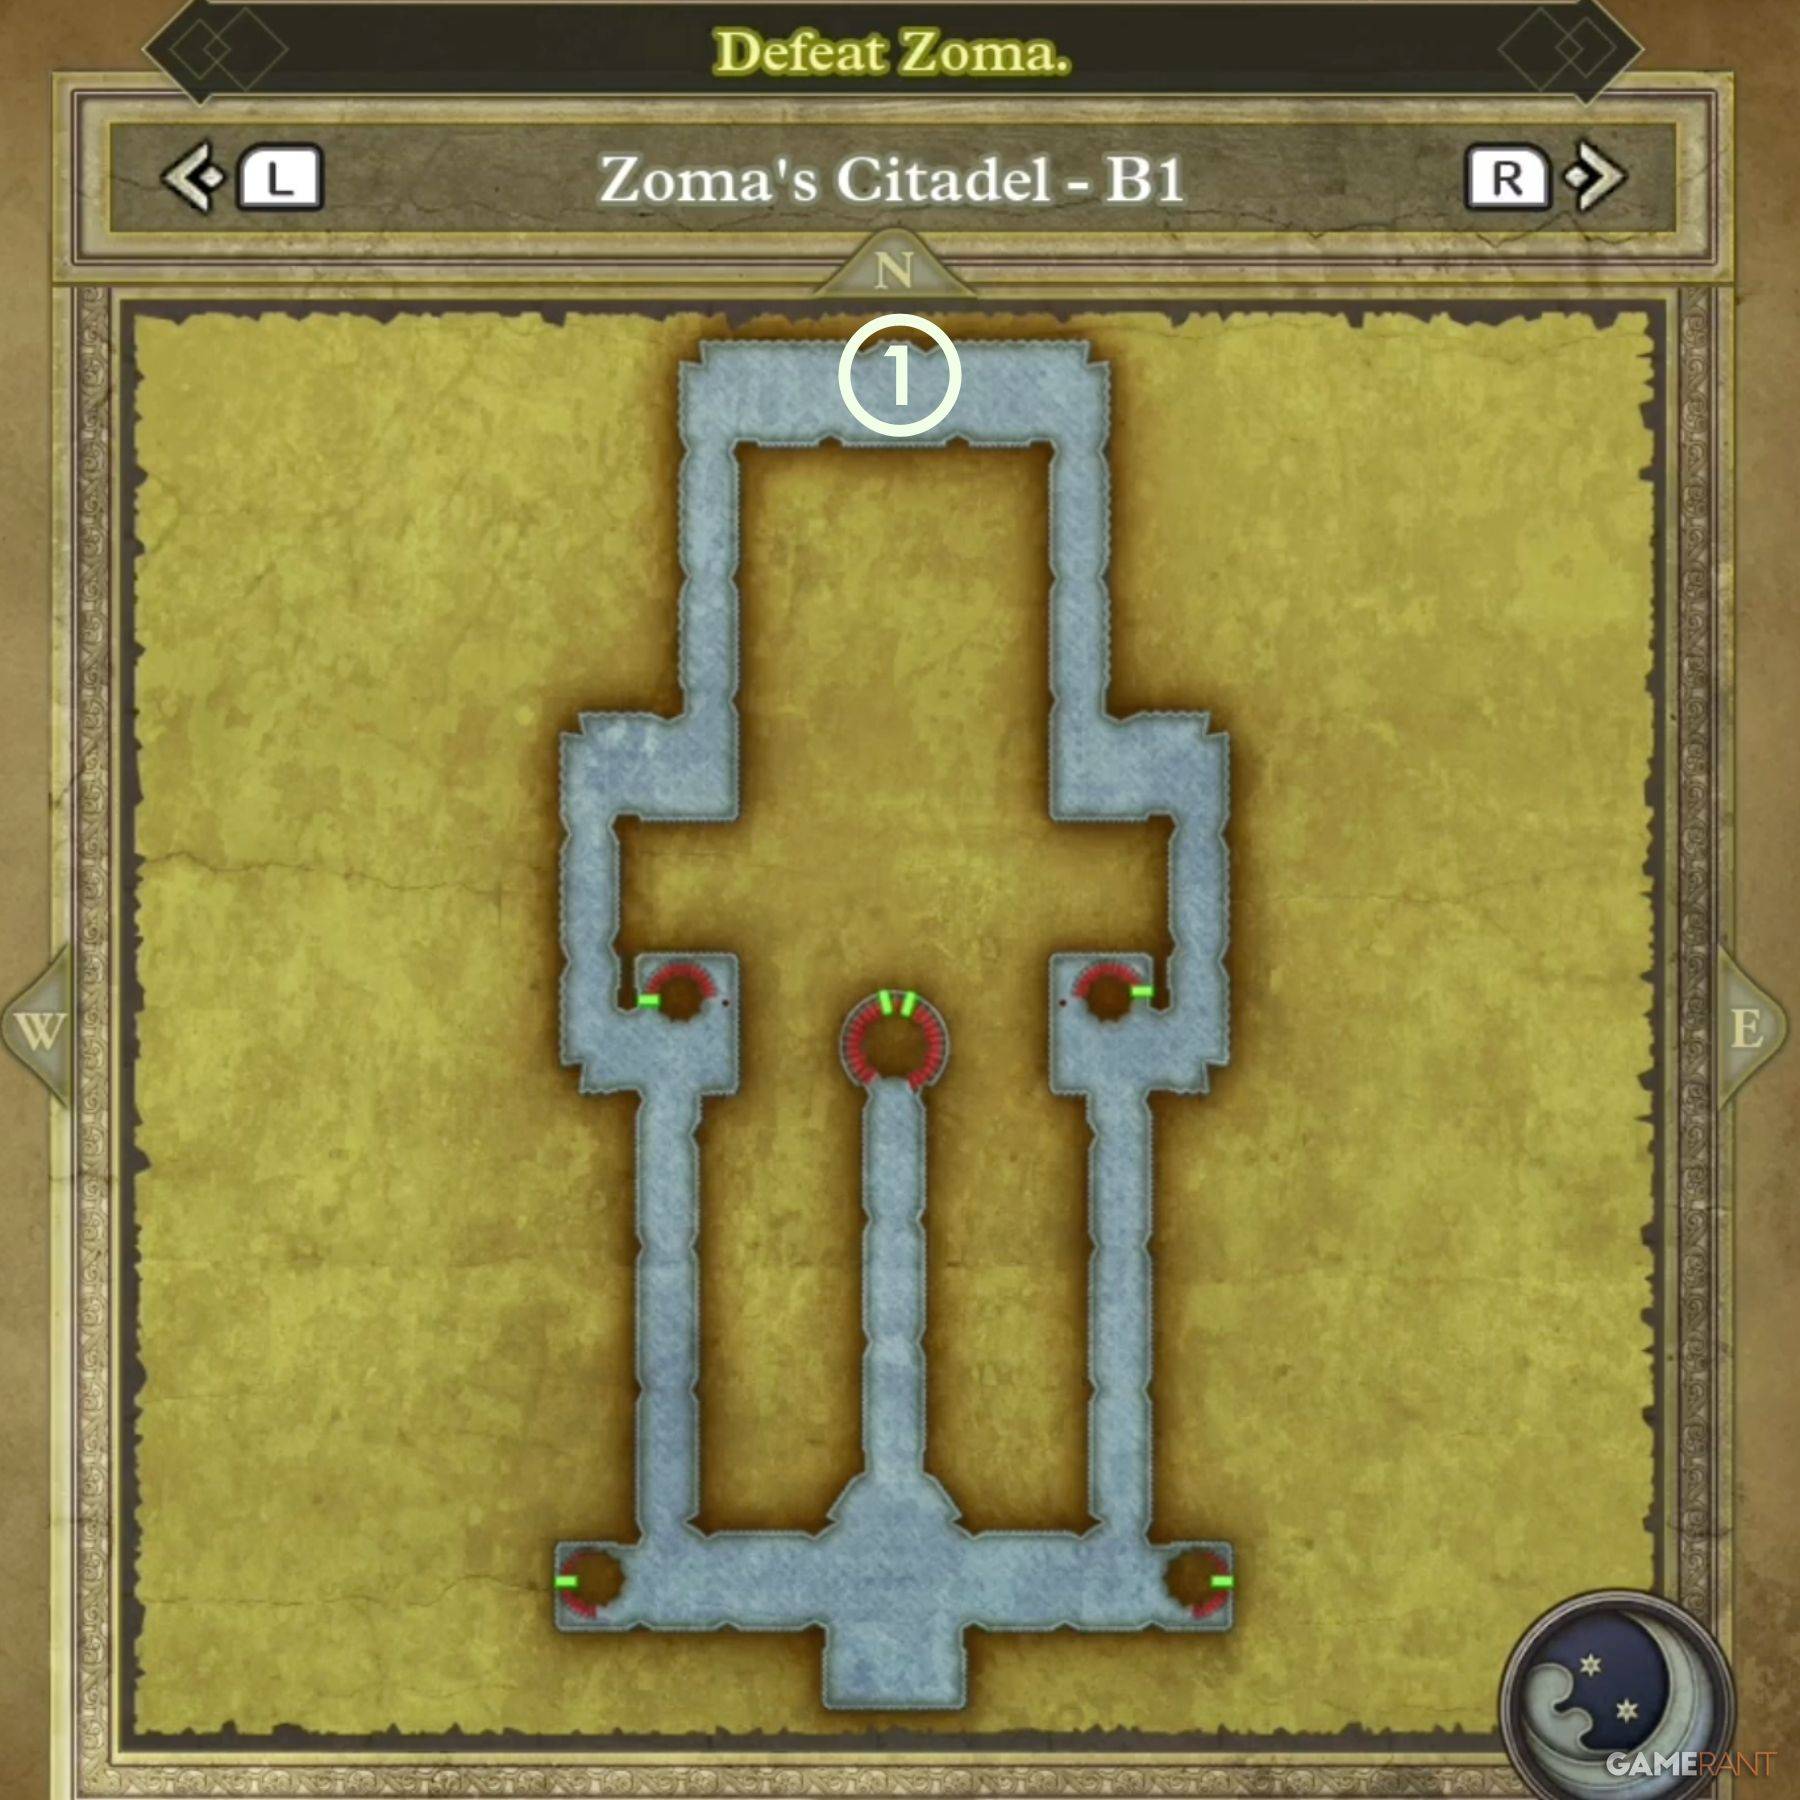 ### B1 Main Path and B1 Treasure:
The main path under the throne leads directly to B2. The four stair sets from 1F lead to an isolated B1 chamber containing one chest:
- Treasure 1 (Chest): Hapless Helm
Zoma's Citadel B2 Walkthrough – Dragon Quest 3 Remake
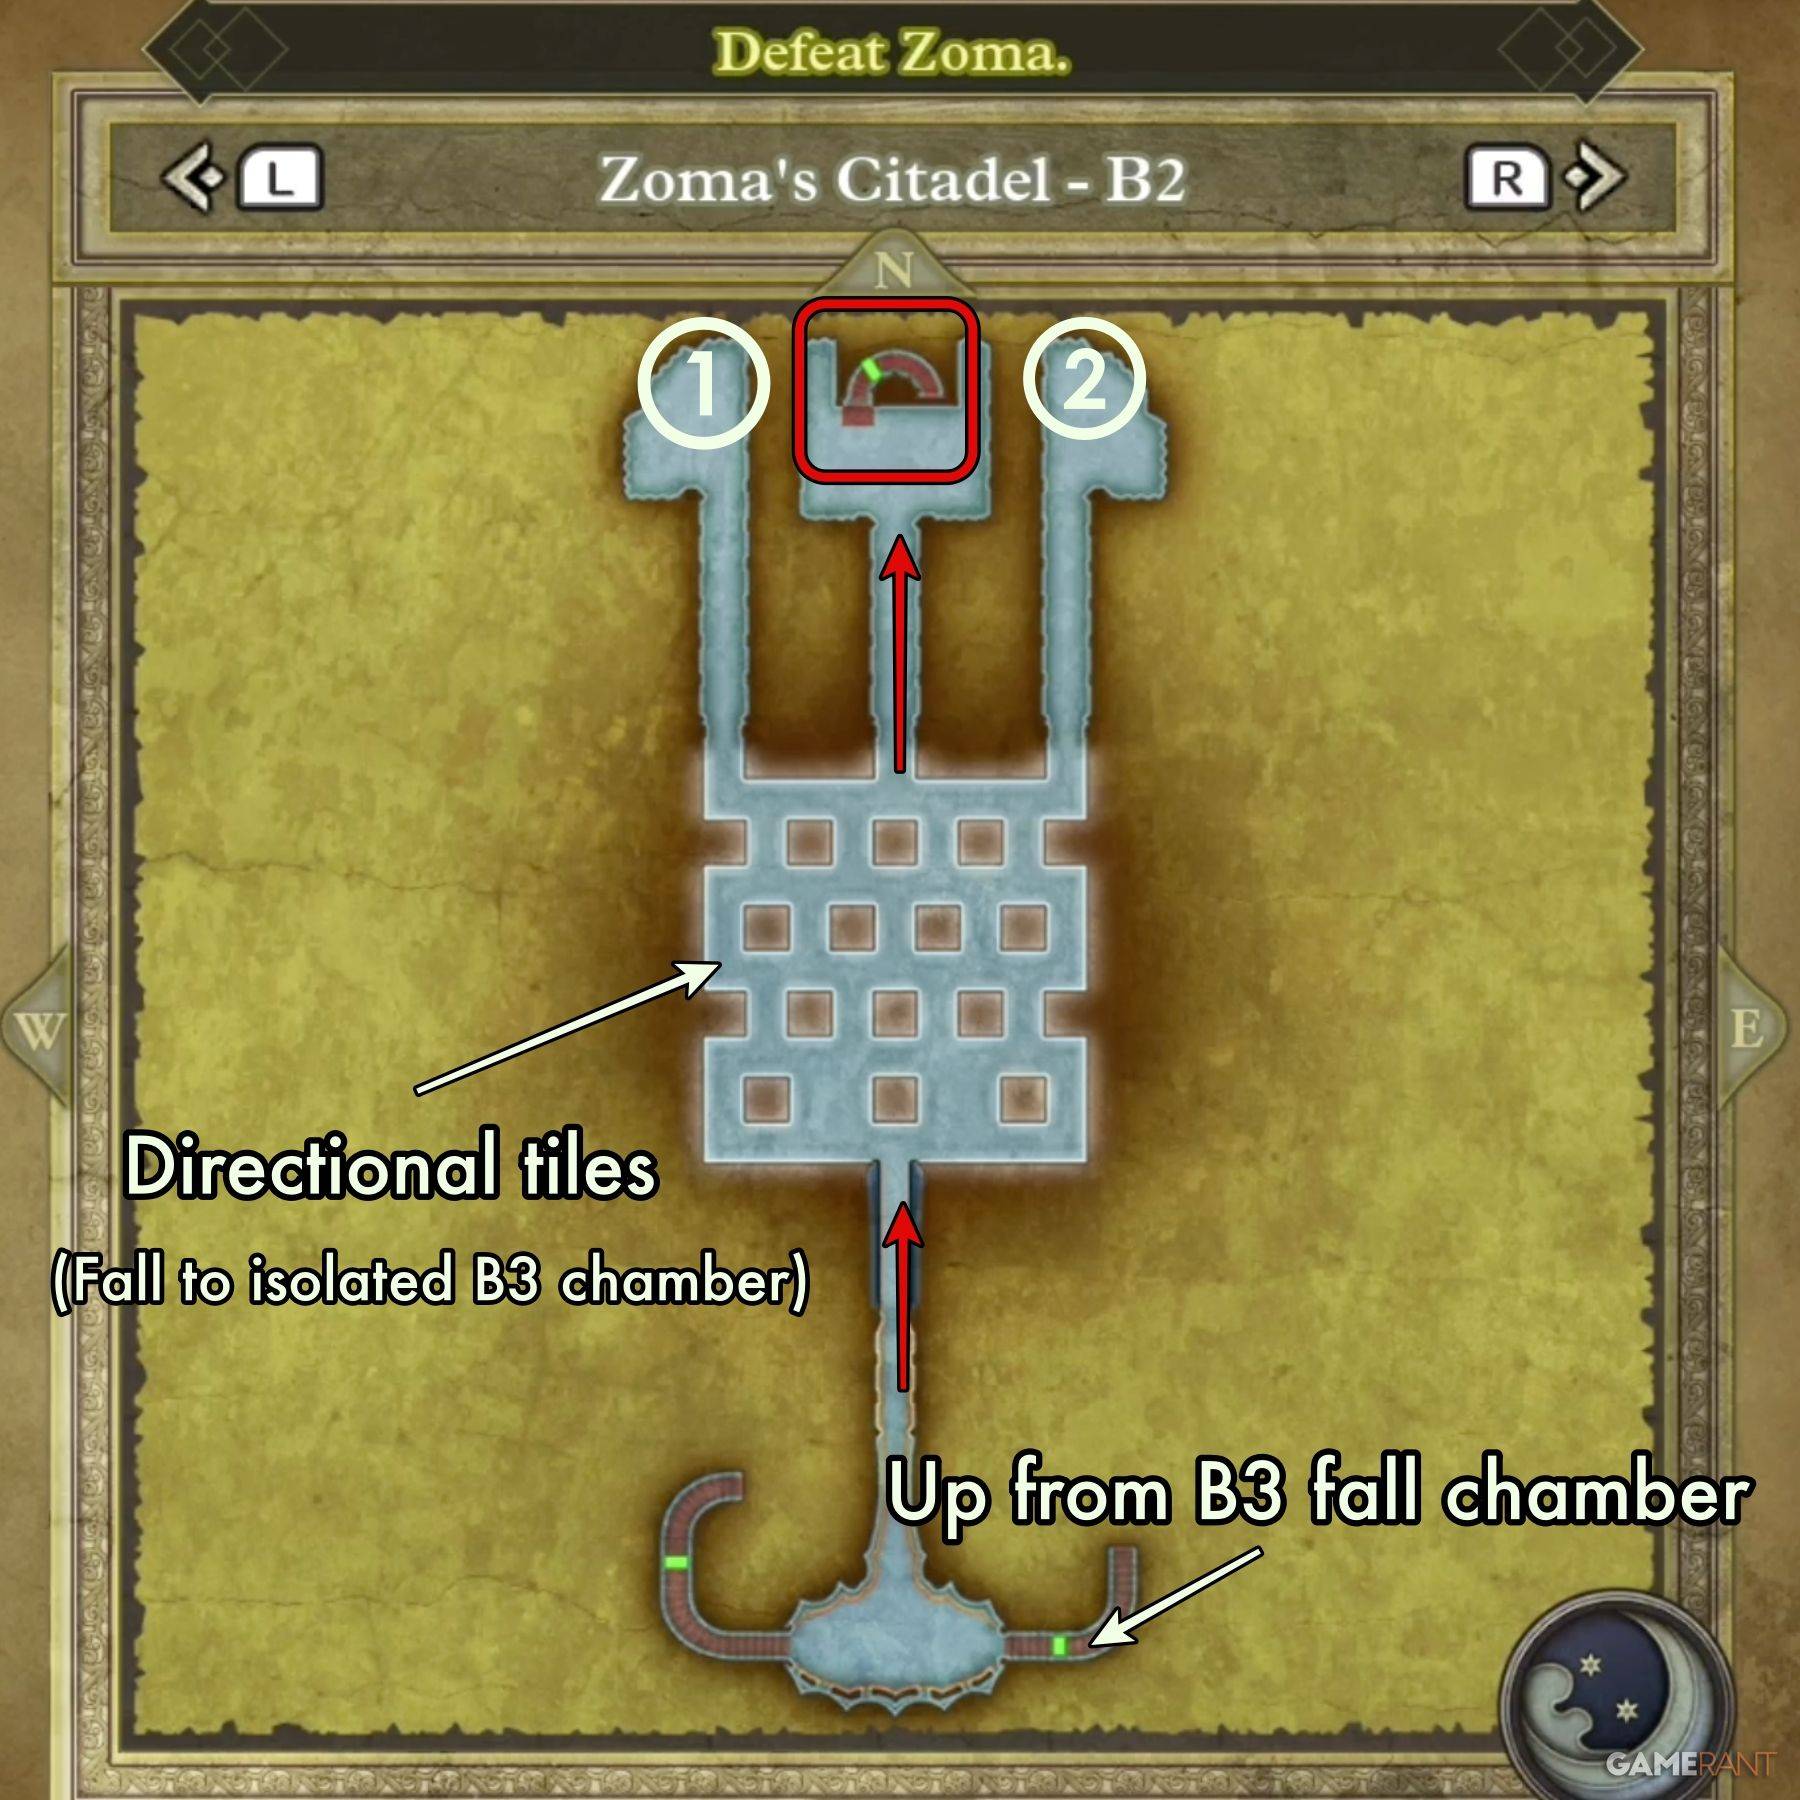 ### B2 Main Path:
Cross the directional tiles to reach the stairs to B3. A separate section details navigating these tiles.
How to Use the Directional Tiles in Dragon Quest 3 Remake:
The directional tiles present a unique challenge. Practice on the third floor of the Tower of Rubiss (northwest corner) before tackling Zoma's Citadel.
The tiles form a diamond; the orange and blue halves determine movement.
- North/South: Blue = North, Orange = South. If the colored half is left, press left on the D-pad; if right, press right.
- East/West: Follow the orange arrow. Press UP to move in the arrow's direction, DOWN to move opposite.
All Treasure on Zoma's Citadel B2:
- Treasure 1 (Chest): Scourge Whip
- Treasure 2 (Chest): 4,989 Gold Coins
Zoma's Citadel B3 Walkthrough – Dragon Quest 3 Remake
 ### B3 Main Path:
Follow the outer edge of the square chamber. A detour to the southwest corner reveals Sky, a friendly Soaring Scourger.
B3 Isolated Chamber:
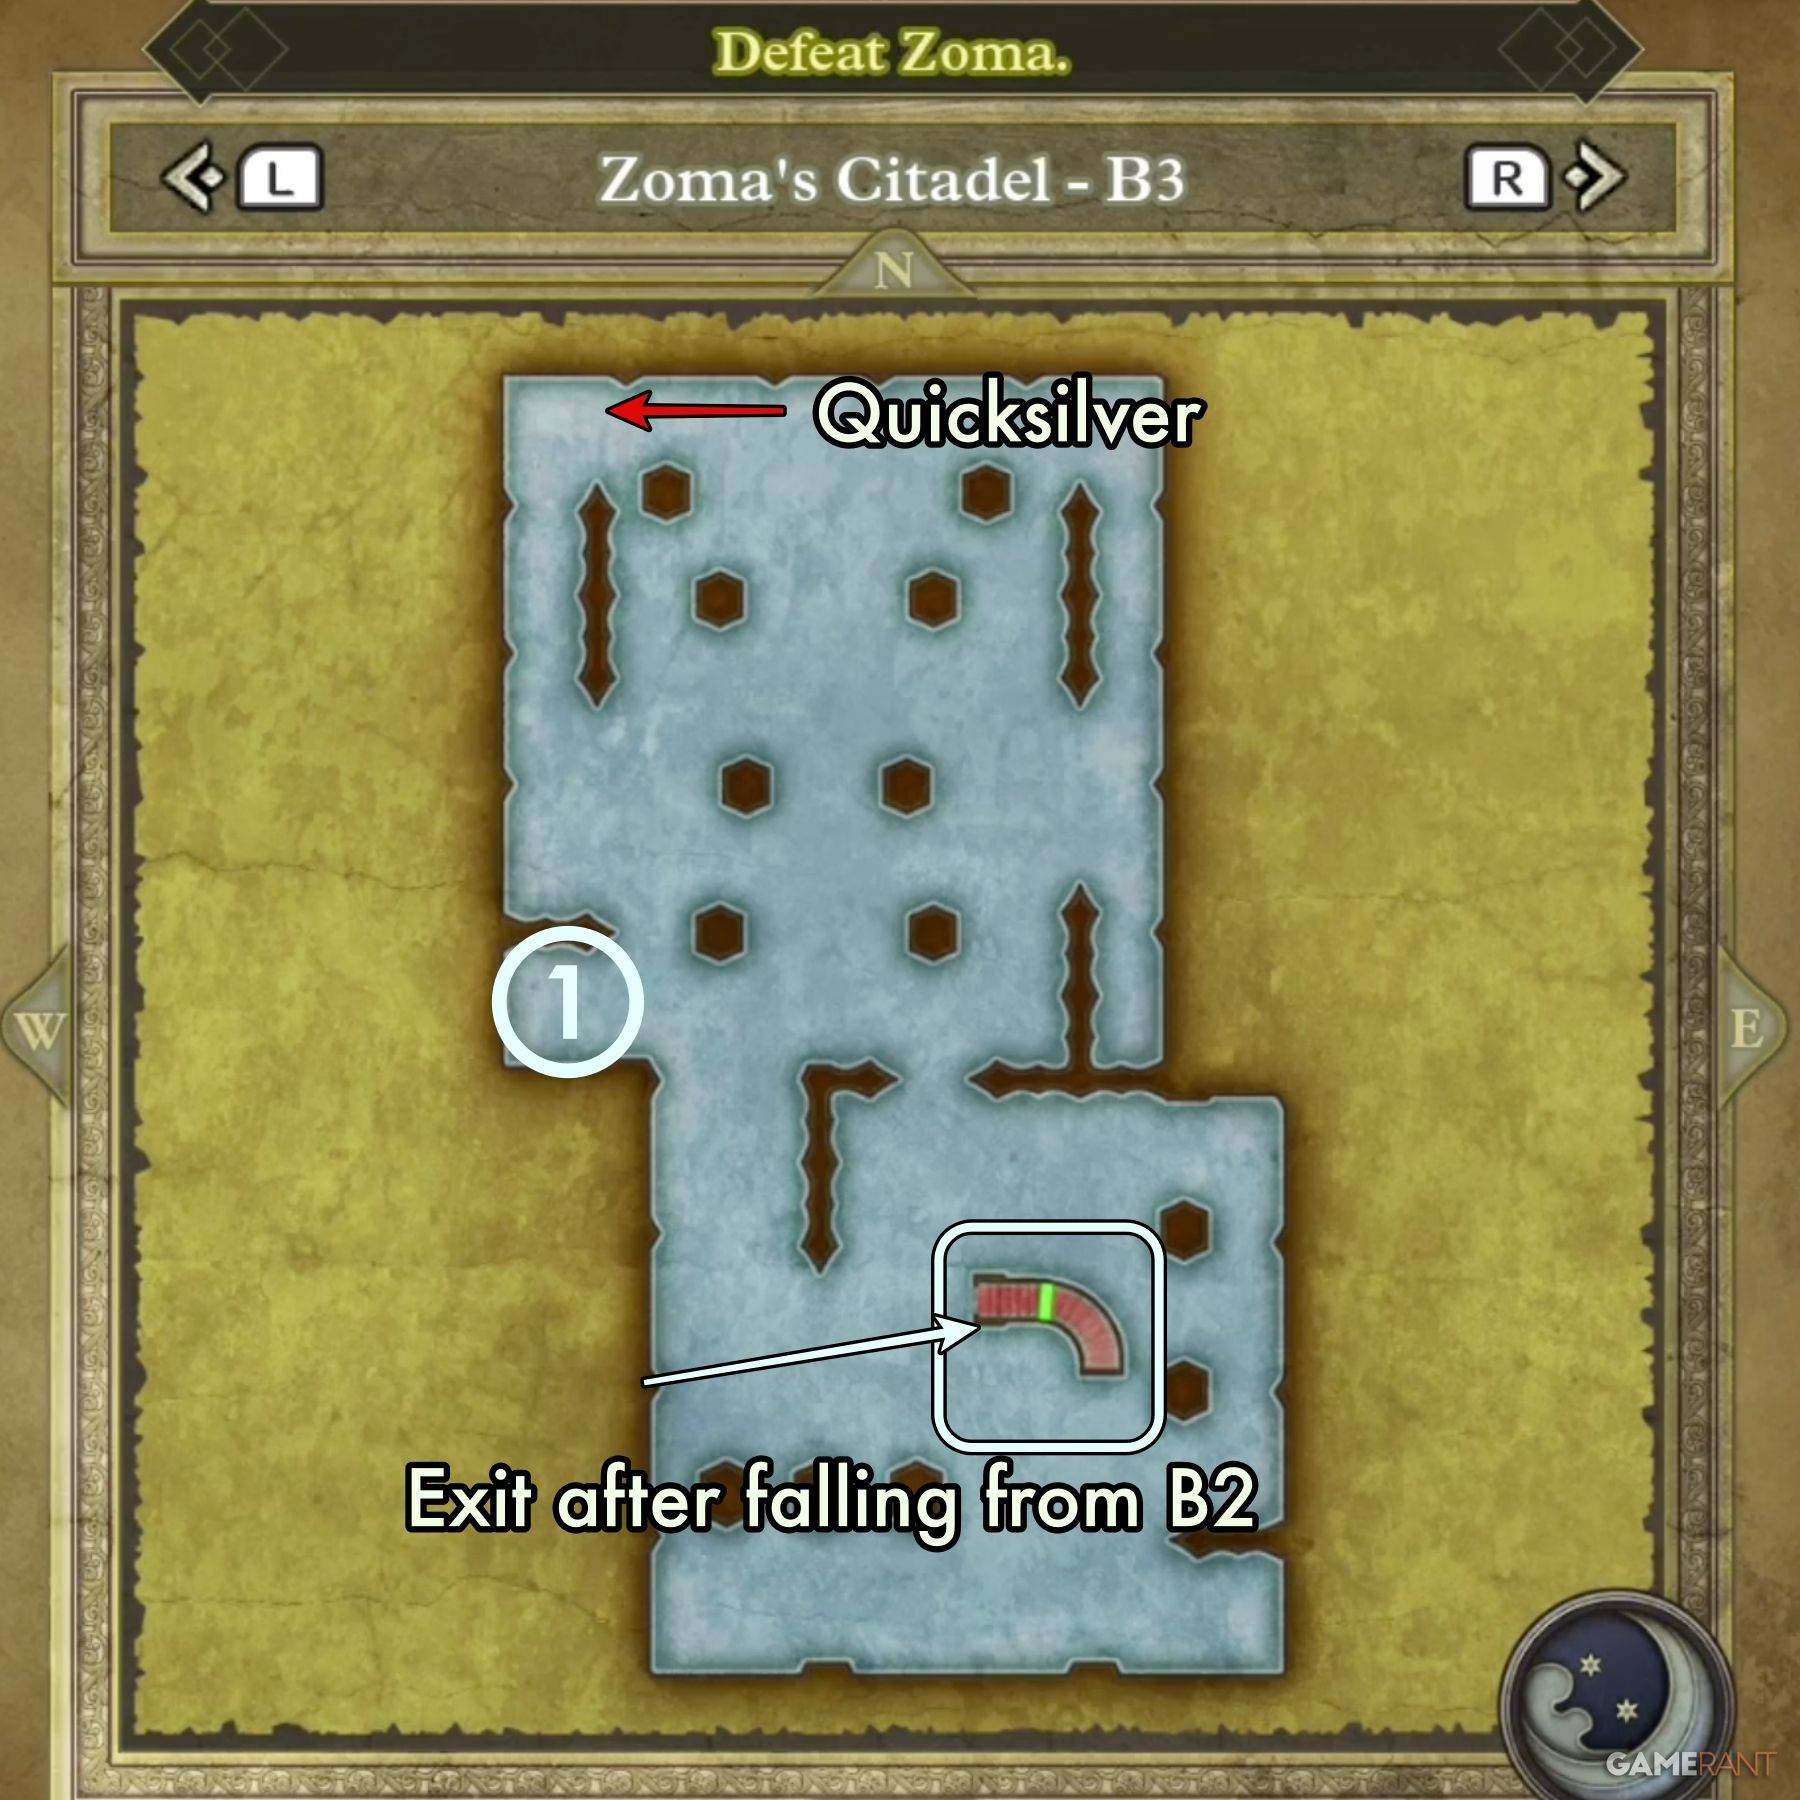 Falling through a hole on B2 leads to this isolated chamber, containing a friendly Liquid Metal Slime. Exit via the eastern stairs.
All Treasure on Zoma's Citadel B3:
Main Chamber:
- Treasure 1 (Chest): Dragon Dojo Duds
- Treasure 2 (Chest): Double-Edged Sword
Isolated Chamber:
- Treasure 1 (Chest): Bastard Sword
Zoma's Citadel B4 Walkthrough – Dragon Quest 3 Remake
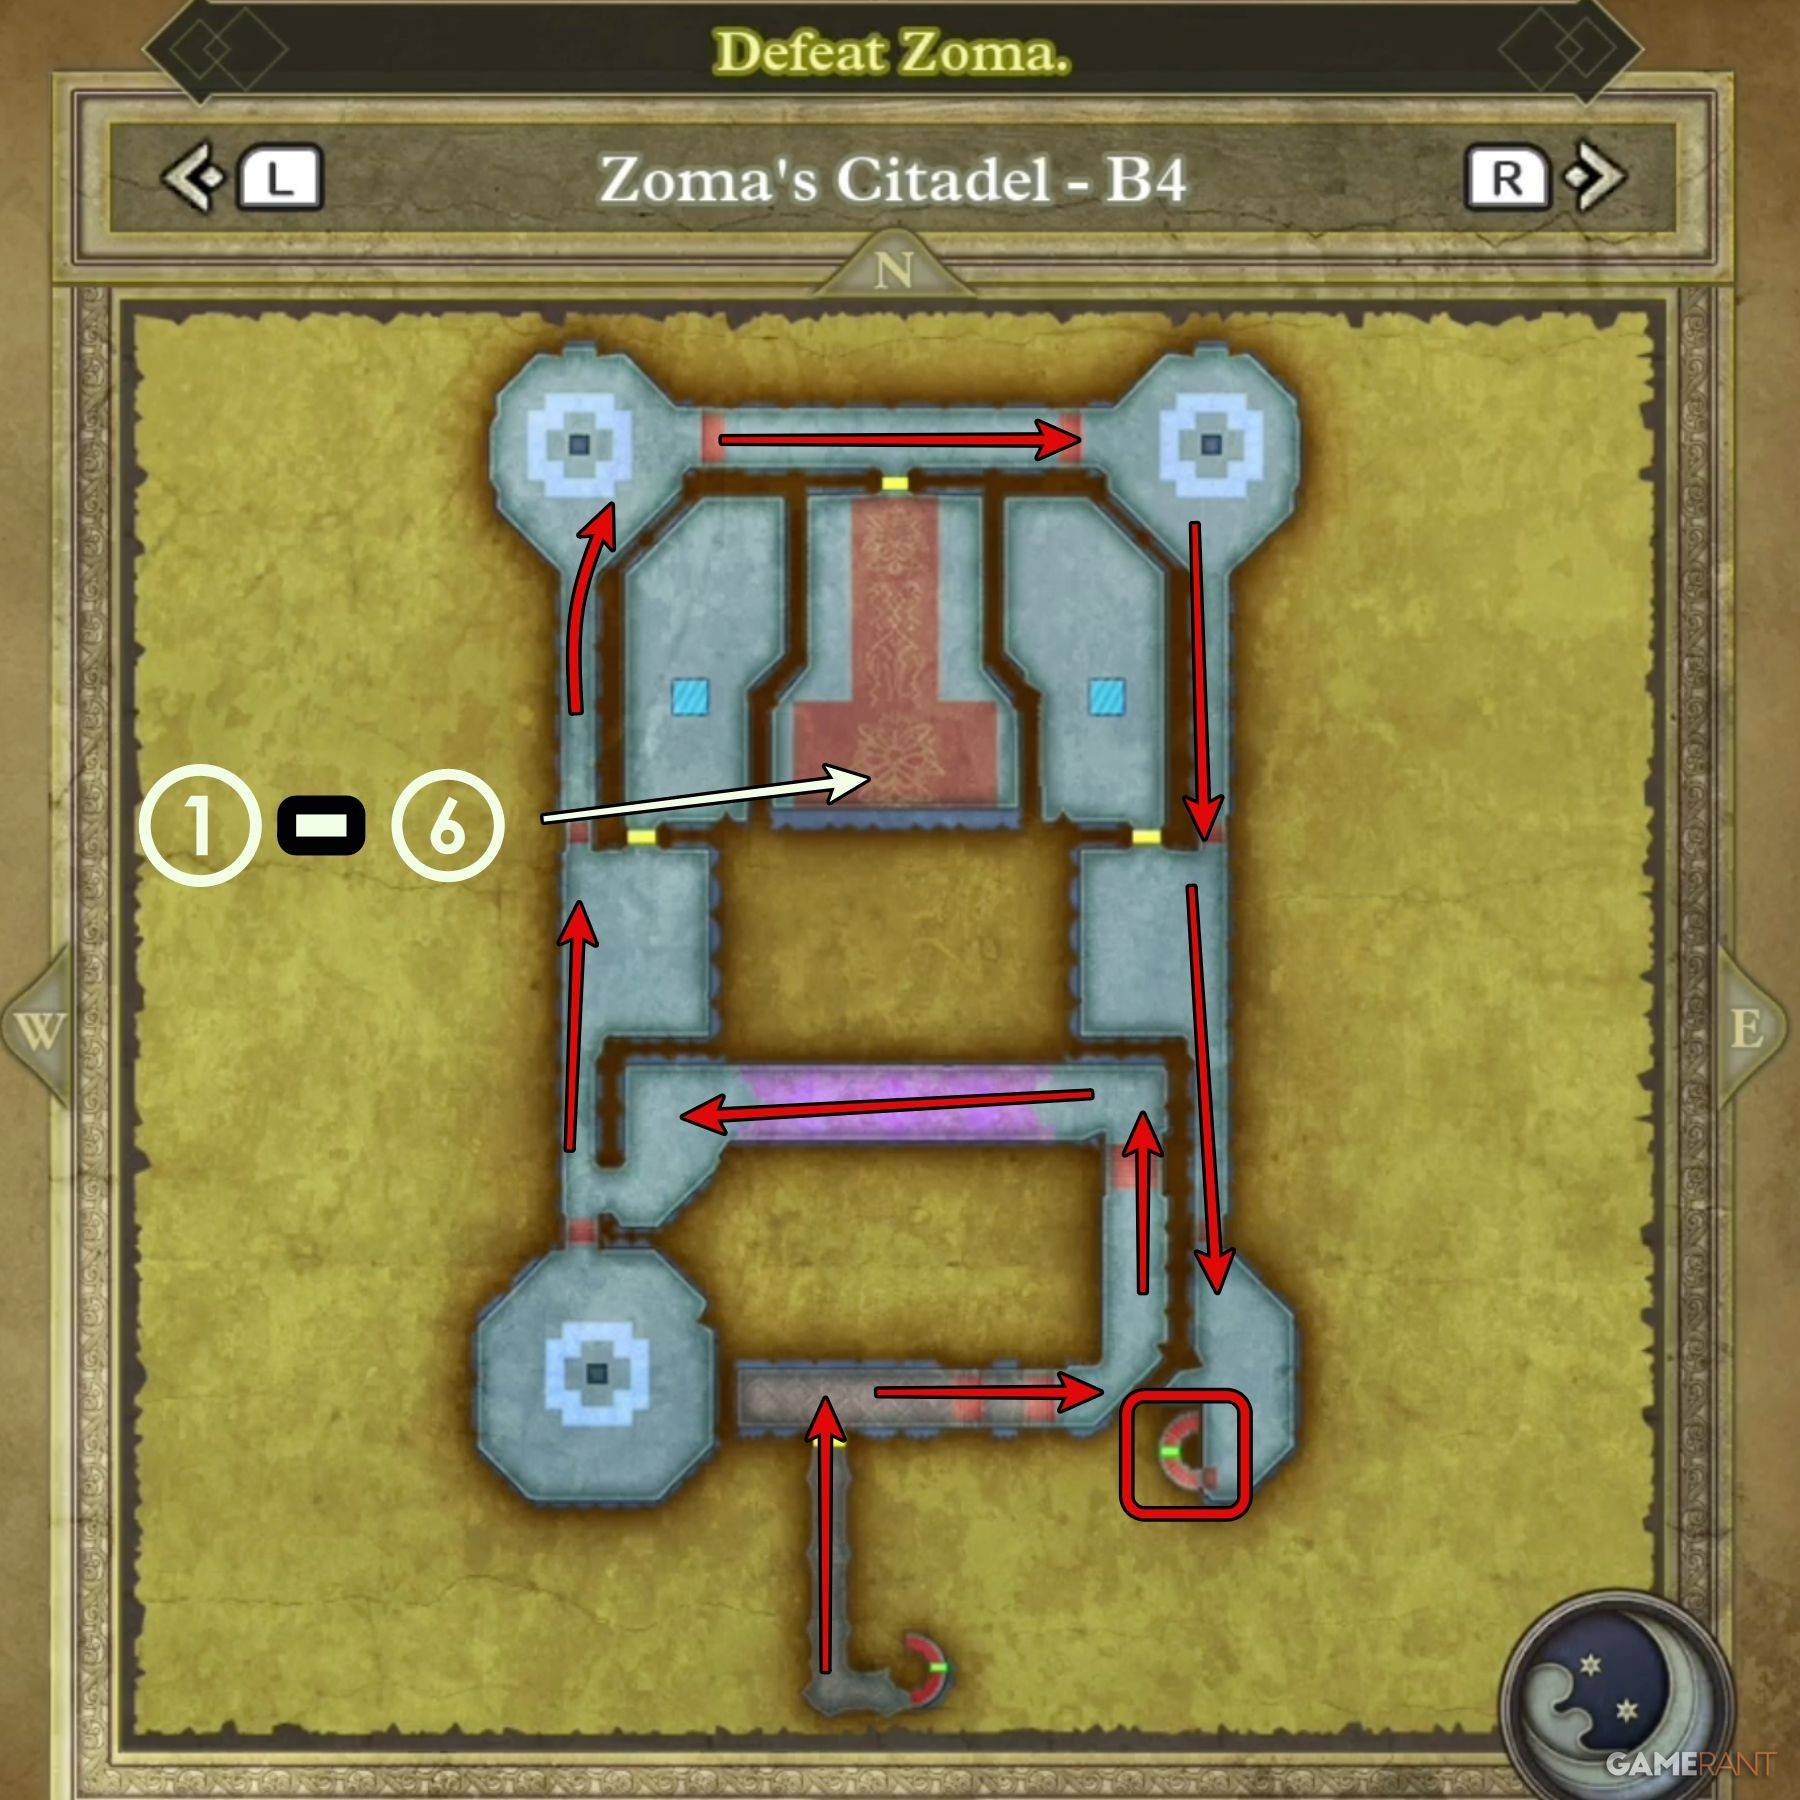 ### B4 Main Path:
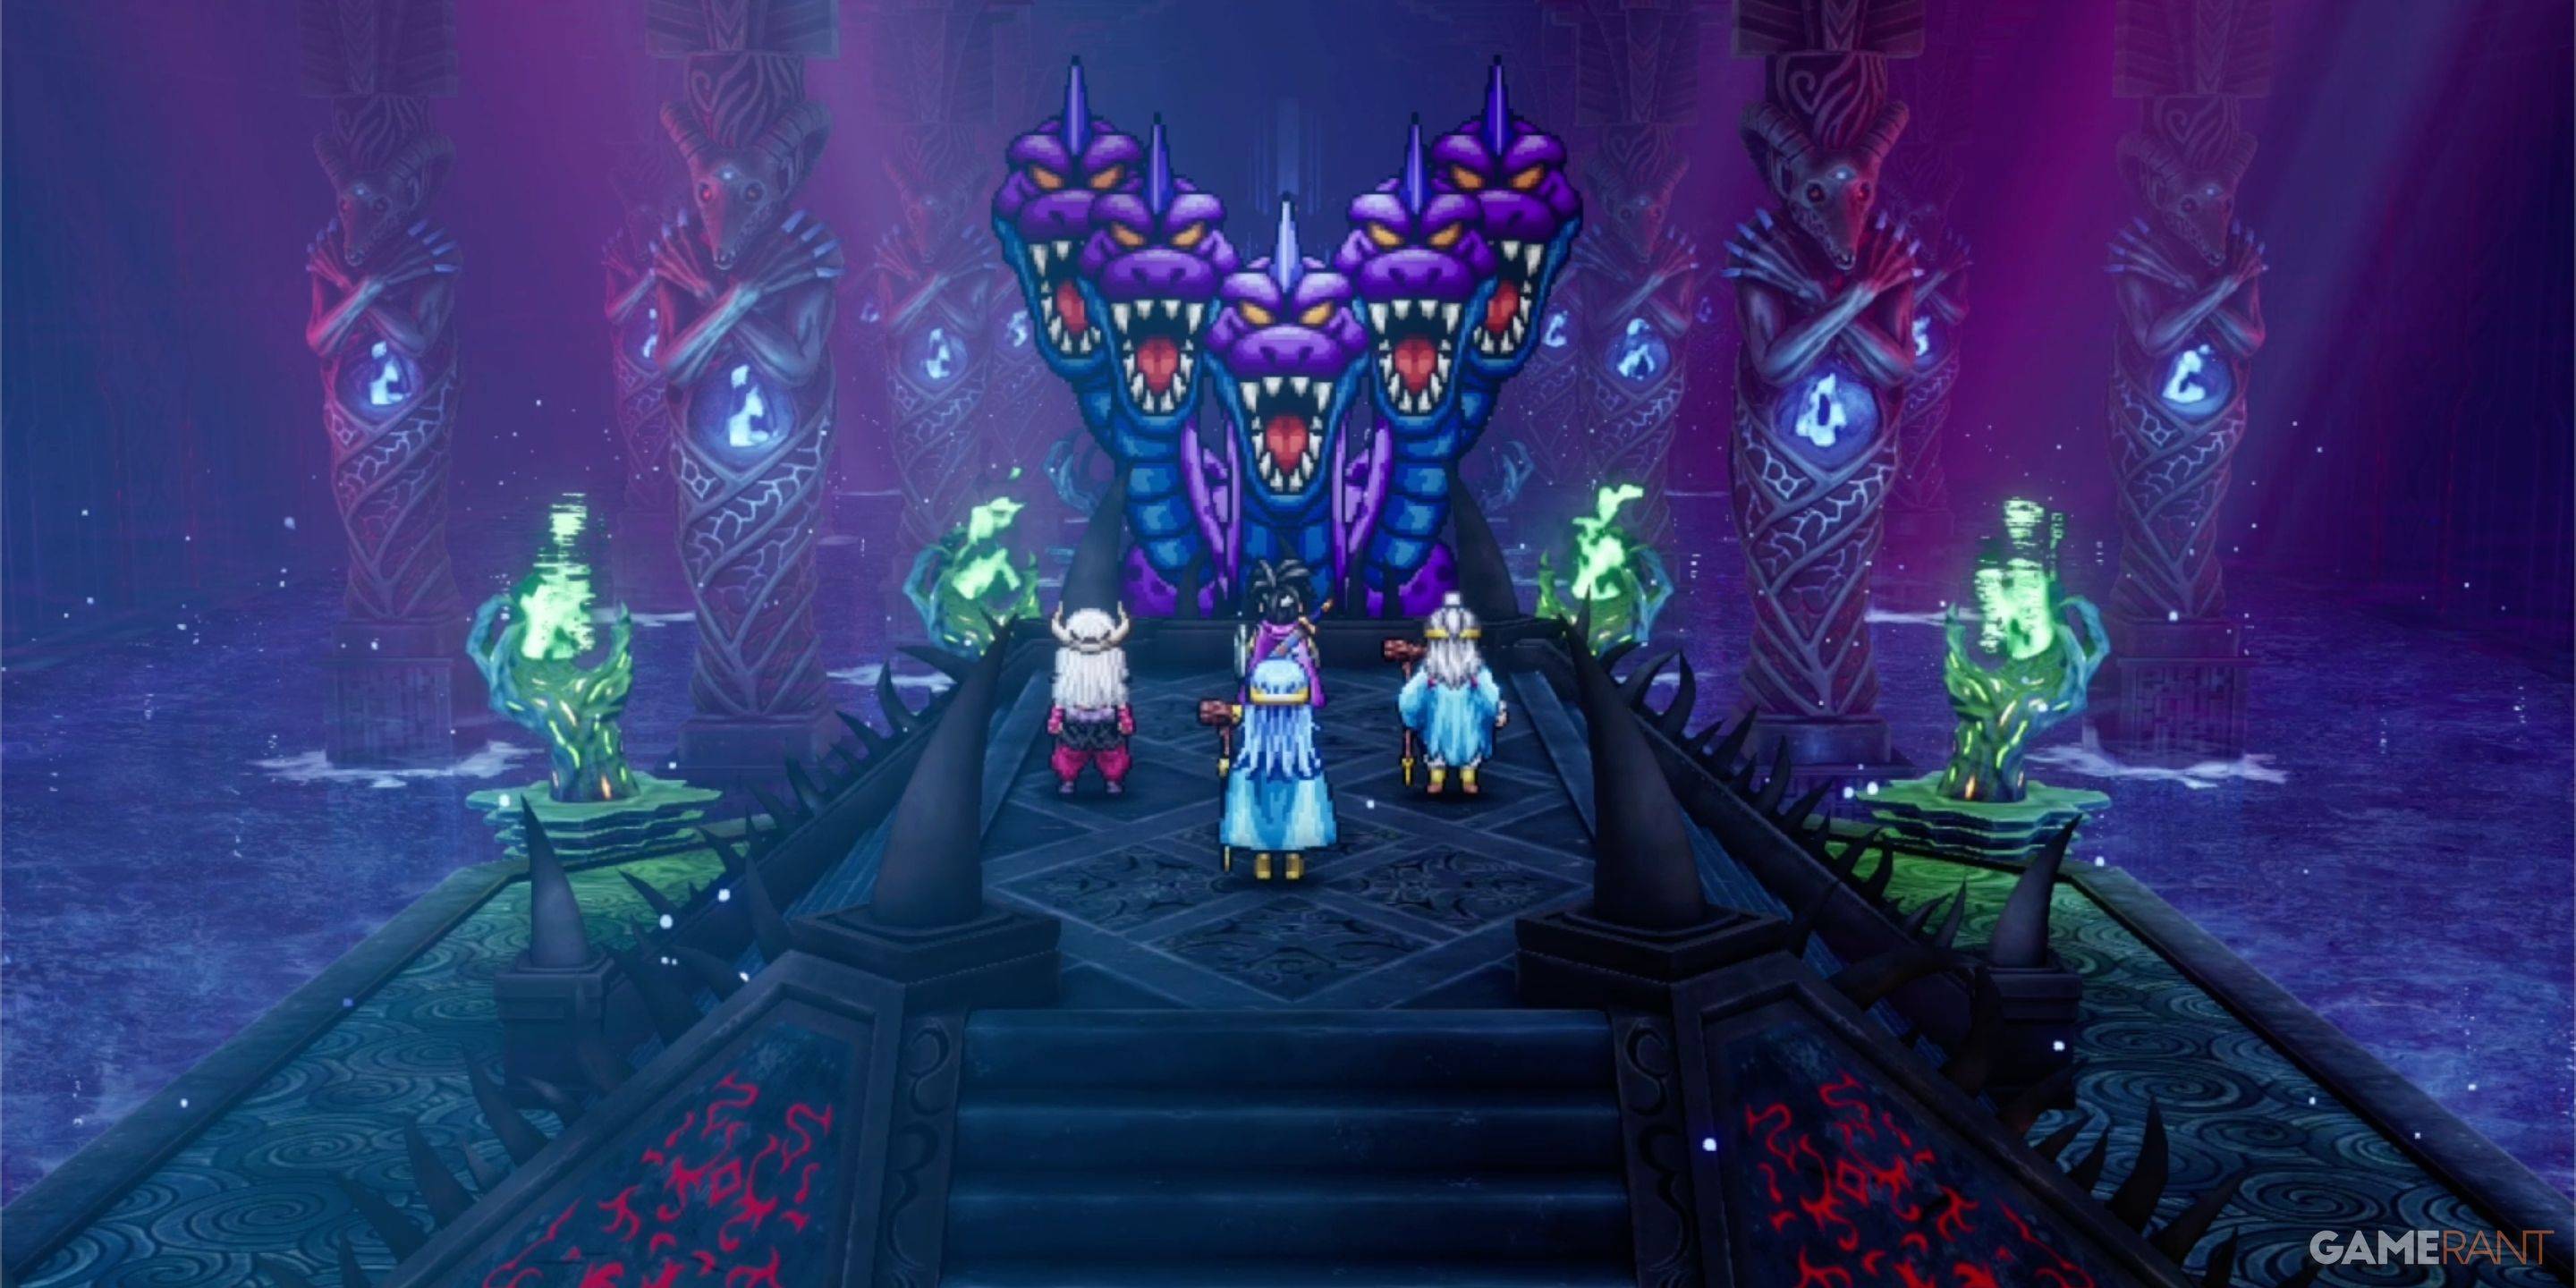
Navigate from the southern center, upwards, then down to the southeast corner to reach Zoma. Watch the cutscene upon entry.
All Treasure on Zoma's Citadel B4:
Six chests in one chamber (right to left):
- Treasure 1 (Chest): Shimmering Dress
- Treasure 2 (Chest): Prayer Ring
- Treasure 3 (Chest): Sage's Stone
- Treasure 4 (Chest): Yggdrasil Leaf
- Treasure 5 (Chest): Diamond
- Treasure 6 (Chest): Mini Medal
How to Defeat Zoma in Dragon Quest 3 Remake
 The final section is a boss gauntlet: King Hydra, Soul of Baramos, Bones of Baramos, then Zoma. You can use items between fights.
How to Defeat the King Hydra:
 The King Hydra is challenging but manageable. Kazap spells inflict significant damage. Aggressive tactics are beneficial, as the Hydra heals after each round.
How to Defeat the Soul of Baramos:
 Exploit its weakness to Zap attacks.
How to Defeat the Bones of Baramos:
 Similar weaknesses to the Soul of Baramos. Kazap and Monster Wrangler combos are effective.
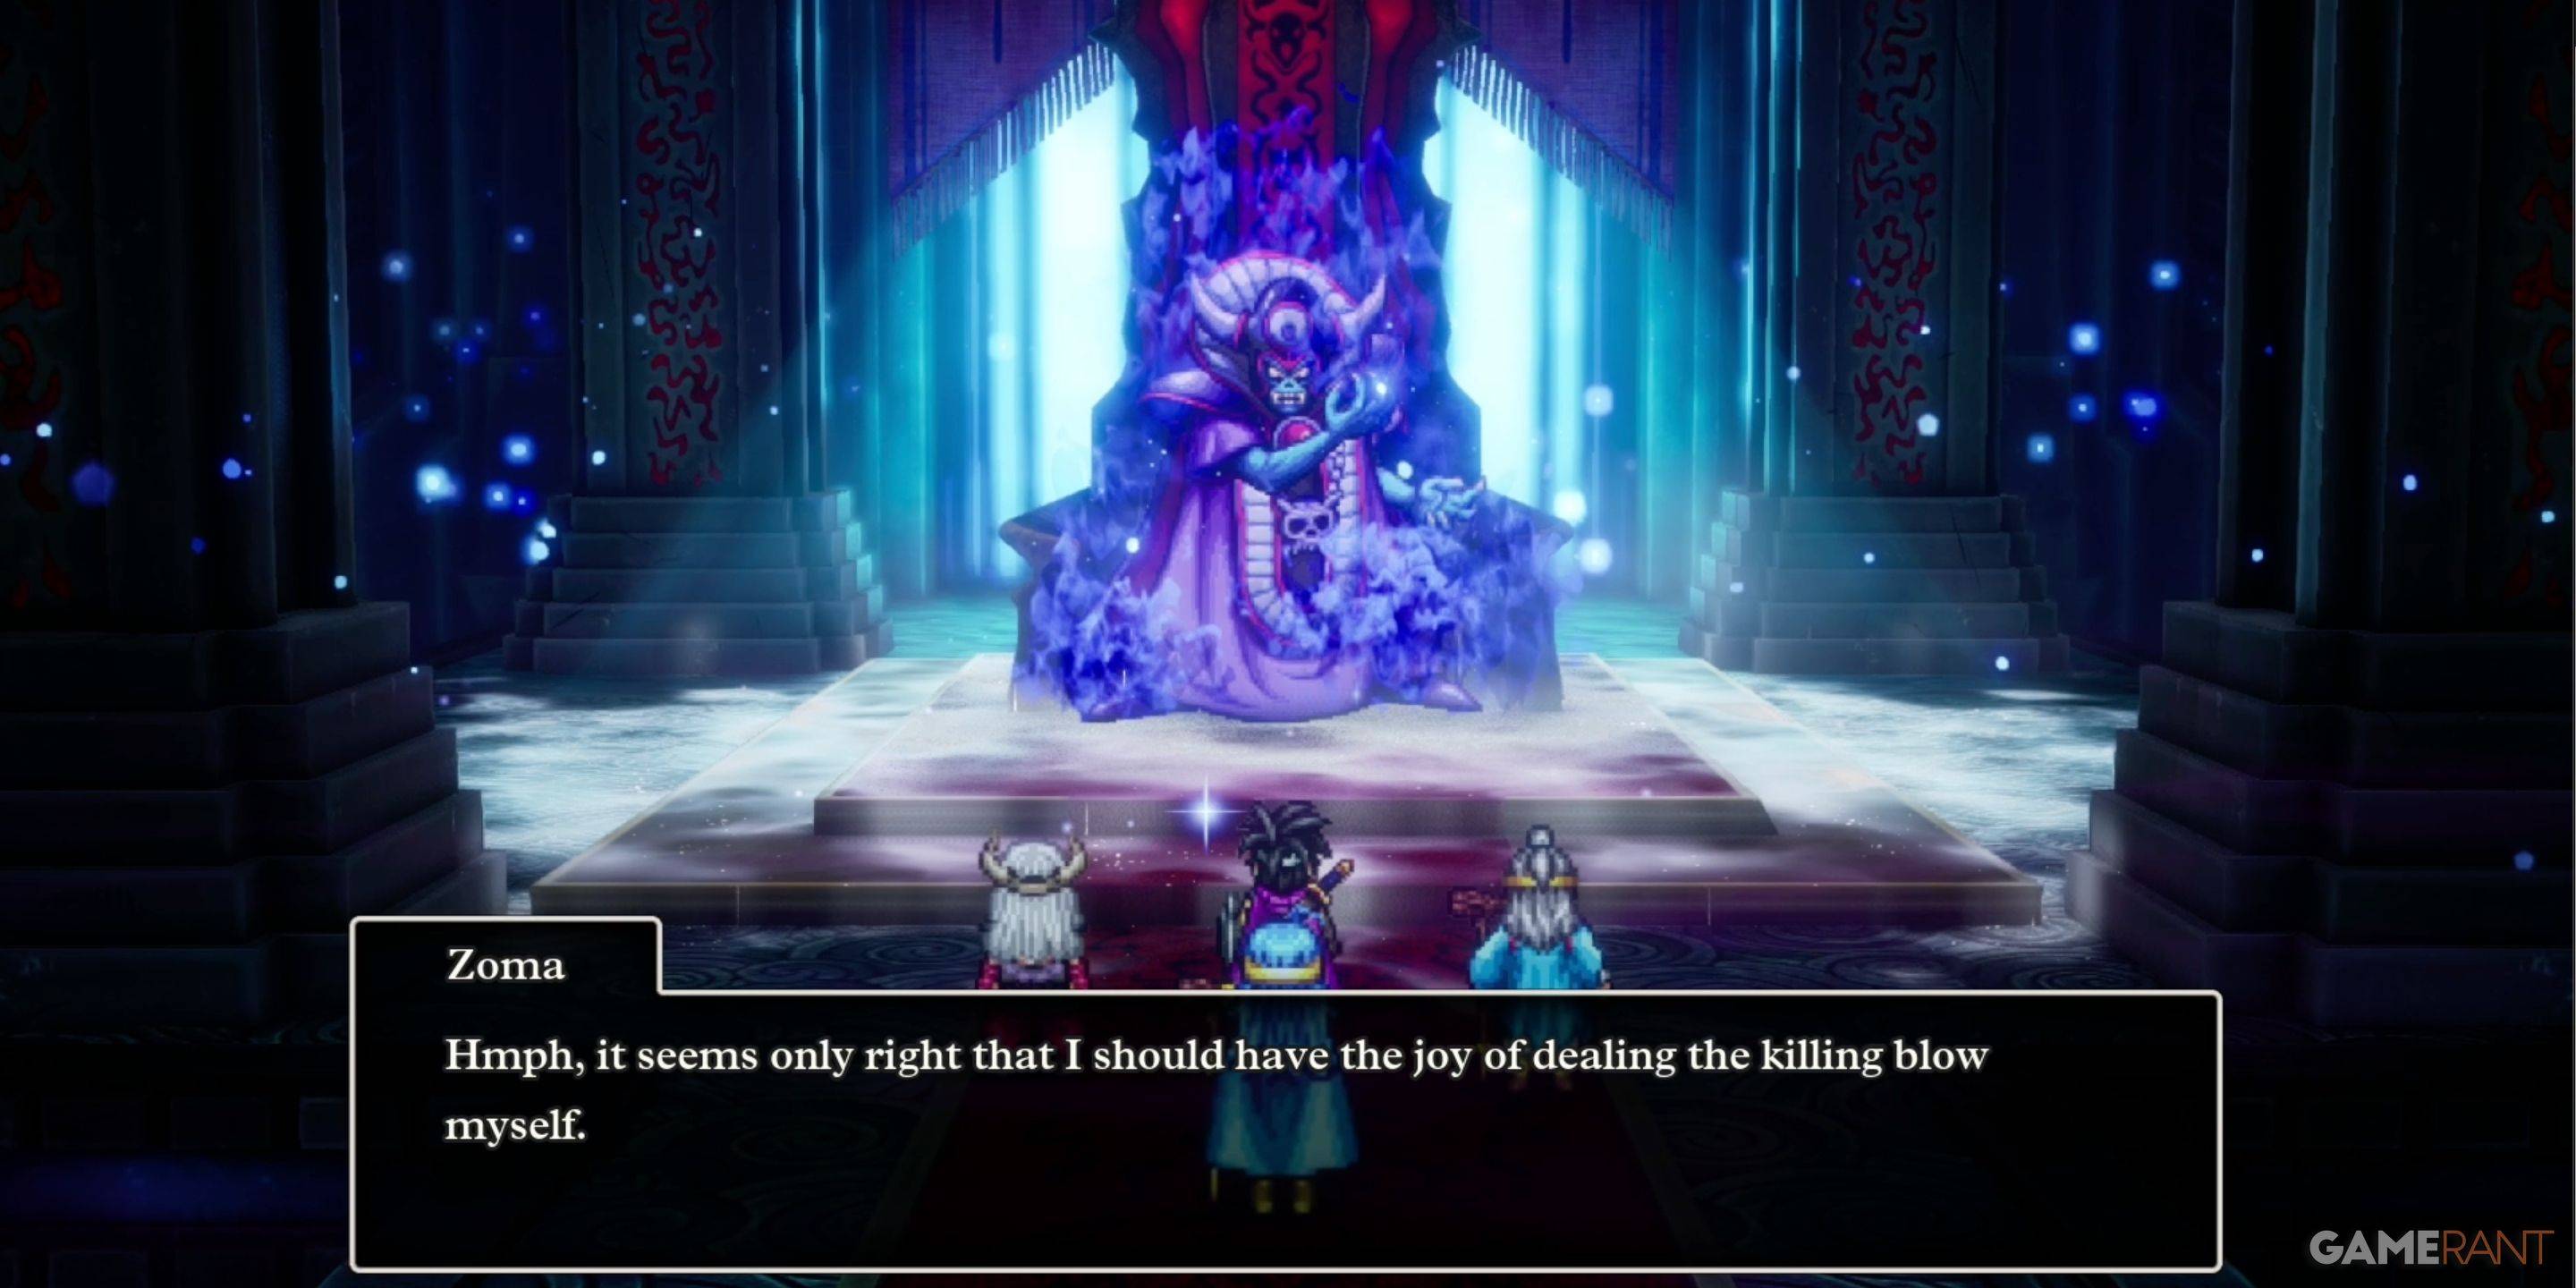
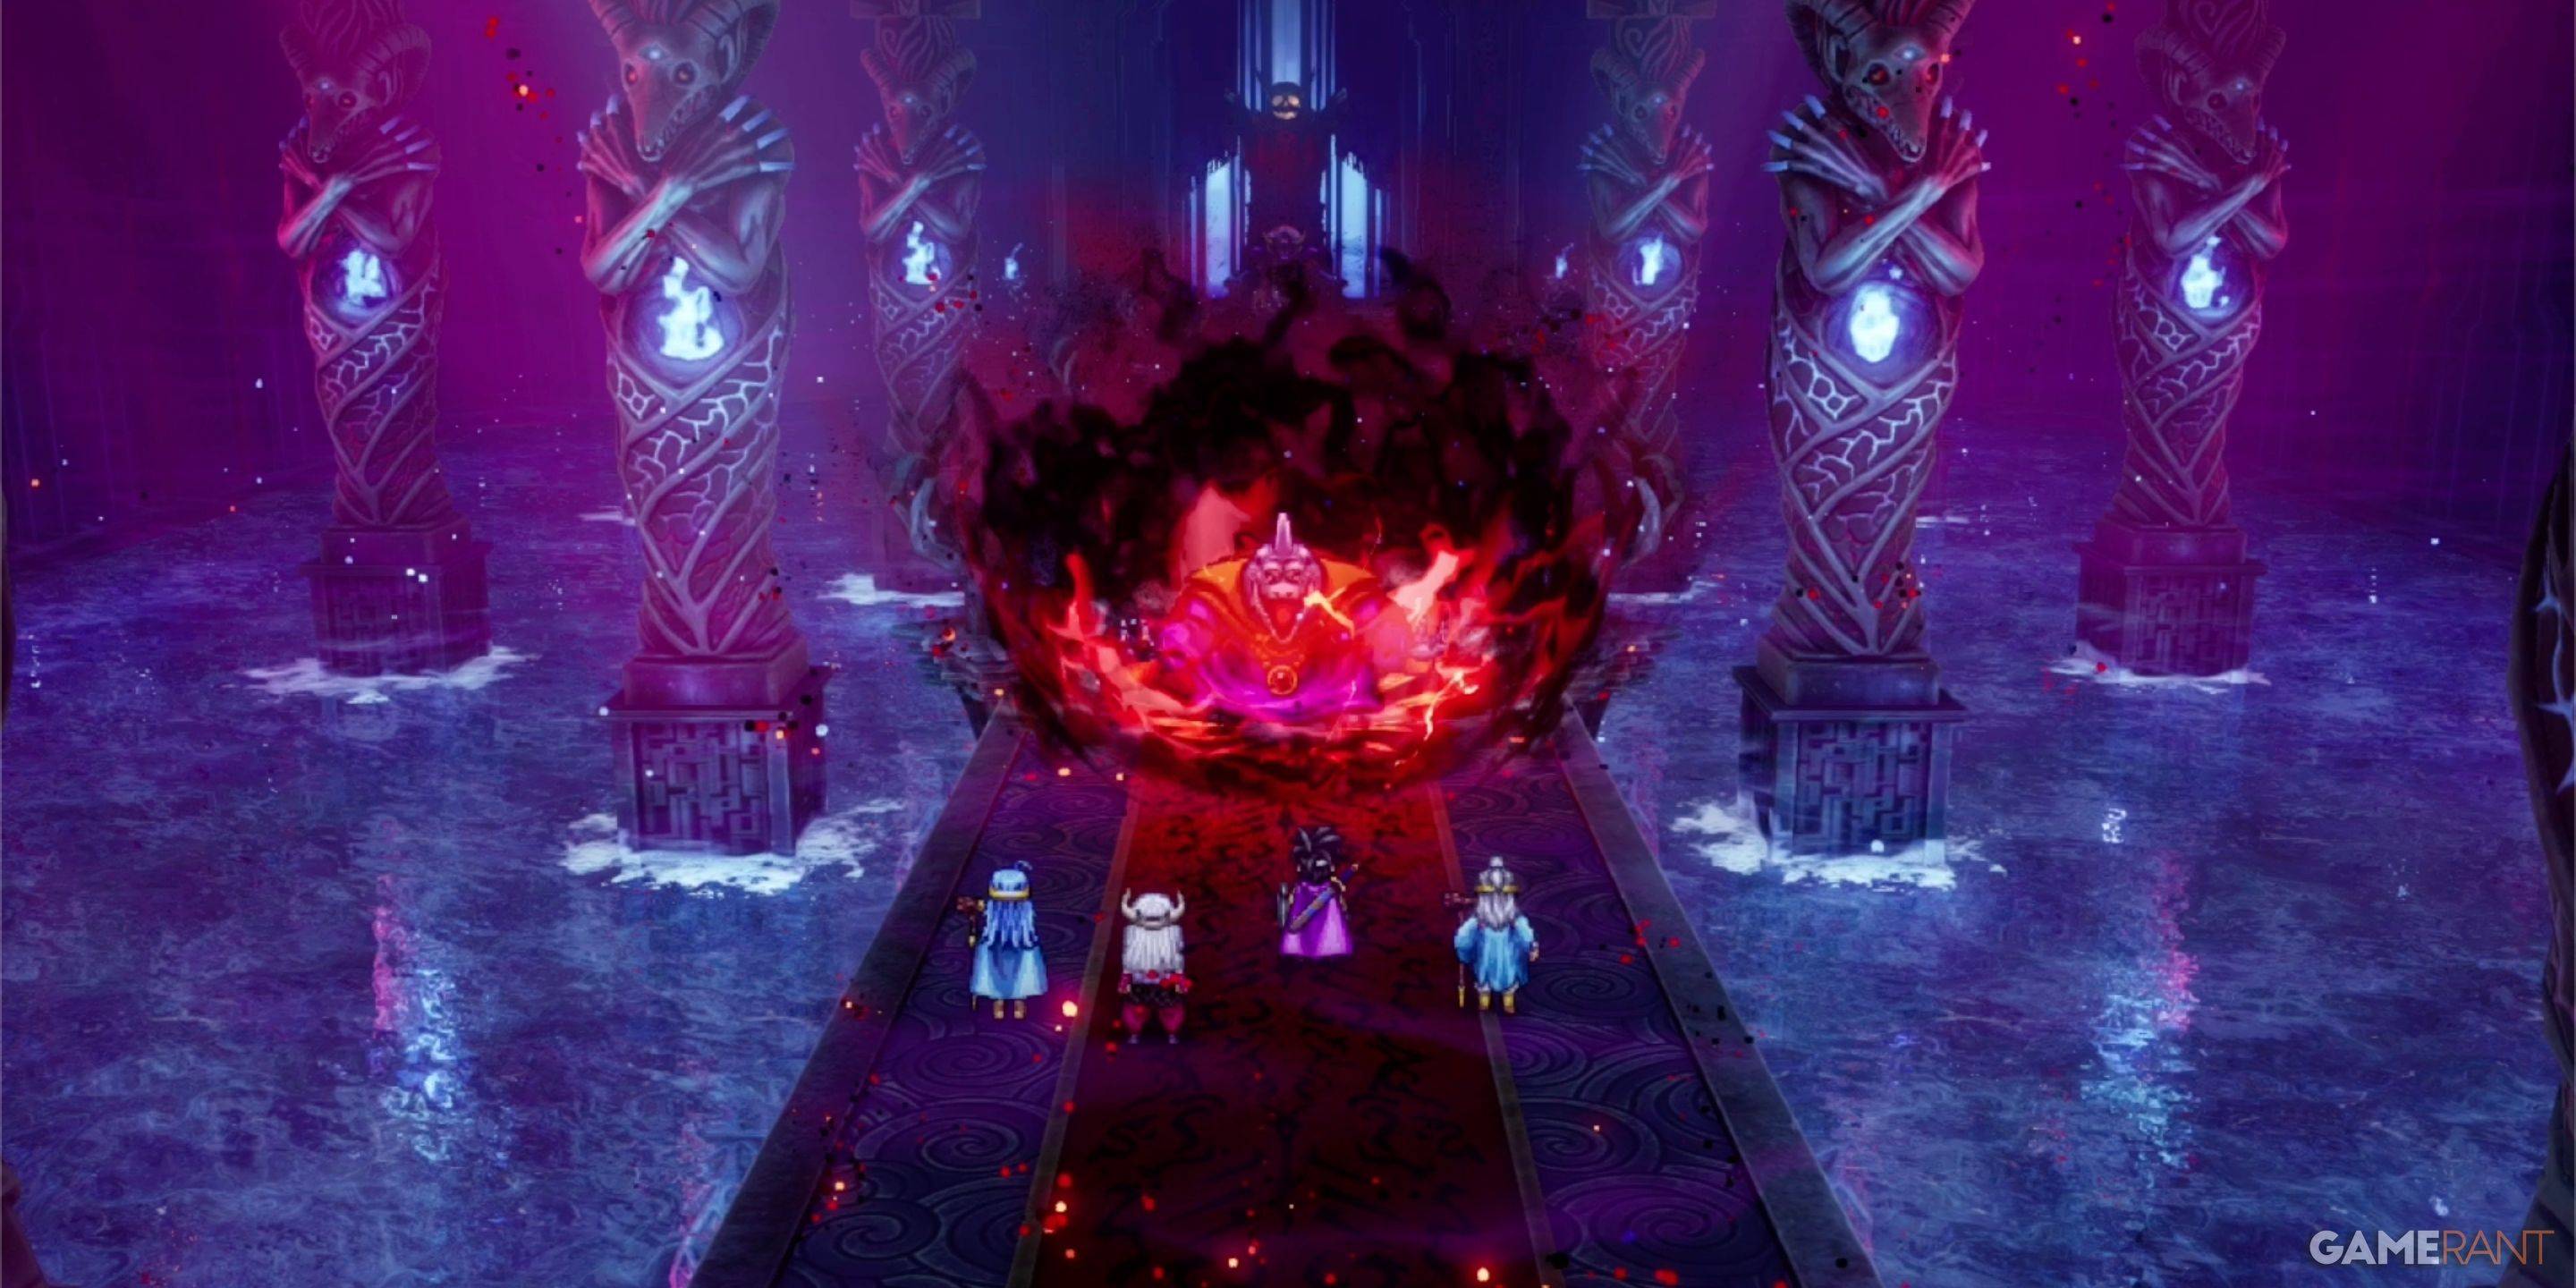
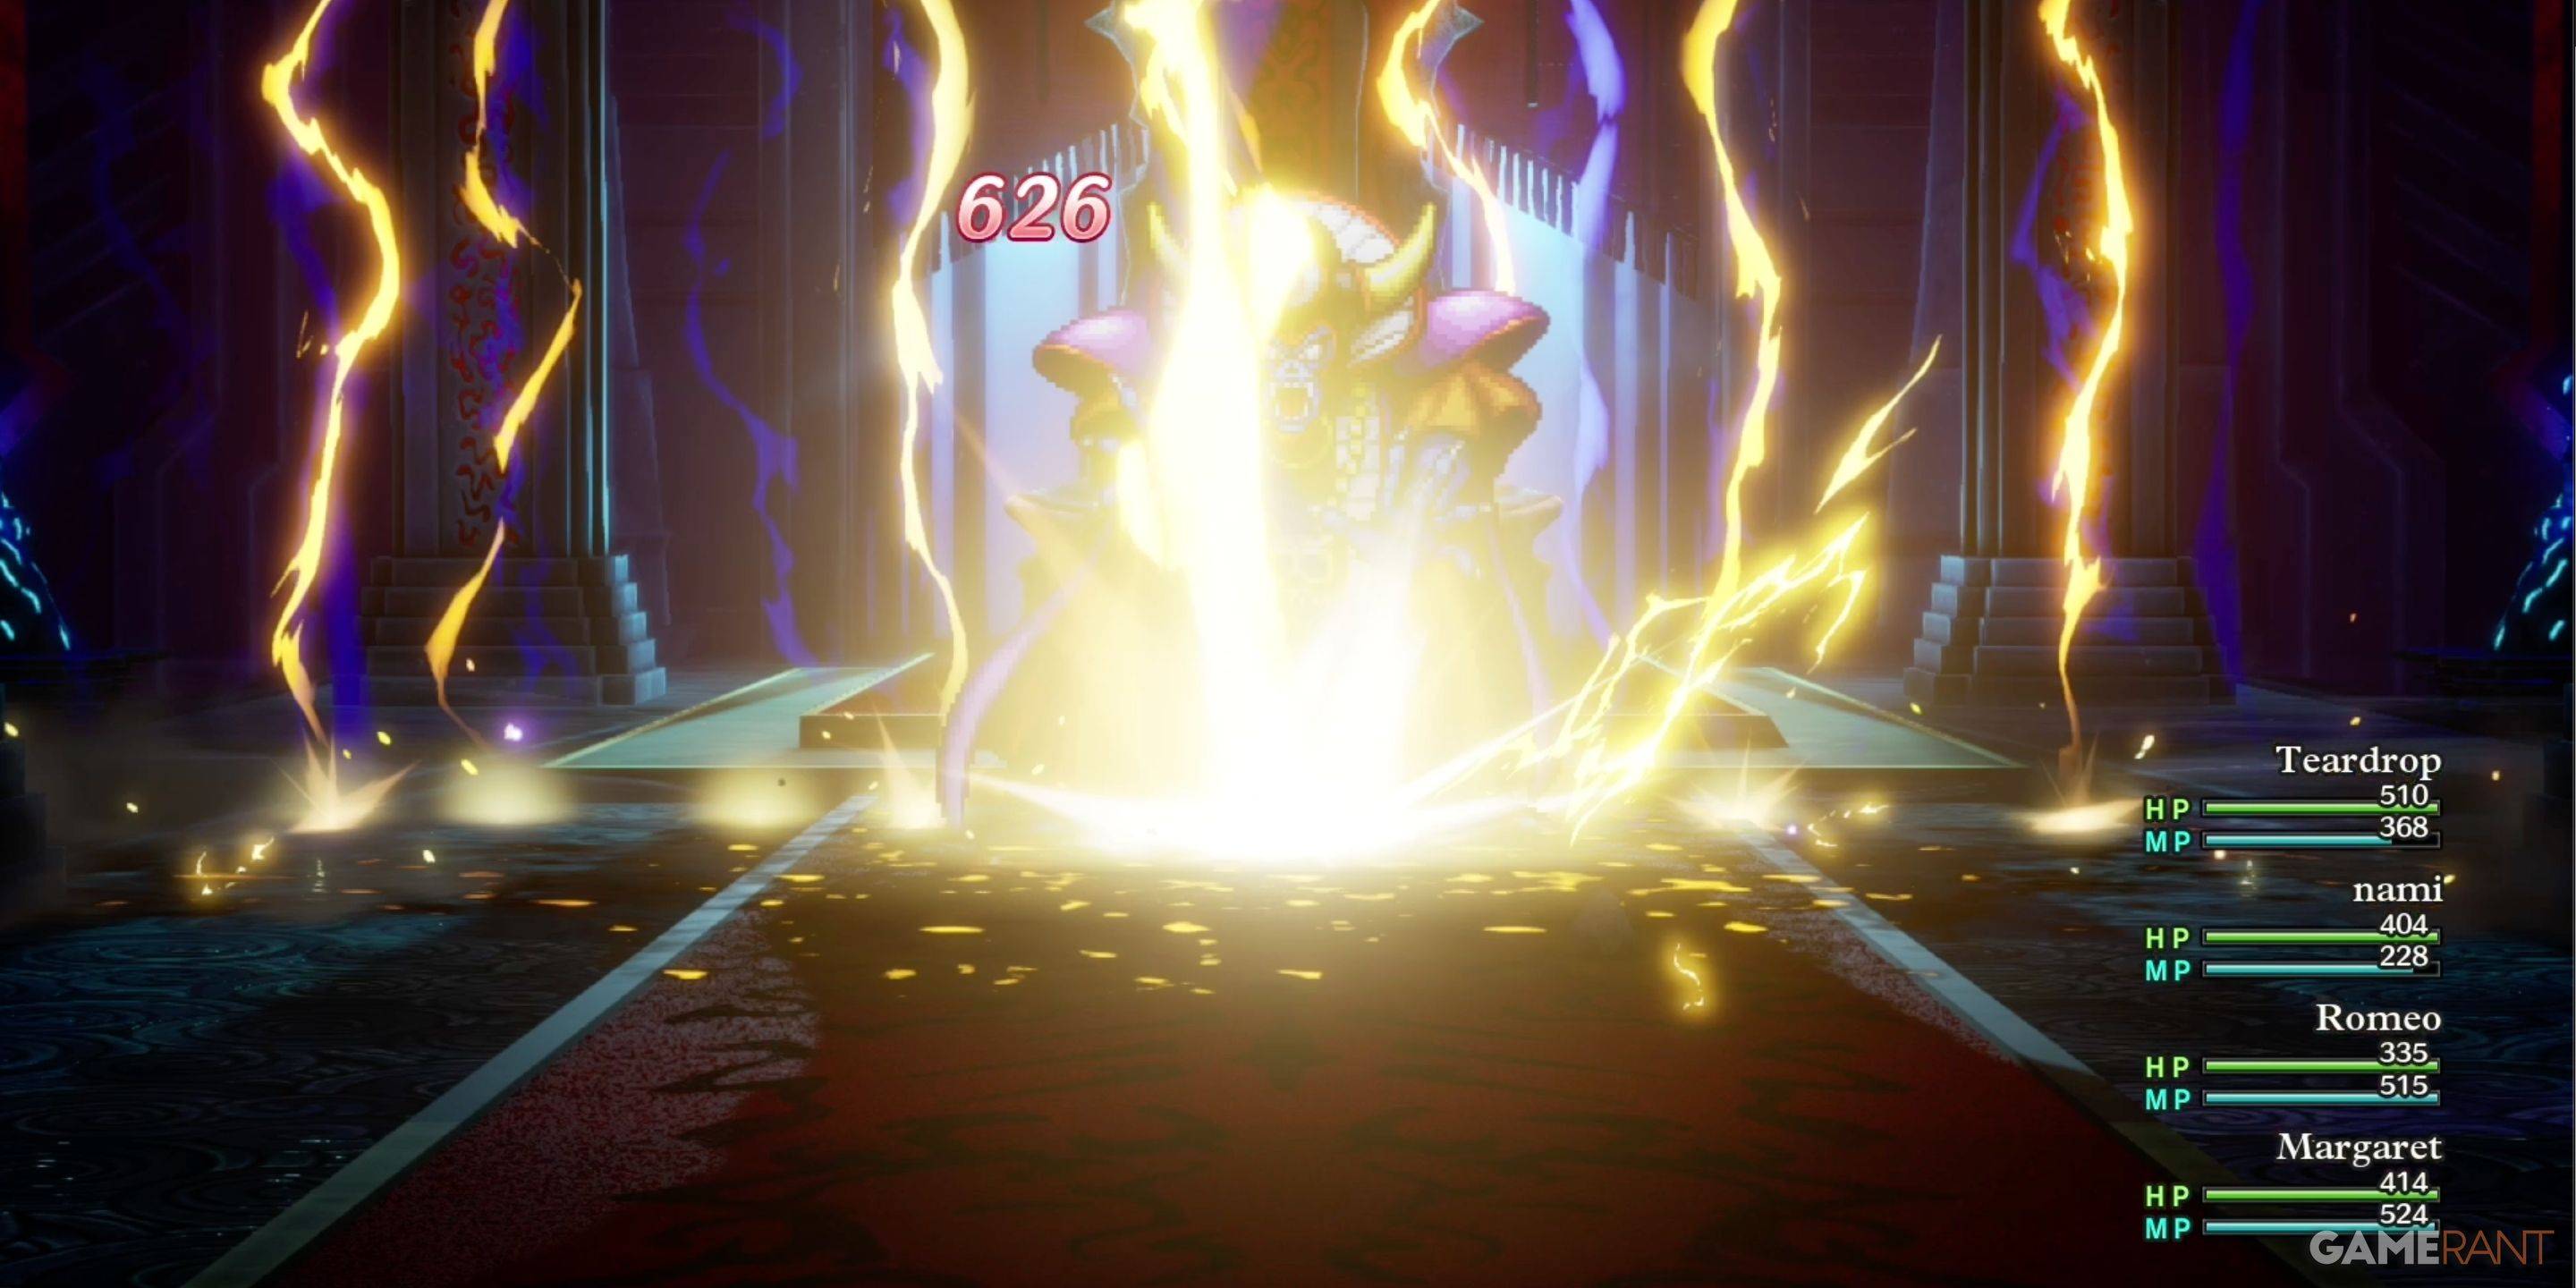
How to Defeat Zoma in Dragon Quest 3 Remake:
Zoma is the ultimate challenge. Strategic play is crucial.
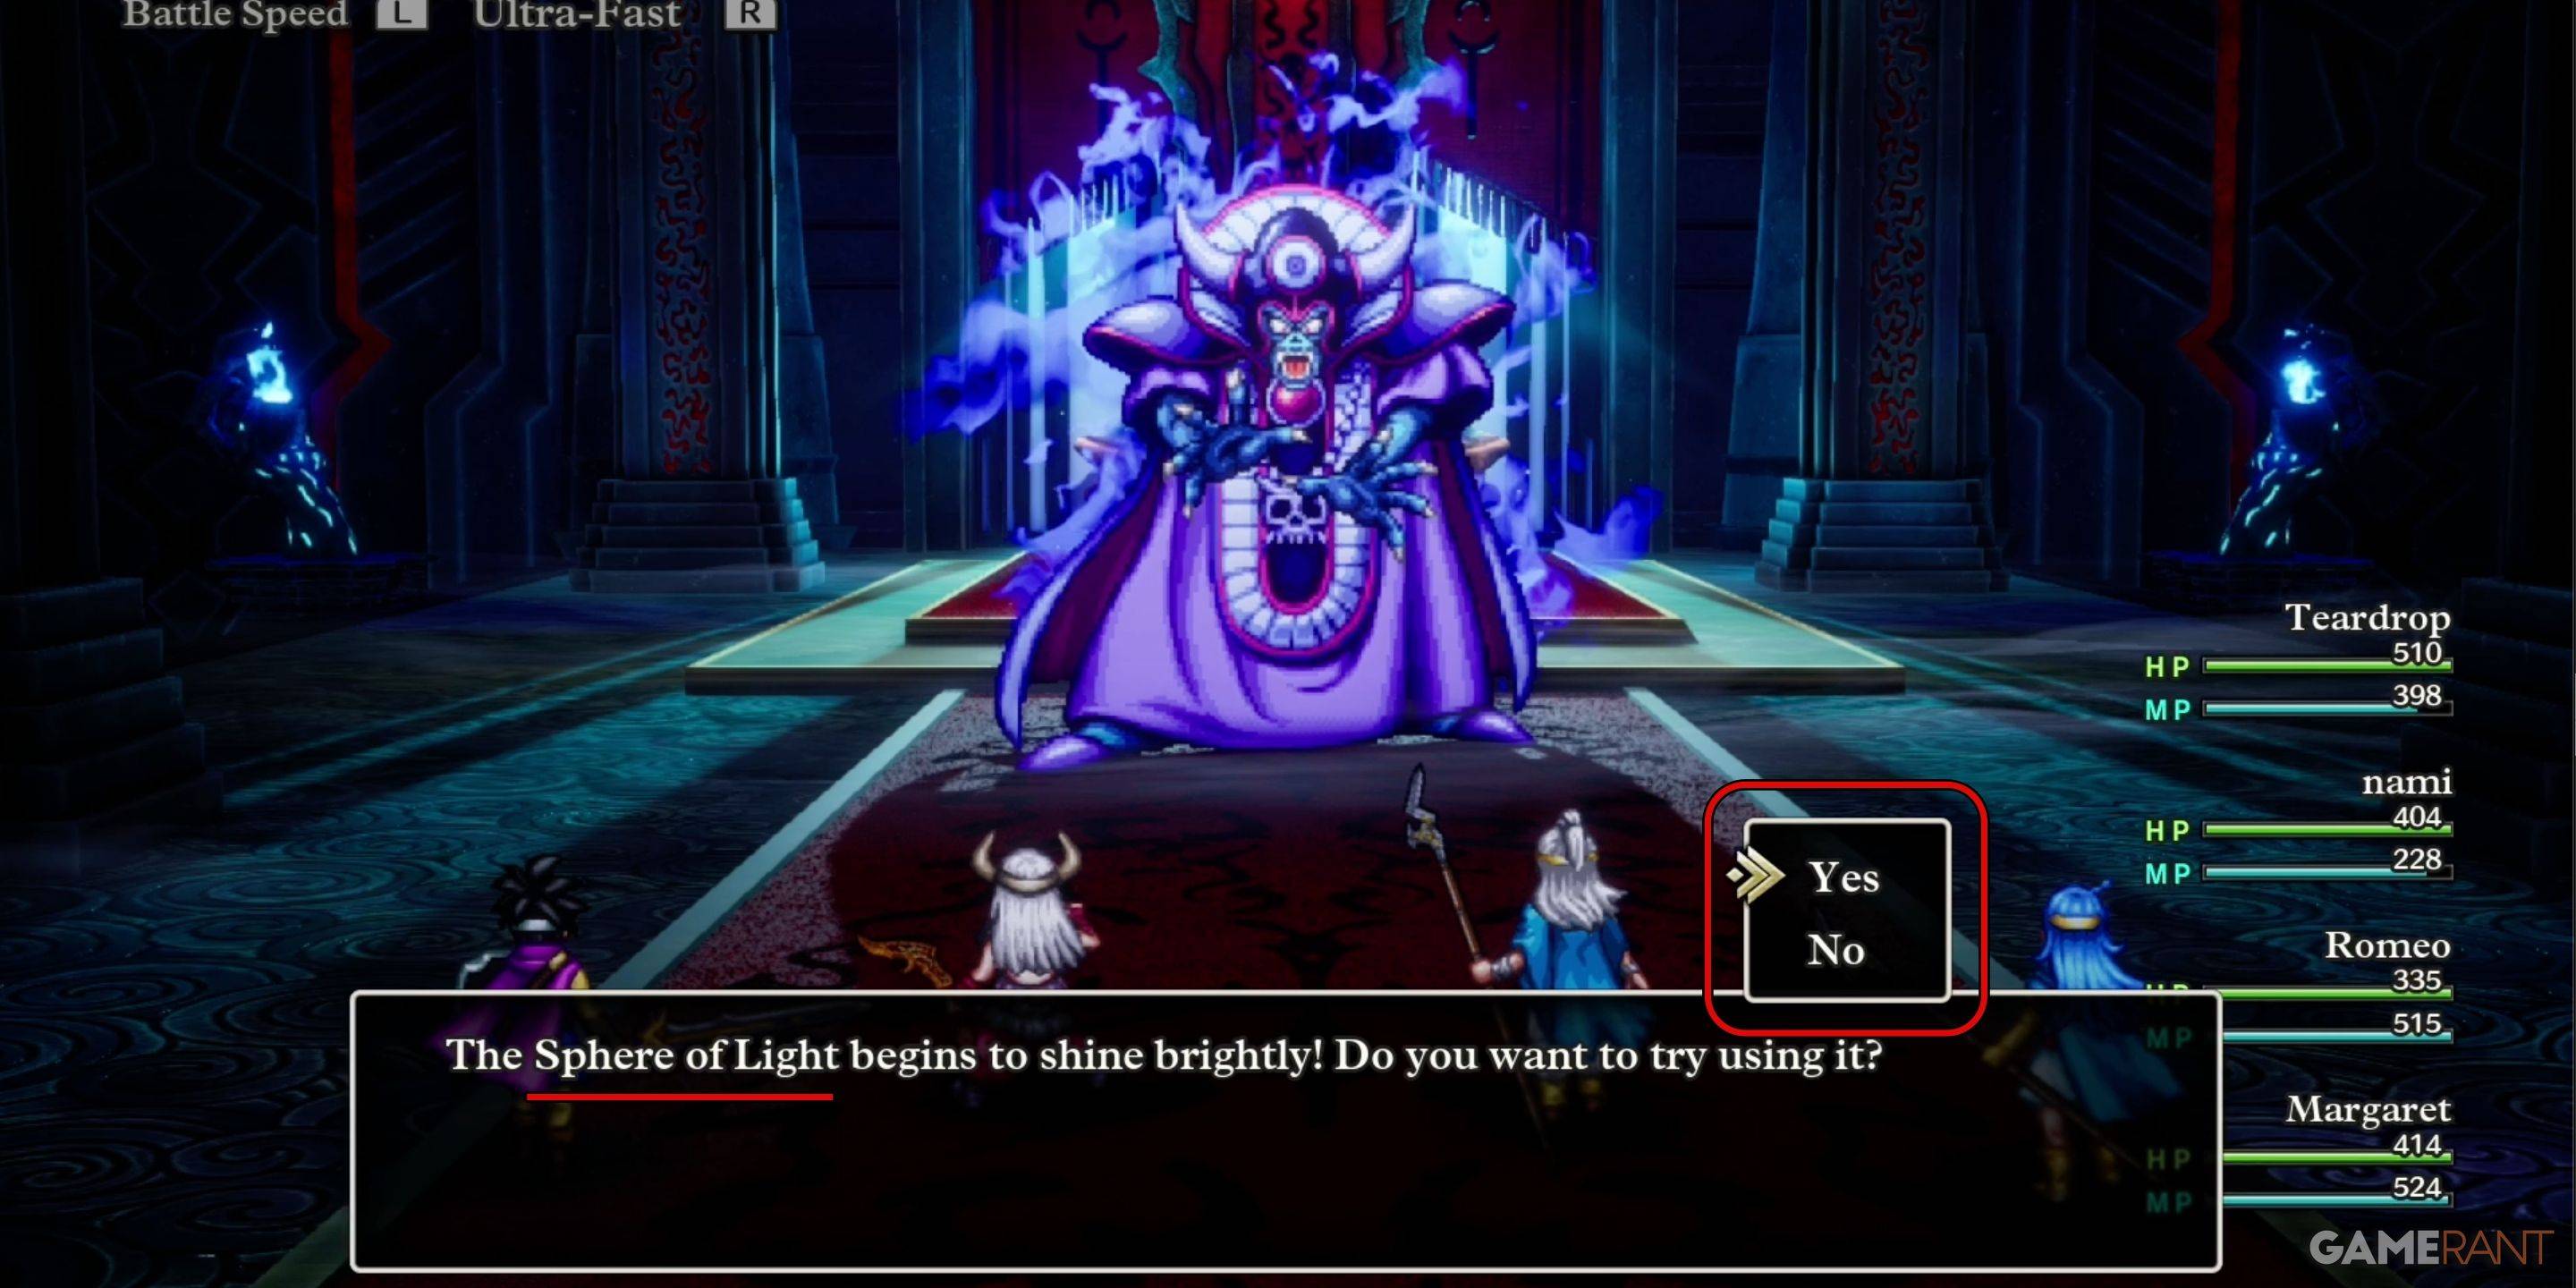 Conserve MP initially; Zoma has a magic barrier. Use the Sphere of Light to remove the barrier, then exploit its Zap weakness. Kazap and Monster Wrangler combos are highly effective. Prioritize HP and don't overextend.
Every Monster in Zoma's Citadel – Dragon Quest 3 Remake
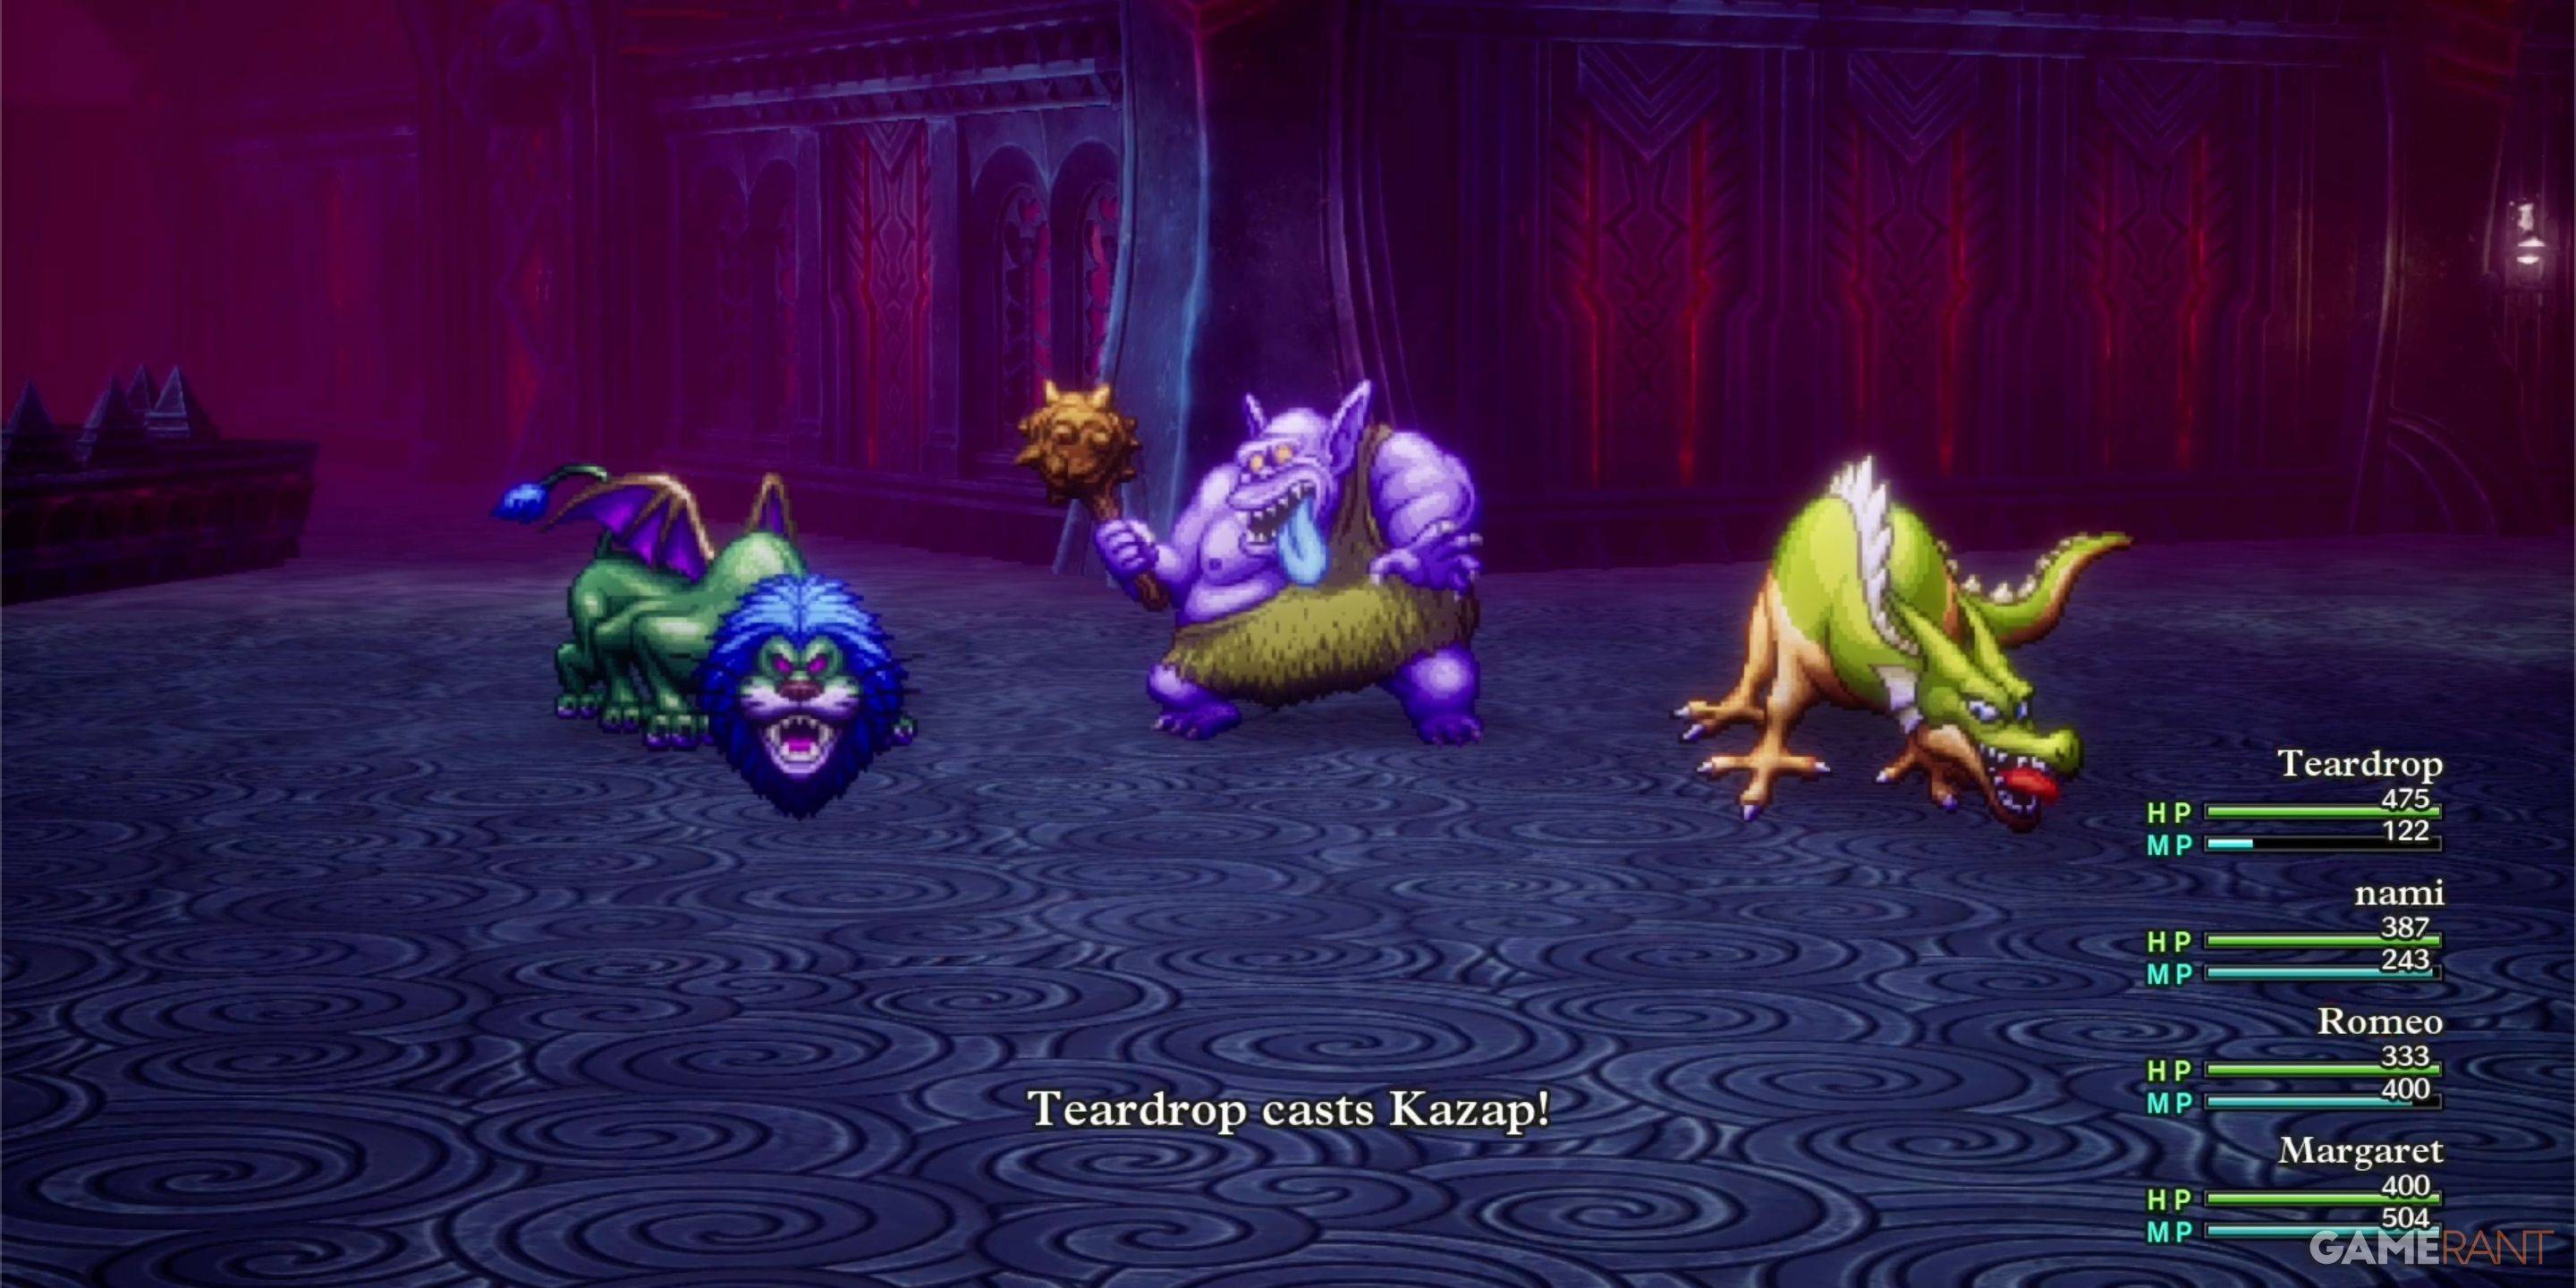
| Monster Name | Weakness |
|---|---|
| Dragon Zombie | None |
| Franticore | None |
| Great Troll | Zap |
| Green Dragon | None |
| Hocus-Poker | None |
| Hydra | None |
| Infernal Serpent | None |
| One-Man Army | Zap |
| Soaring Scourger | Zap |
| Troobloovoodoo | Zap |


-
1

Top Streaming Platforms for Live Sports in 2025
Jun 18,2025
-
2

GTA 6 Set for Fall 2025 Release, CEO Confirms
Apr 03,2025
-
3

First ALGS in Asia Emerges in Japan
Jan 19,2025
-
4

Roblox: CrossBlox Codes (January 2025)
Mar 04,2025
-
5
![Roblox Forsaken Characters Tier List [UPDATED] (2025)](https://img.jdzca.com/uploads/18/17380116246797f3e8a8a39.jpg)
Roblox Forsaken Characters Tier List [UPDATED] (2025)
Mar 05,2025
-
6
Introducing the Ultimate Guide to Seamless Character Swapping in Dynasty Warriors: Origins
Feb 25,2025
-
7
Gwent: Top 5 Witcher Decks (2025 Update)
Mar 13,2025
-
8
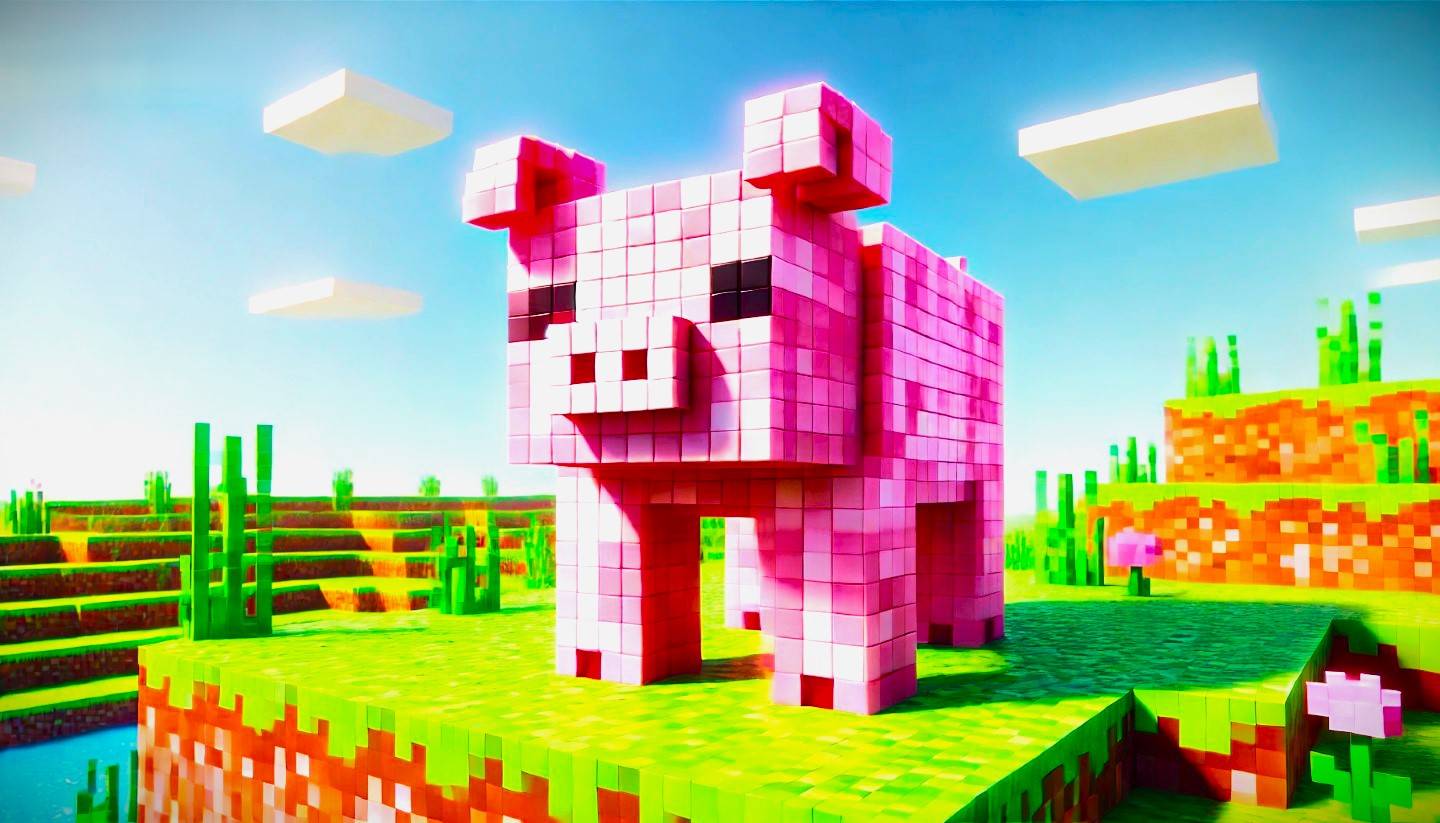
Cute mobs in Minecraft: pink pigs and why they are needed
Mar 06,2025
-
9
Max Hunter Rank in Monster Hunter Wilds: Tips to Increase
Apr 04,2025
-
10
Capcom Spotlight Feb 2025 Showcases Monster Hunter Wilds, Onimusha and More
Apr 01,2025
-
Download

Portrait Sketch
Photography / 37.12M
Update: Dec 17,2024
-
Download

Friendship with Benefits
Casual / 150.32M
Update: Dec 13,2024
-
Download

F.I.L.F. 2
Casual / 352.80M
Update: Dec 20,2024
-
4
[NSFW 18+] Sissy Trainer
-
5
Pocket Touch Simulation! for
-
6
슬롯 마카오 카지노 - 정말 재미나는 리얼 슬롯머신
-
7
Chubby Story [v1.4.2] (Localizations)
-
8
Life with a College Girl
-
9
Shuffles by Pinterest
-
10
Hunter Akuna