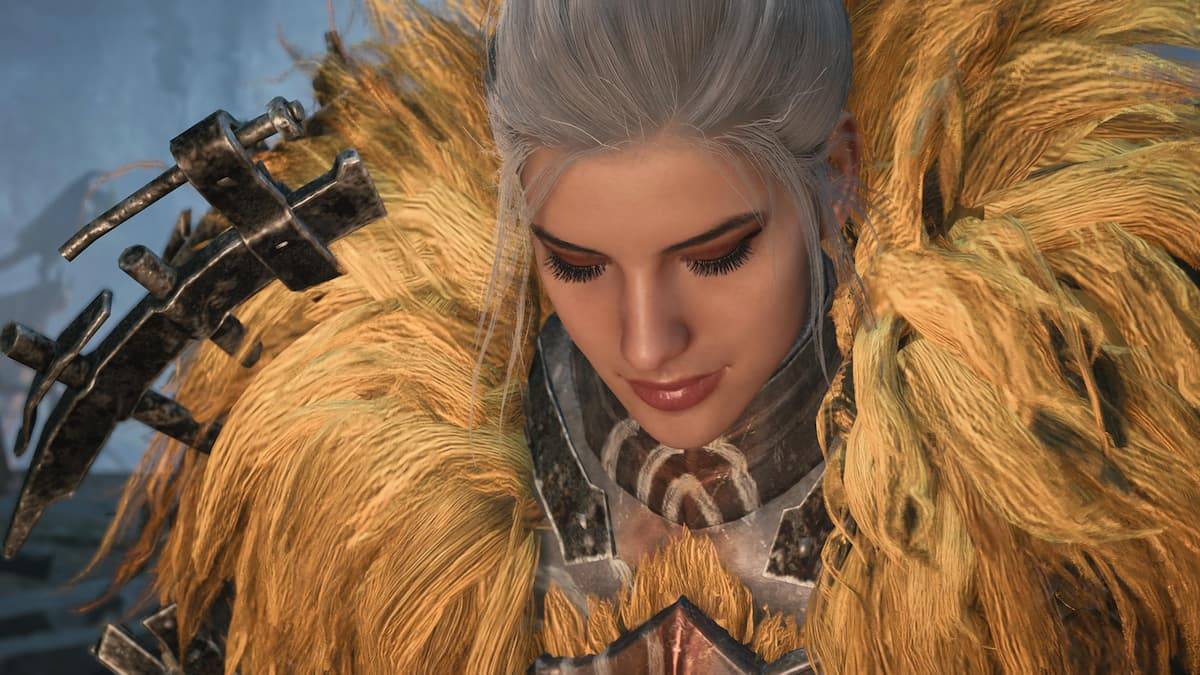
Monster Hunter Wilds: Sword & Shield Moves Guide

Finding the perfect balance in Monster Hunter Wilds can be challenging, especially when weighing armor and Talisman tradeoffs. However, the Sword and Shield offers remarkable versatility in battle. Covering both offensive and defensive capabilities, here's how to maximize this reliable weapon's potential.
Sword and Shield Fundamentals
Ideal for both beginners and experienced hunters, the Sword and Shield provides exceptional mobility and striking power while maintaining defensive options through guarding. This makes it adaptable to nearly any hunting scenario.
Combat Techniques
| Input | Action | Effect |
|---|---|---|
| Triangle/Y | Basic Slash | Performs a foundational sword strike that chains into a 4-hit combo. Adjust positioning mid-combo using the analog stick. |
| Circle/B | Special Strike | With directional input, executes a Shield Bash causing stun damage. Without input, delivers a strong Lateral Slash. |
| Triangle/Y + Circle/B | Advancing Slash | Performs a forward-moving upward slash. Triggers environmental attacks when used near ledges or while sliding. |
| Triangle/Y + Circle/B (Mid-combo) | Roundslash | Executes a wide-area slash with repositioning flexibility. Leads into Spinning Reaper when properly chained. |
| Hold Triangle/Y + Circle/B | Charged Chop | A devastating leaping attack that deals multiple hits on weak spots. Power increases when following specific attacks. |
| Forward + Circle/B | Shield Bash | Directs shield impact toward enemies, particularly effective when targeting heads for maximum stun potential. |
| Back + Circle/B | Evasive Backstep | Dodges attacks mid-combo. Follow with Triangle/Y timing for Perfect Rush multi-hit combo. |
| Circle/B During Backstep | Charged Slash | Launches aerial attacks including Jumping Slash (Triangle/Y) or Falling Bash (Circle/B). |
| Hold R2/RT | Defensive Guard | Blocks incoming attacks. Perfect timing triggers Counter Slash opportunity. |
| R2/RT + Triangle/Y | Closing Strike | Quickly bridges distance to target. |
| R2/RT + Square/X | Item Usage | Allows item consumption without sheathing weapon. |
| L2/LT + R1/RB | Vital Strike | Precise stab targeting wounds. Follow with Falling Slash (Triangle/Y) or Upswing Bash (Circle/B). |
Essential Combinations
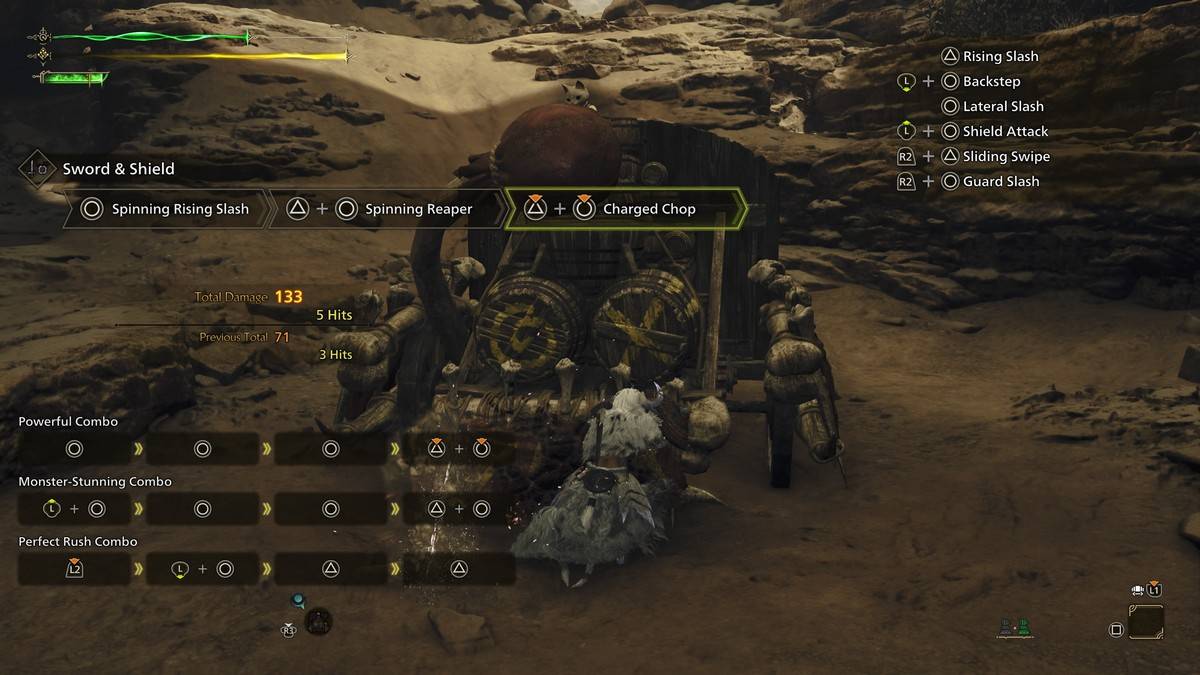
Lateral Slash Chain
Sequence: Lateral Slash → Return Stroke → Spinning Rising Slash → Spinning Reaper → Charged Chop. This efficient combo delivers concentrated damage while maintaining mobility.
Stun-focused Bash Sequence
Pattern: Shield Attack → Shield Attack → Shield Attack → Guard Slash. Ideal for targeting monster heads to create knockdown opportunities.
Perfect Rush Execution
Flow: Any opening attack → Backstep → Leaping Slash → Perfect Rush → Scaling Slash → Falling Bash. Maximize damage by executing follow-up attacks during red flash animations.
Advanced Tactics

Adaptive Assault
Alternate between rapid sword strikes (accumulating elemental damage) and opportunistic shield bashes (building stun status) for optimal takedown efficiency.
Defensive Mastery
Perfect Guards completely negate damage when timed precisely, while Backsteps create space while setting up immediate counterattacks.
Wound Exploitation
Use Focus Strikes on vulnerable body parts, choosing between Falling Slash (damage focus) or Upswing Bash → Falling Bash (stun focus) based on hunt requirements.
Tactical Item Usage
Maintain combat momentum by using potions and support items without weapon sheathing downtime.
For additional Monster Hunter Wilds guides, continue exploring The Escapist.
Monster Hunter Wilds is currently available PlayStation, Xbox, and PC platforms.


-
1

Top Streaming Platforms for Live Sports in 2025
Jun 18,2025
-
2

GTA 6 Set for Fall 2025 Release, CEO Confirms
Apr 03,2025
-
3

Roblox: CrossBlox Codes (January 2025)
Mar 04,2025
-
4

First ALGS in Asia Emerges in Japan
Jan 19,2025
-
5
![Roblox Forsaken Characters Tier List [UPDATED] (2025)](https://img.jdzca.com/uploads/18/17380116246797f3e8a8a39.jpg)
Roblox Forsaken Characters Tier List [UPDATED] (2025)
Mar 05,2025
-
6
Introducing the Ultimate Guide to Seamless Character Swapping in Dynasty Warriors: Origins
Feb 25,2025
-
7
Gwent: Top 5 Witcher Decks (2025 Update)
Mar 13,2025
-
8
Max Hunter Rank in Monster Hunter Wilds: Tips to Increase
Apr 04,2025
-
9
Cute mobs in Minecraft: pink pigs and why they are needed
Mar 06,2025
-
10
Capcom Spotlight Feb 2025 Showcases Monster Hunter Wilds, Onimusha and More
Apr 01,2025
-
Download

Portrait Sketch
Photography / 37.12M
Update: Dec 17,2024
-
Download

Friendship with Benefits
Casual / 150.32M
Update: Dec 13,2024
-
Download

F.I.L.F. 2
Casual / 352.80M
Update: Dec 20,2024
-
4
[NSFW 18+] Sissy Trainer
-
5
Pocket Touch Simulation! for
-
6
Chubby Story [v1.4.2] (Localizations)
-
7
슬롯 마카오 카지노 - 정말 재미나는 리얼 슬롯머신
-
8
Life with a College Girl
-
9
Shuffles by Pinterest
-
10
Hunter Akuna