Dragon Quest III Remake: Conquer Baramos's Lair, Guide Unveiled
Conquering Baramos's Lair in Dragon Quest 3 Remake: A Comprehensive Guide
After securing the Six Orbs and hatching Ramia, the Everbird, your journey to Baramos's Lair begins. This challenging dungeon serves as the ultimate test before venturing into the underworld. This guide details navigating and conquering Baramos's Lair in Dragon Quest III HD-2D Remake.
Baramos, the primary antagonist of the game's first half, resides within this formidable dungeon. Access is granted only after obtaining Ramia. Aim for a party level of at least 20 before tackling this challenge. Valuable items await within.
Reaching Baramos's Lair

Having completed the Maw of the Necrogond and acquired the Silver Orb, Ramia becomes available. Fly from either the Shrine of the Everbird or the Necrogond Shrine to the island north of the Necrogond Shrine, nestled amidst mountains. This is Baramos's Lair. Ramia will deposit you near the entrance.
Navigating Baramos's Lair
Baramos's Lair deviates from typical dungeon structures. Instead of linear progression, you'll traverse indoor and outdoor areas to reach Baramos. The main outdoor area, "Baramos's Lair – Surroundings," serves as a central hub. The following outlines the main path to the boss fight:
Main Path to Baramos:
- Upon entering from the overworld, bypass the main entrance. Instead, proceed east to the northeast pool.
- Turn left at the stairs leading to the pool and continue west to another staircase. Ascend and locate the door to your right.
- Enter the Eastern Tower, reach the top, and exit.
- Traverse the castle roof southwest, descend the stairs, and proceed west through the gaps in the northwestern double wall. Use the northwest staircase.
- The staircase leads to the Central Tower. Use Safe Passage to navigate electrified floor panels to the southwest stairs, descending to B1 Passageway A.
- In B1 Passageway A, turn east and proceed to the eastern staircase.
- Enter the South-East Tower, ascend the northeast staircase to the roof, and then head west to another staircase down. Cross the grass northwest and enter the only available door.
- This leads to the northeast section of the Central Tower. Exit via the single available path.
- You'll be in B1 Passageway B. Proceed north and ascend the stairs.
- Enter the Throne Room. Avoid floor panels and exit south.
- Head east from the Throne Room (northwest corner of the Surroundings map) to the structure on the island in the lake (northeast corner). This is Baramos's Den.
Treasure Locations
Surroundings:
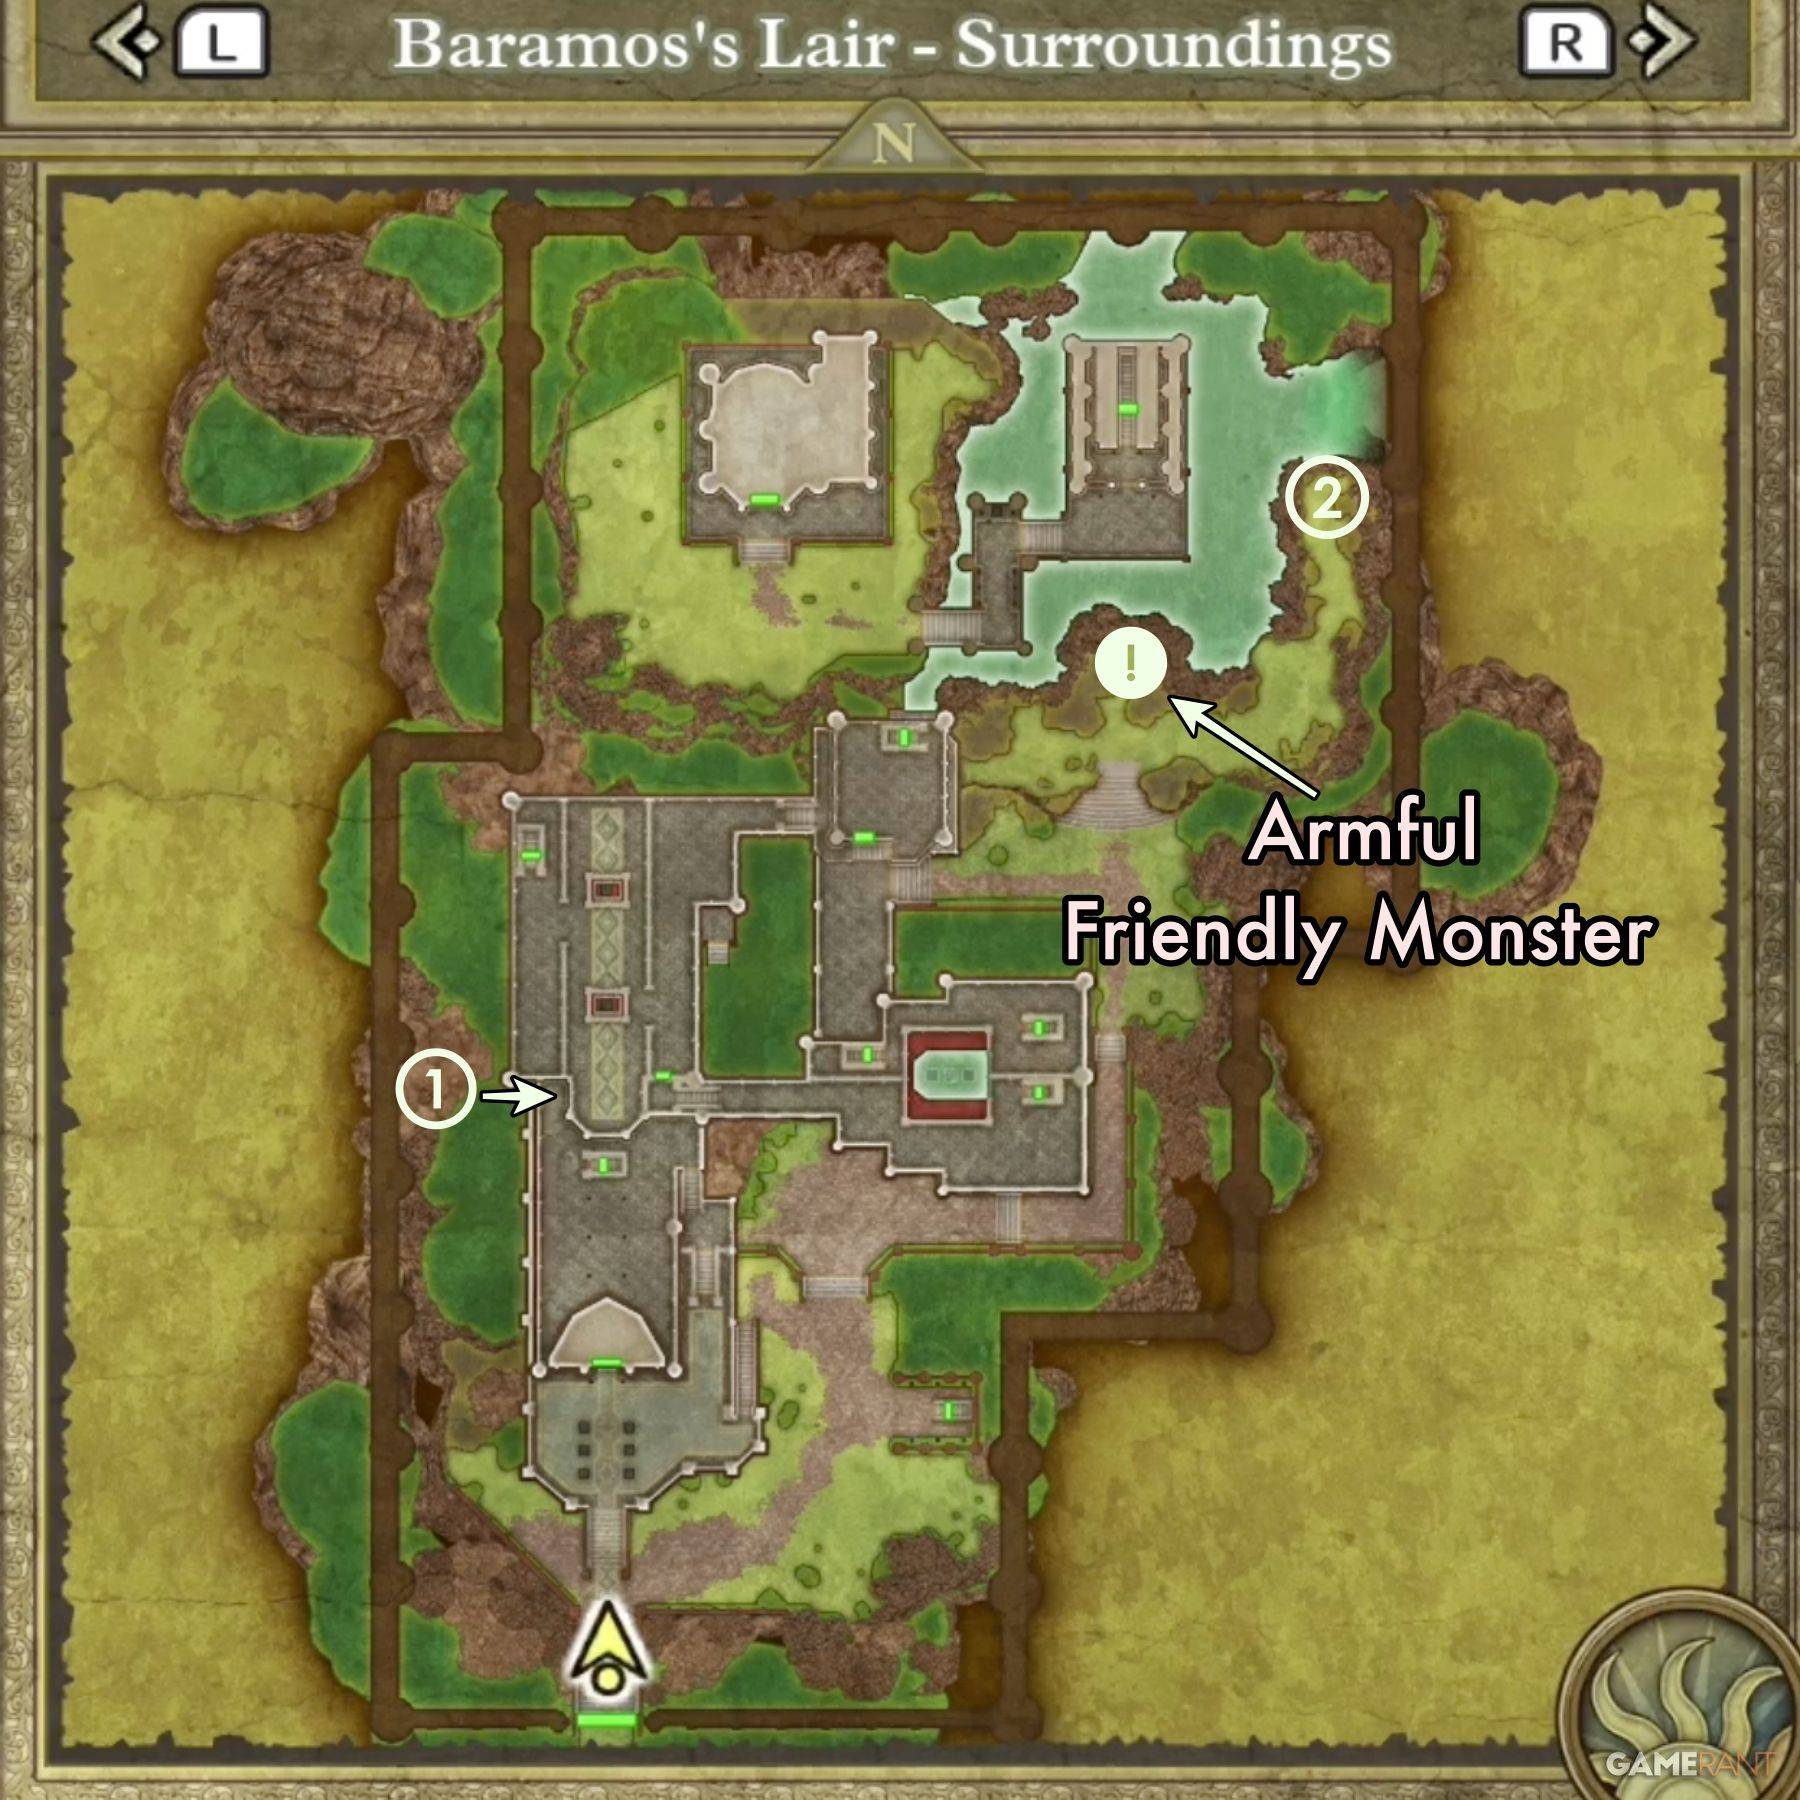
- Treasure 1 (Chest): Prayer Ring
- Treasure 2 (Buried): Flowing Dress
Central Tower:
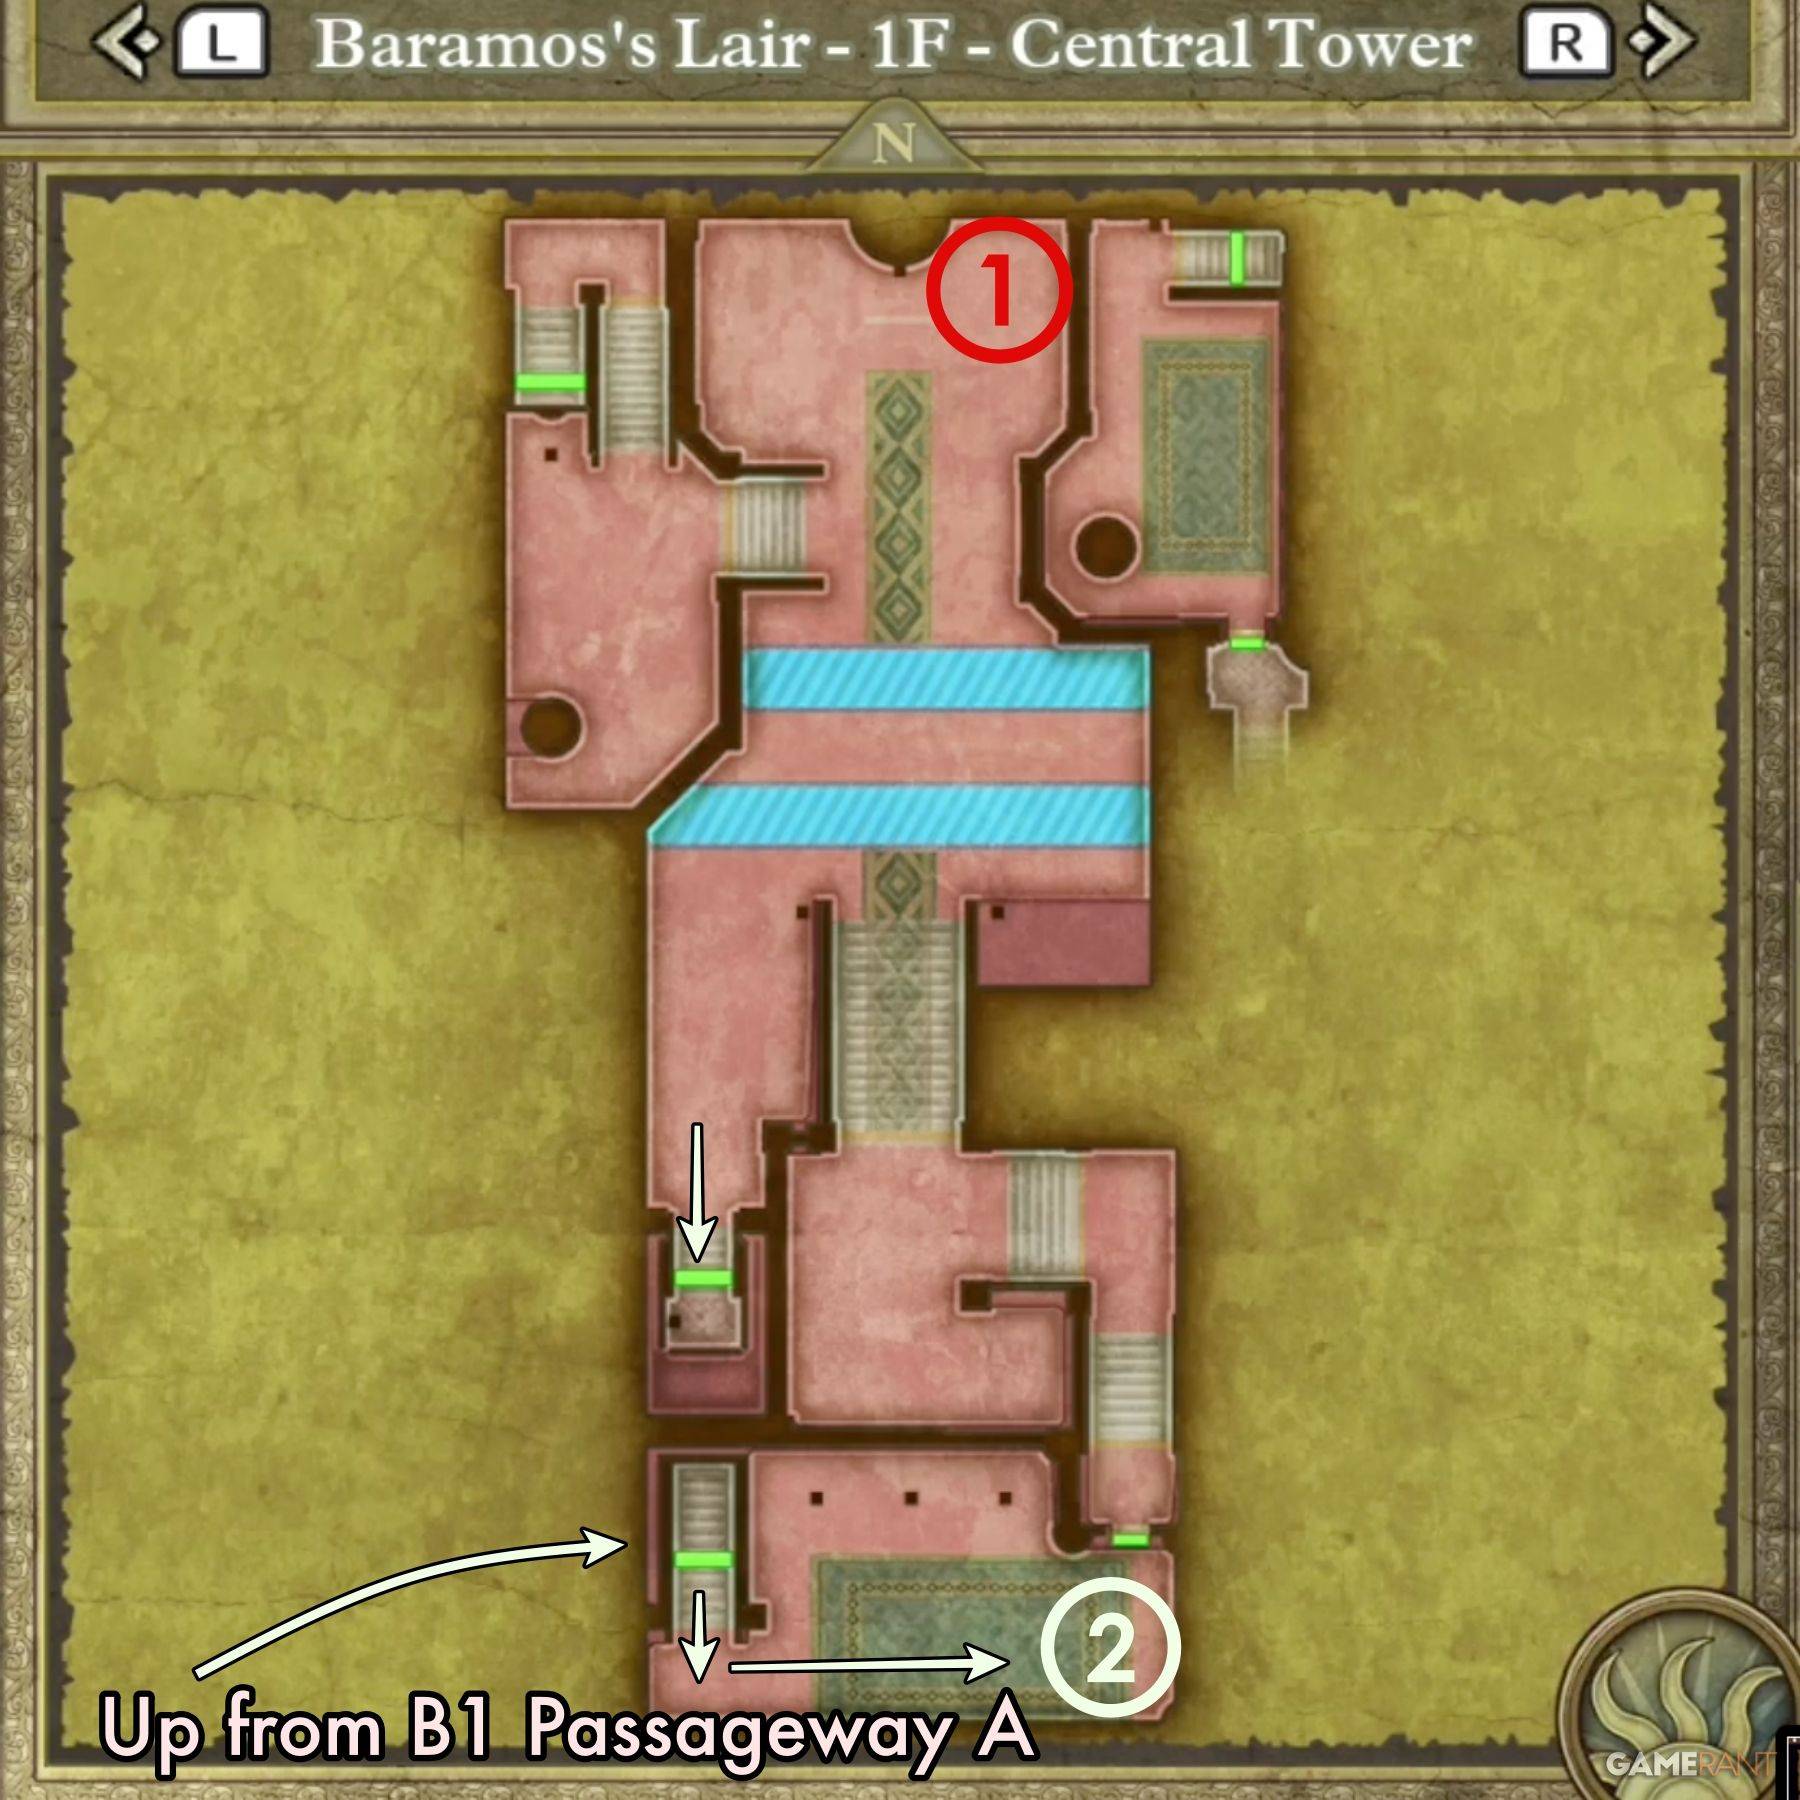
- Treasure 1: Mimic (enemy)
- Treasure 2: Dragon Mail
South-East Tower:
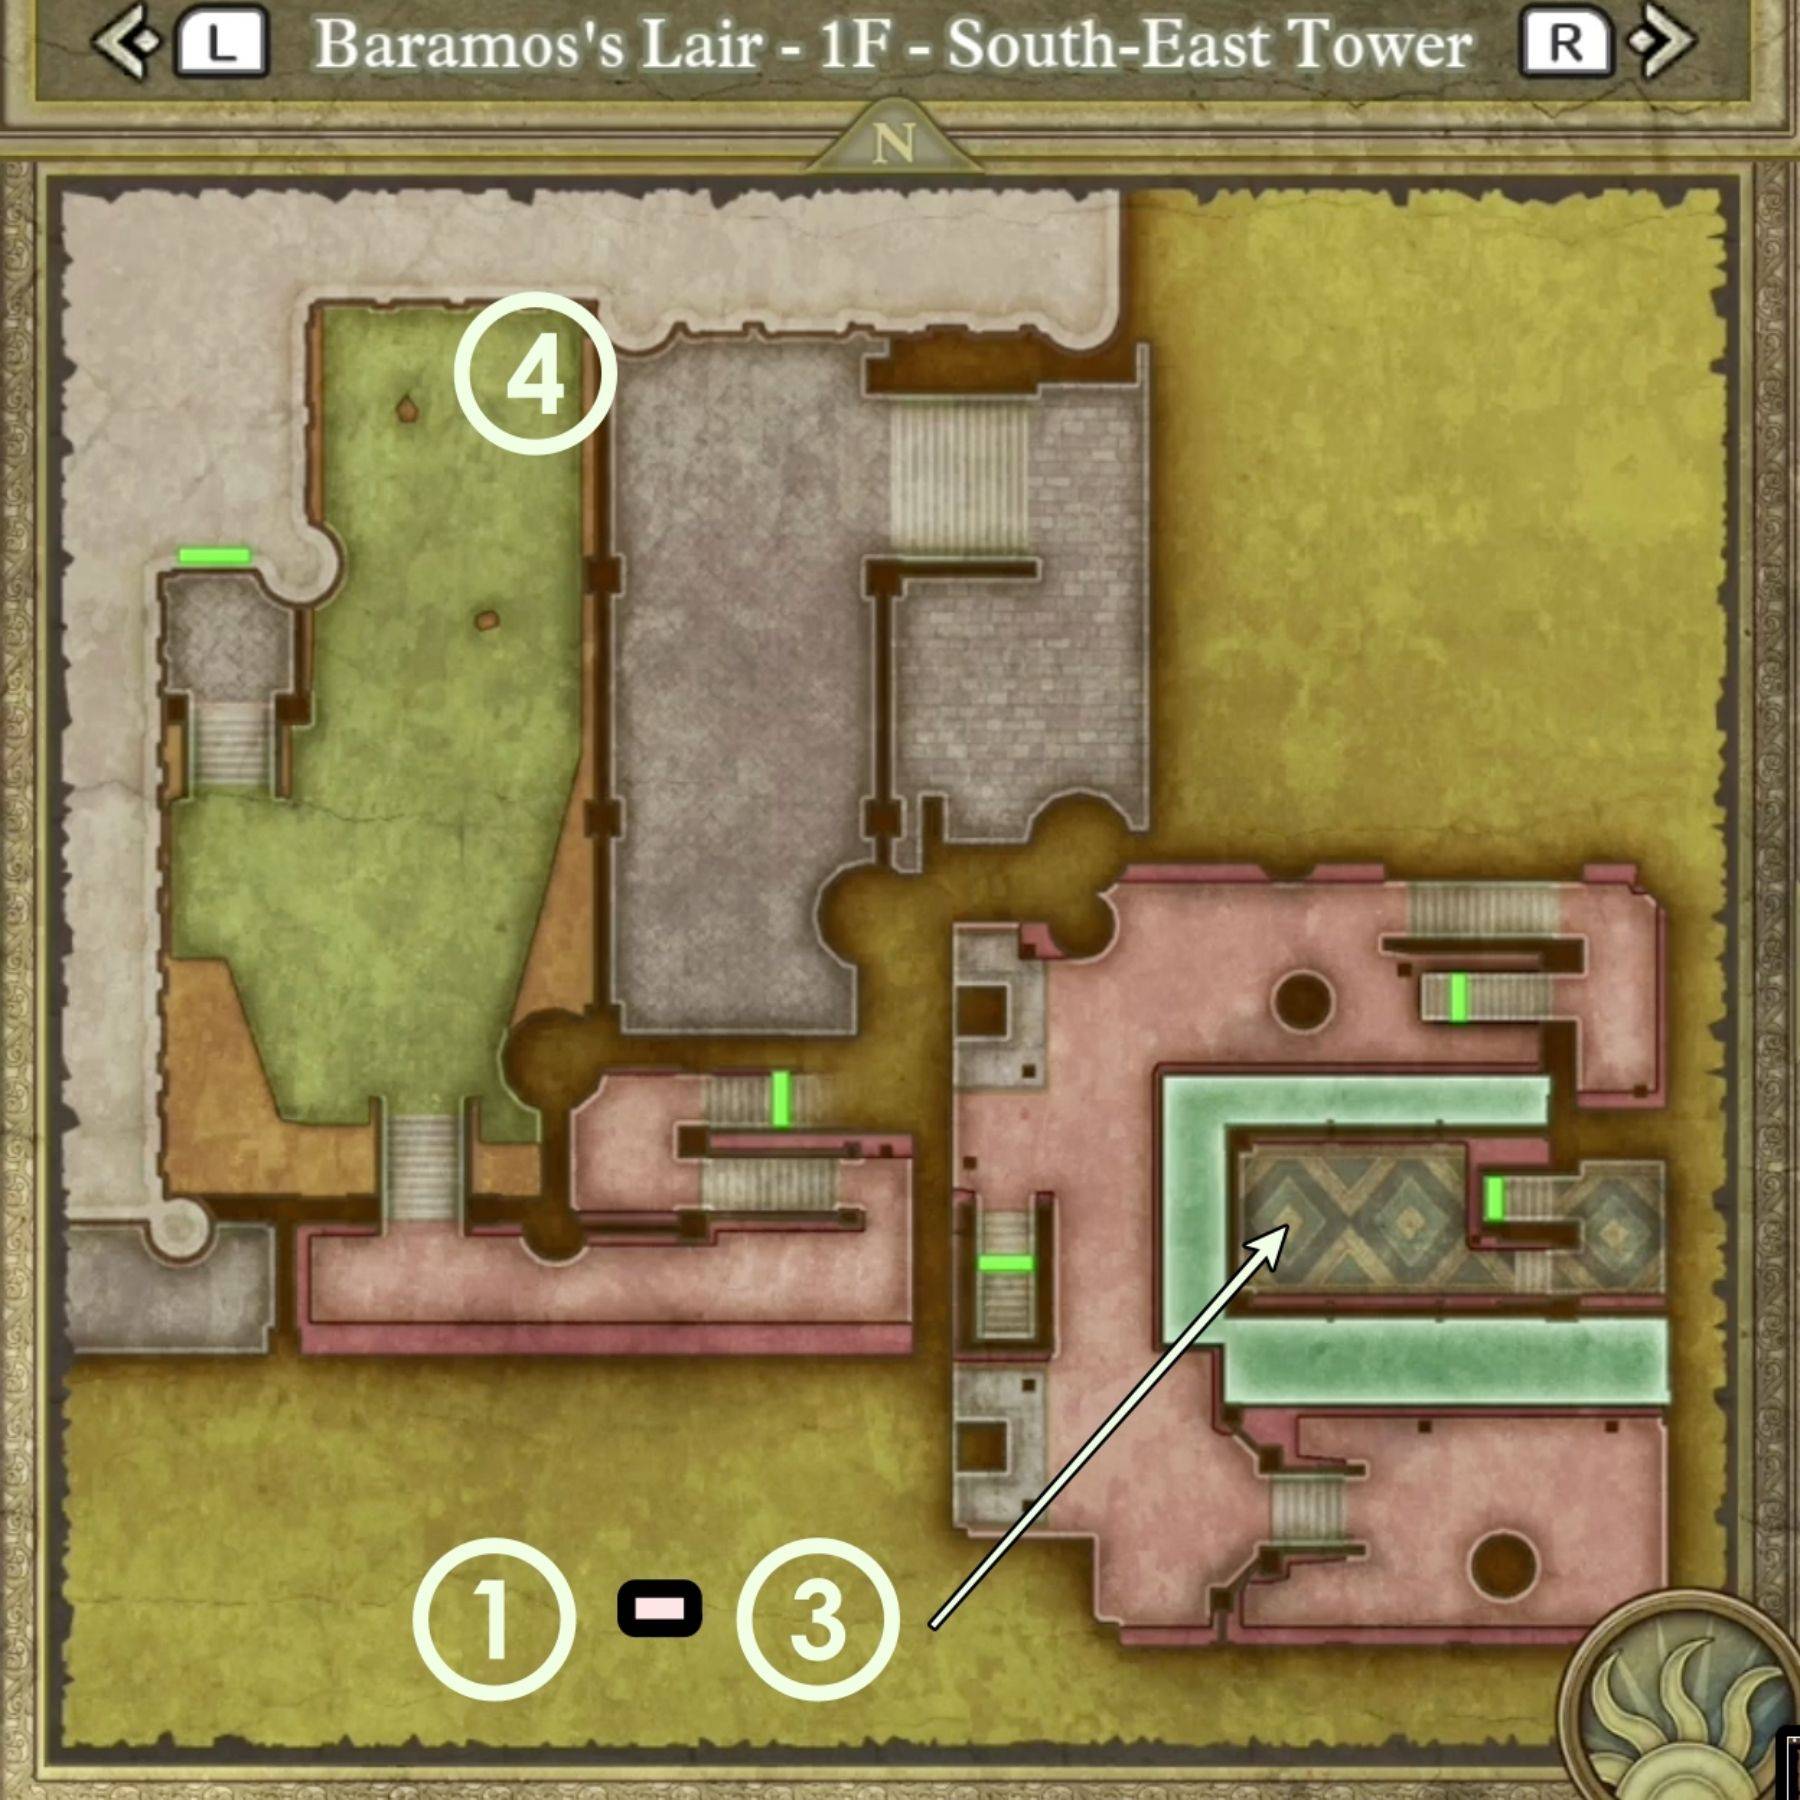
- Treasure 1 (Chest): Hapless Helm
- Treasure 2 (Chest): Sage's Elixir
- Treasure 3 (Chest): Headsman's Axe
- Treasure 4 (Chest): Zombiesbane
B1 Passageway:
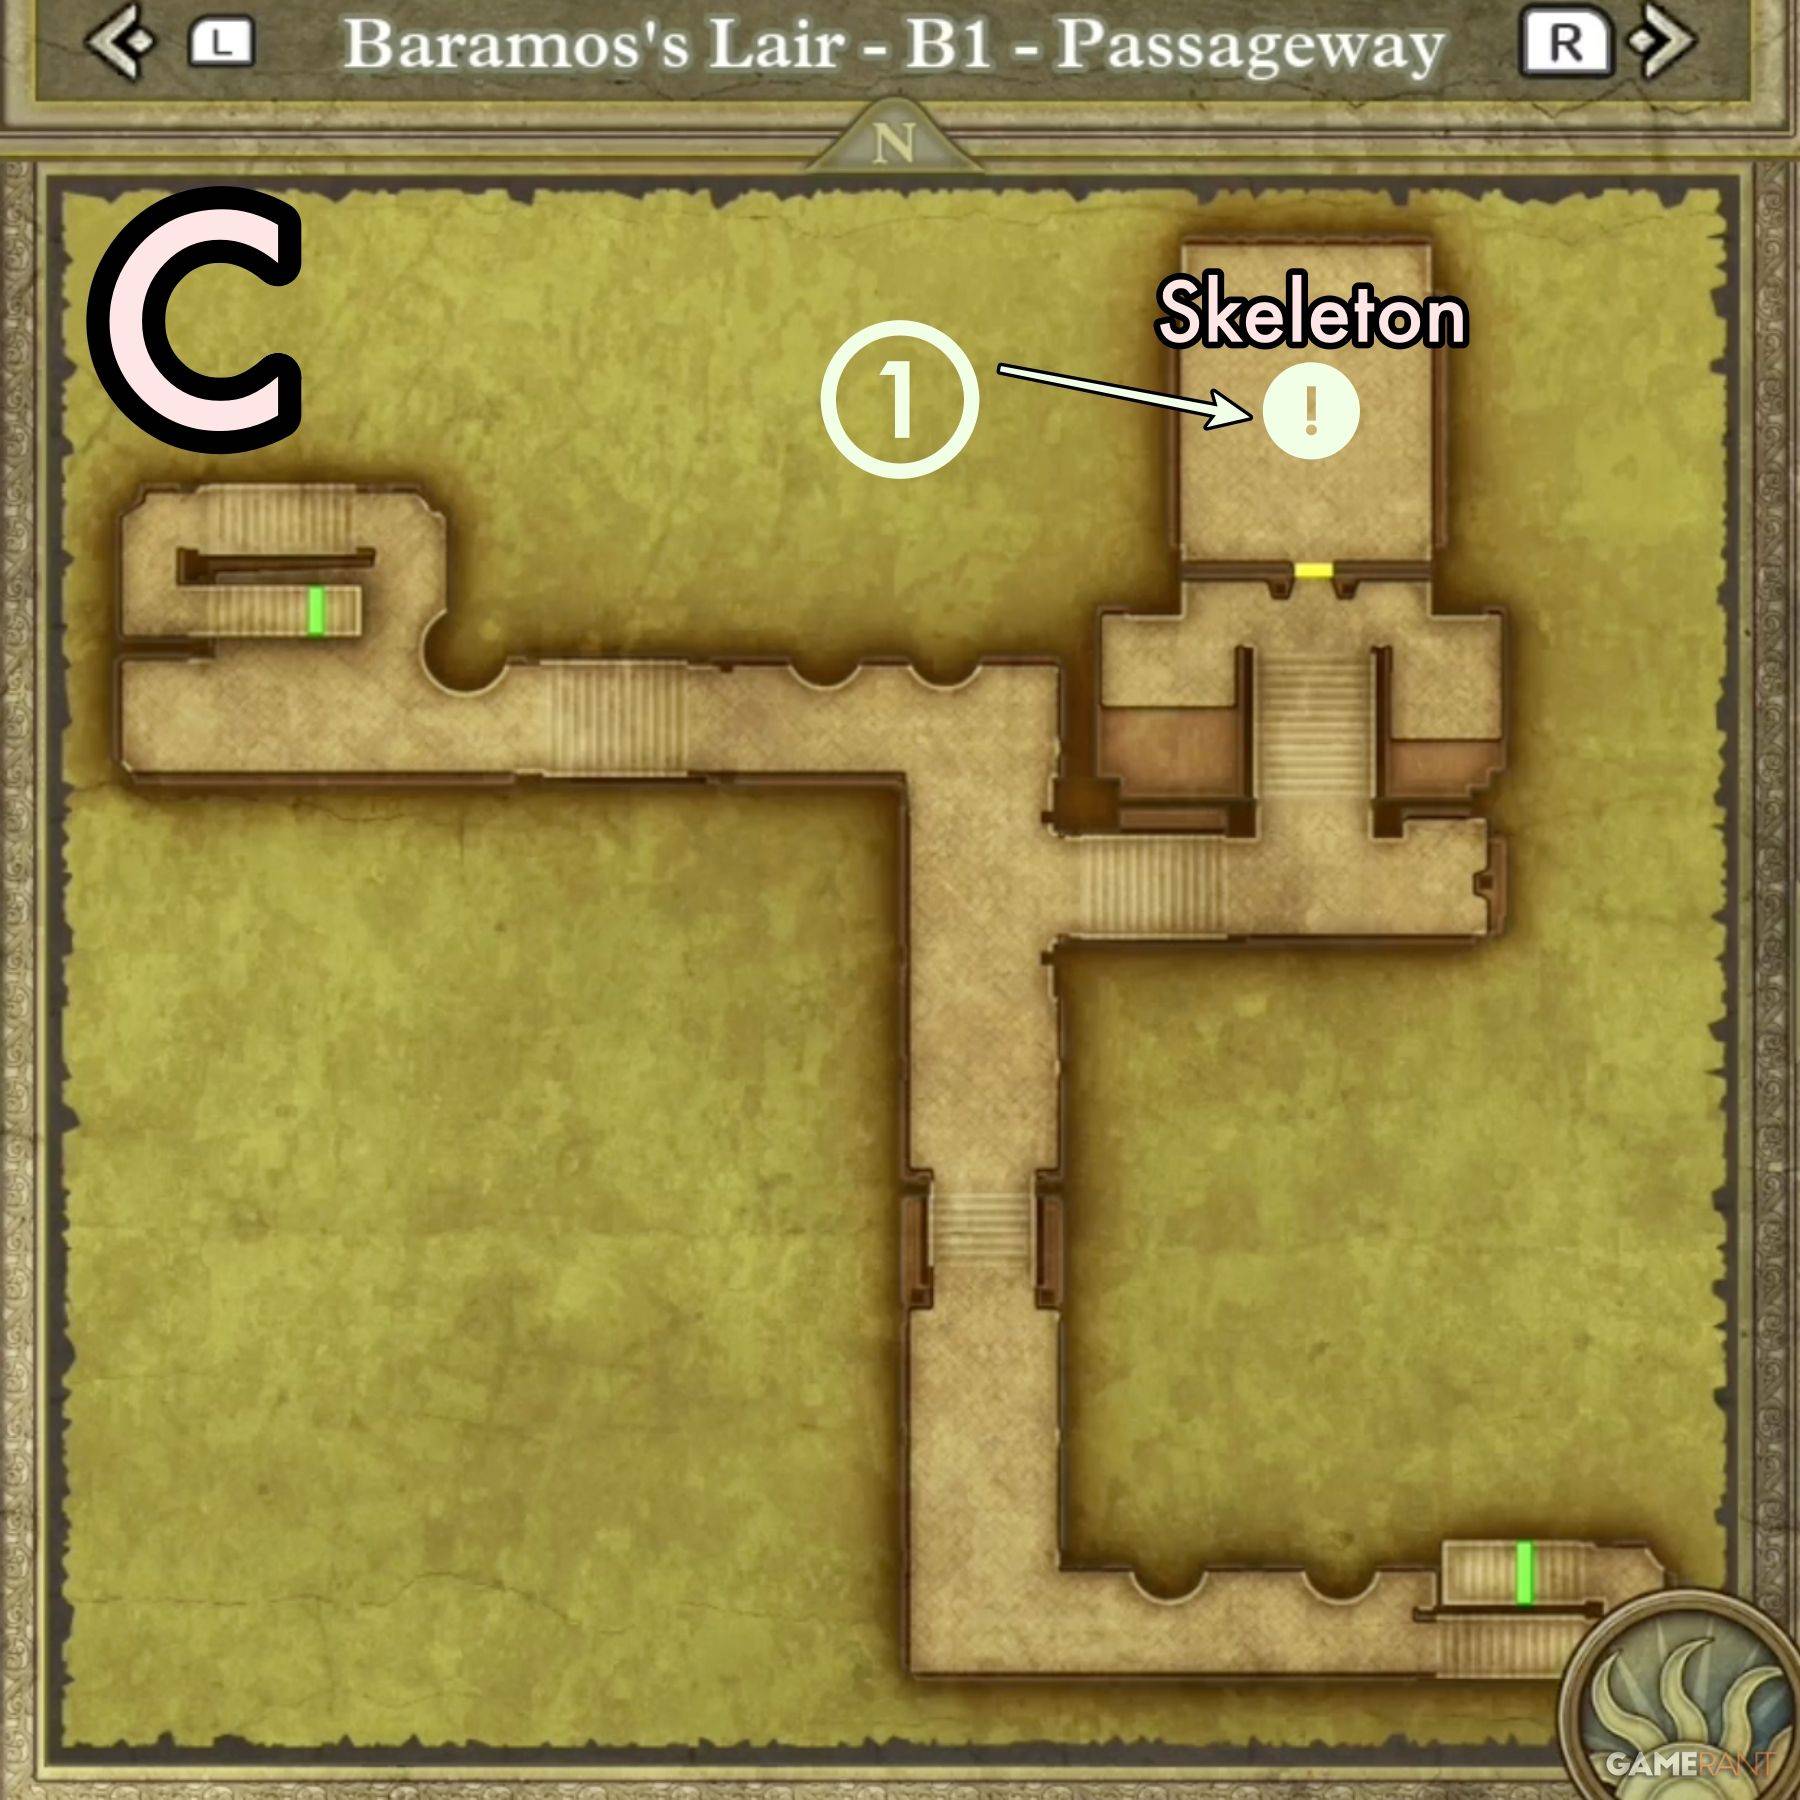
- Treasure 1 (Buried): Mini Medal
Throne Room:
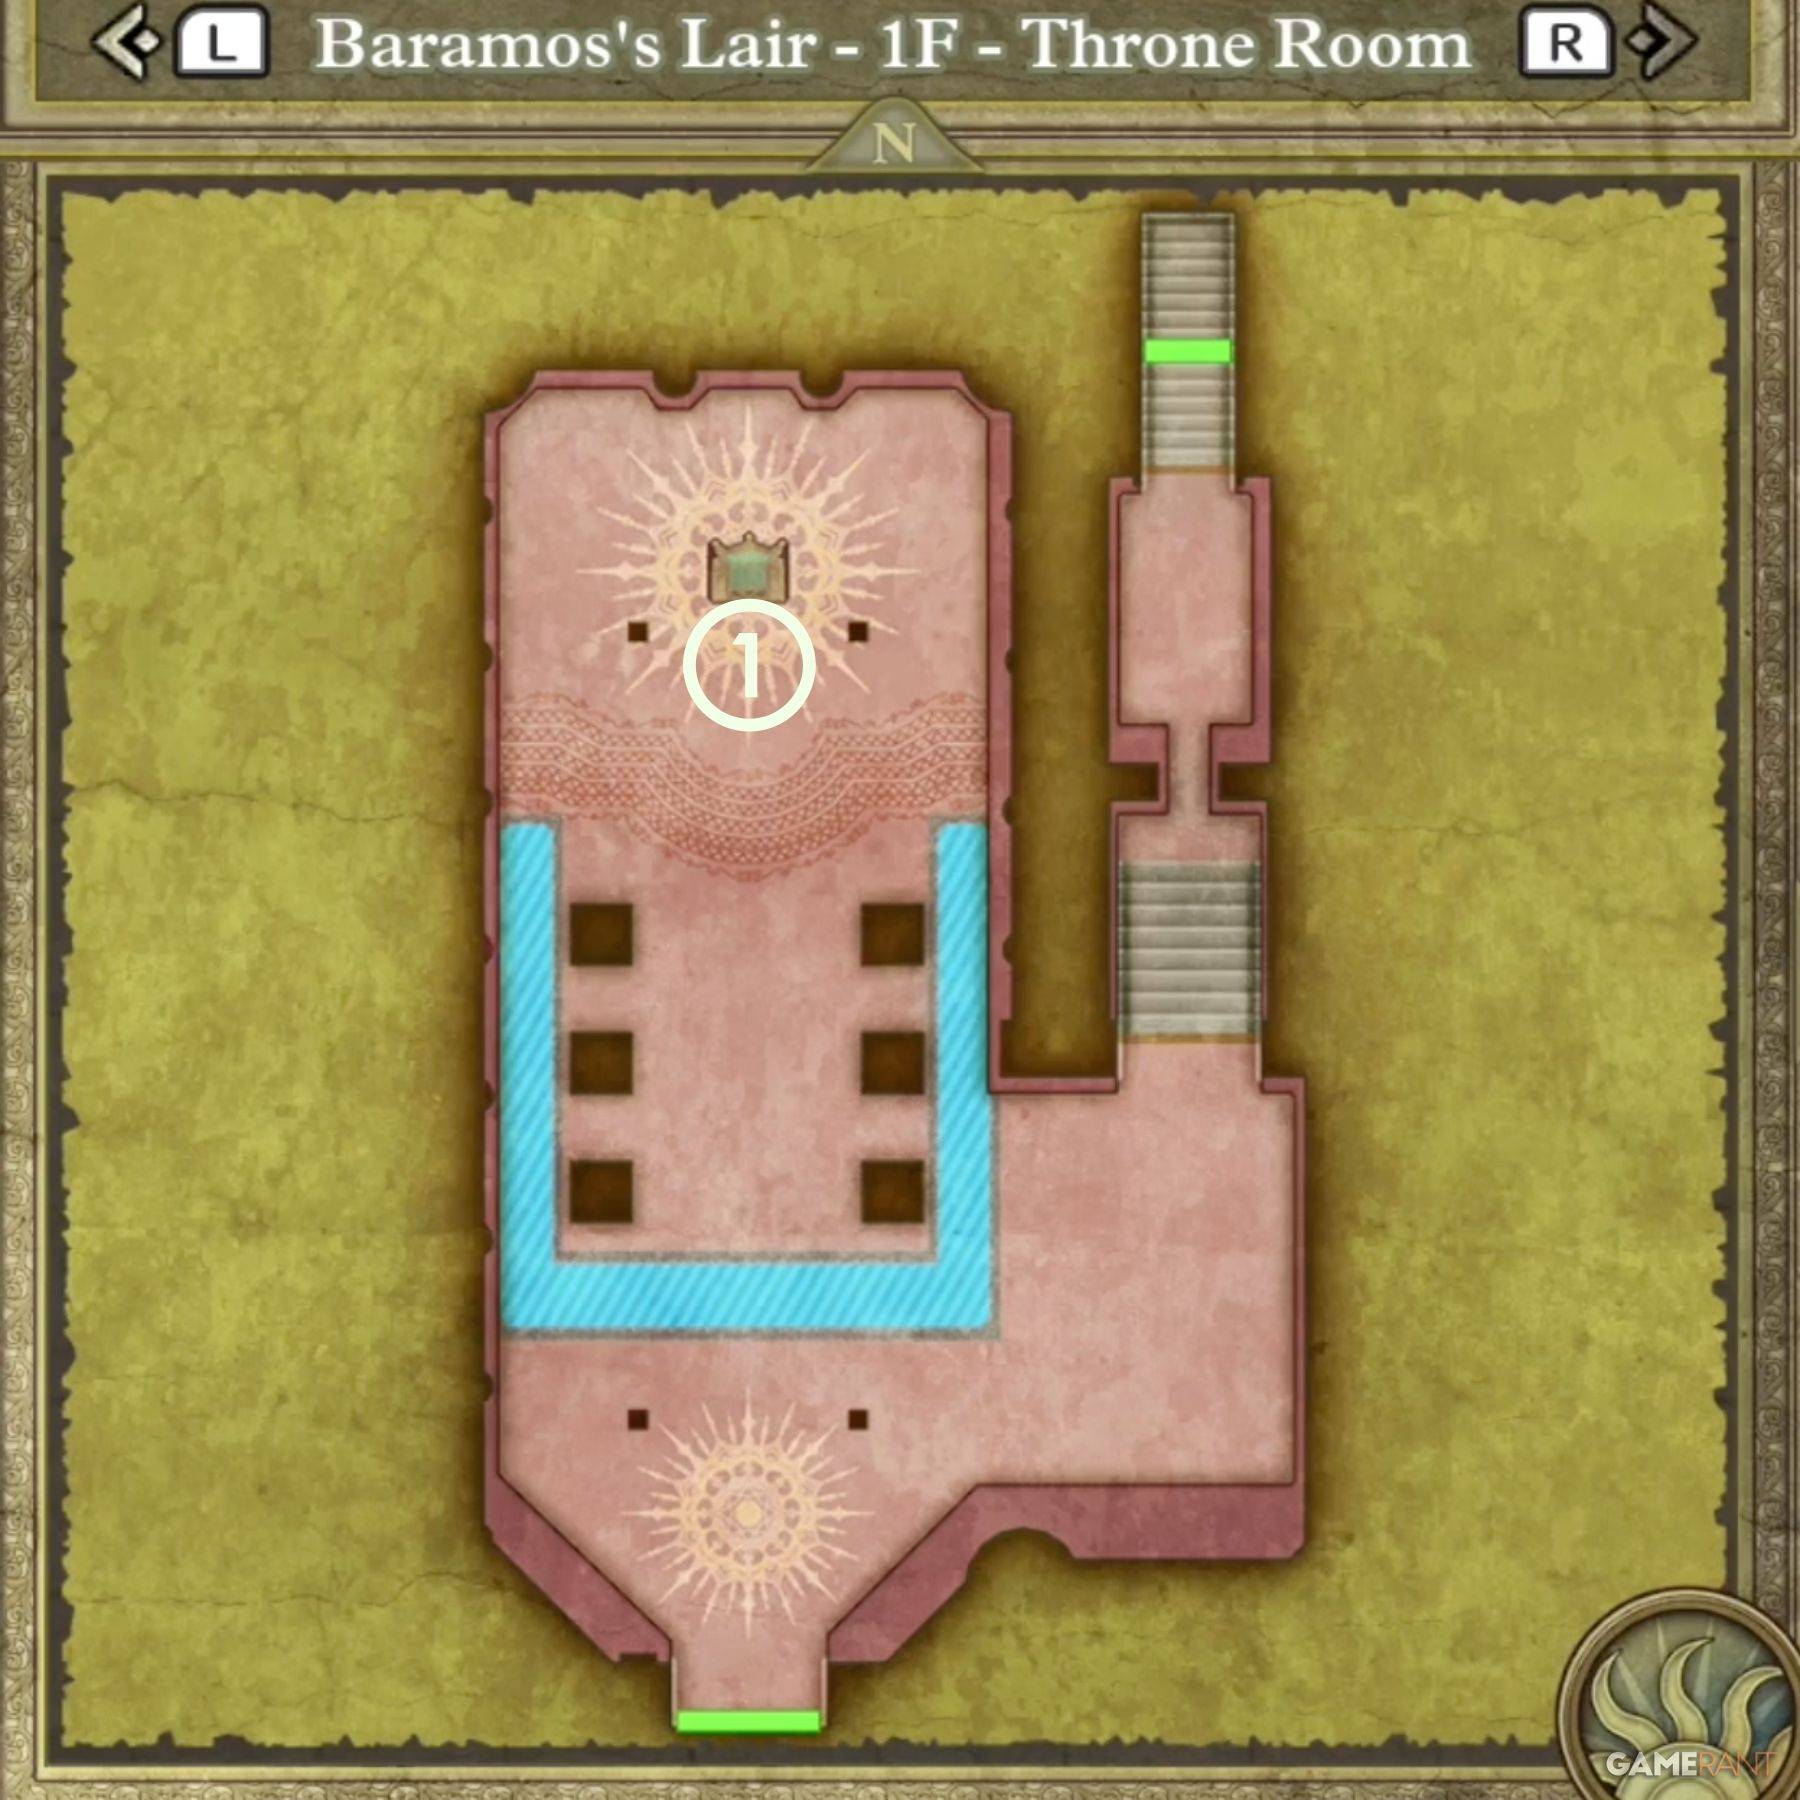
- Treasure 1 (Buried): Mini Medal
Defeating Baramos
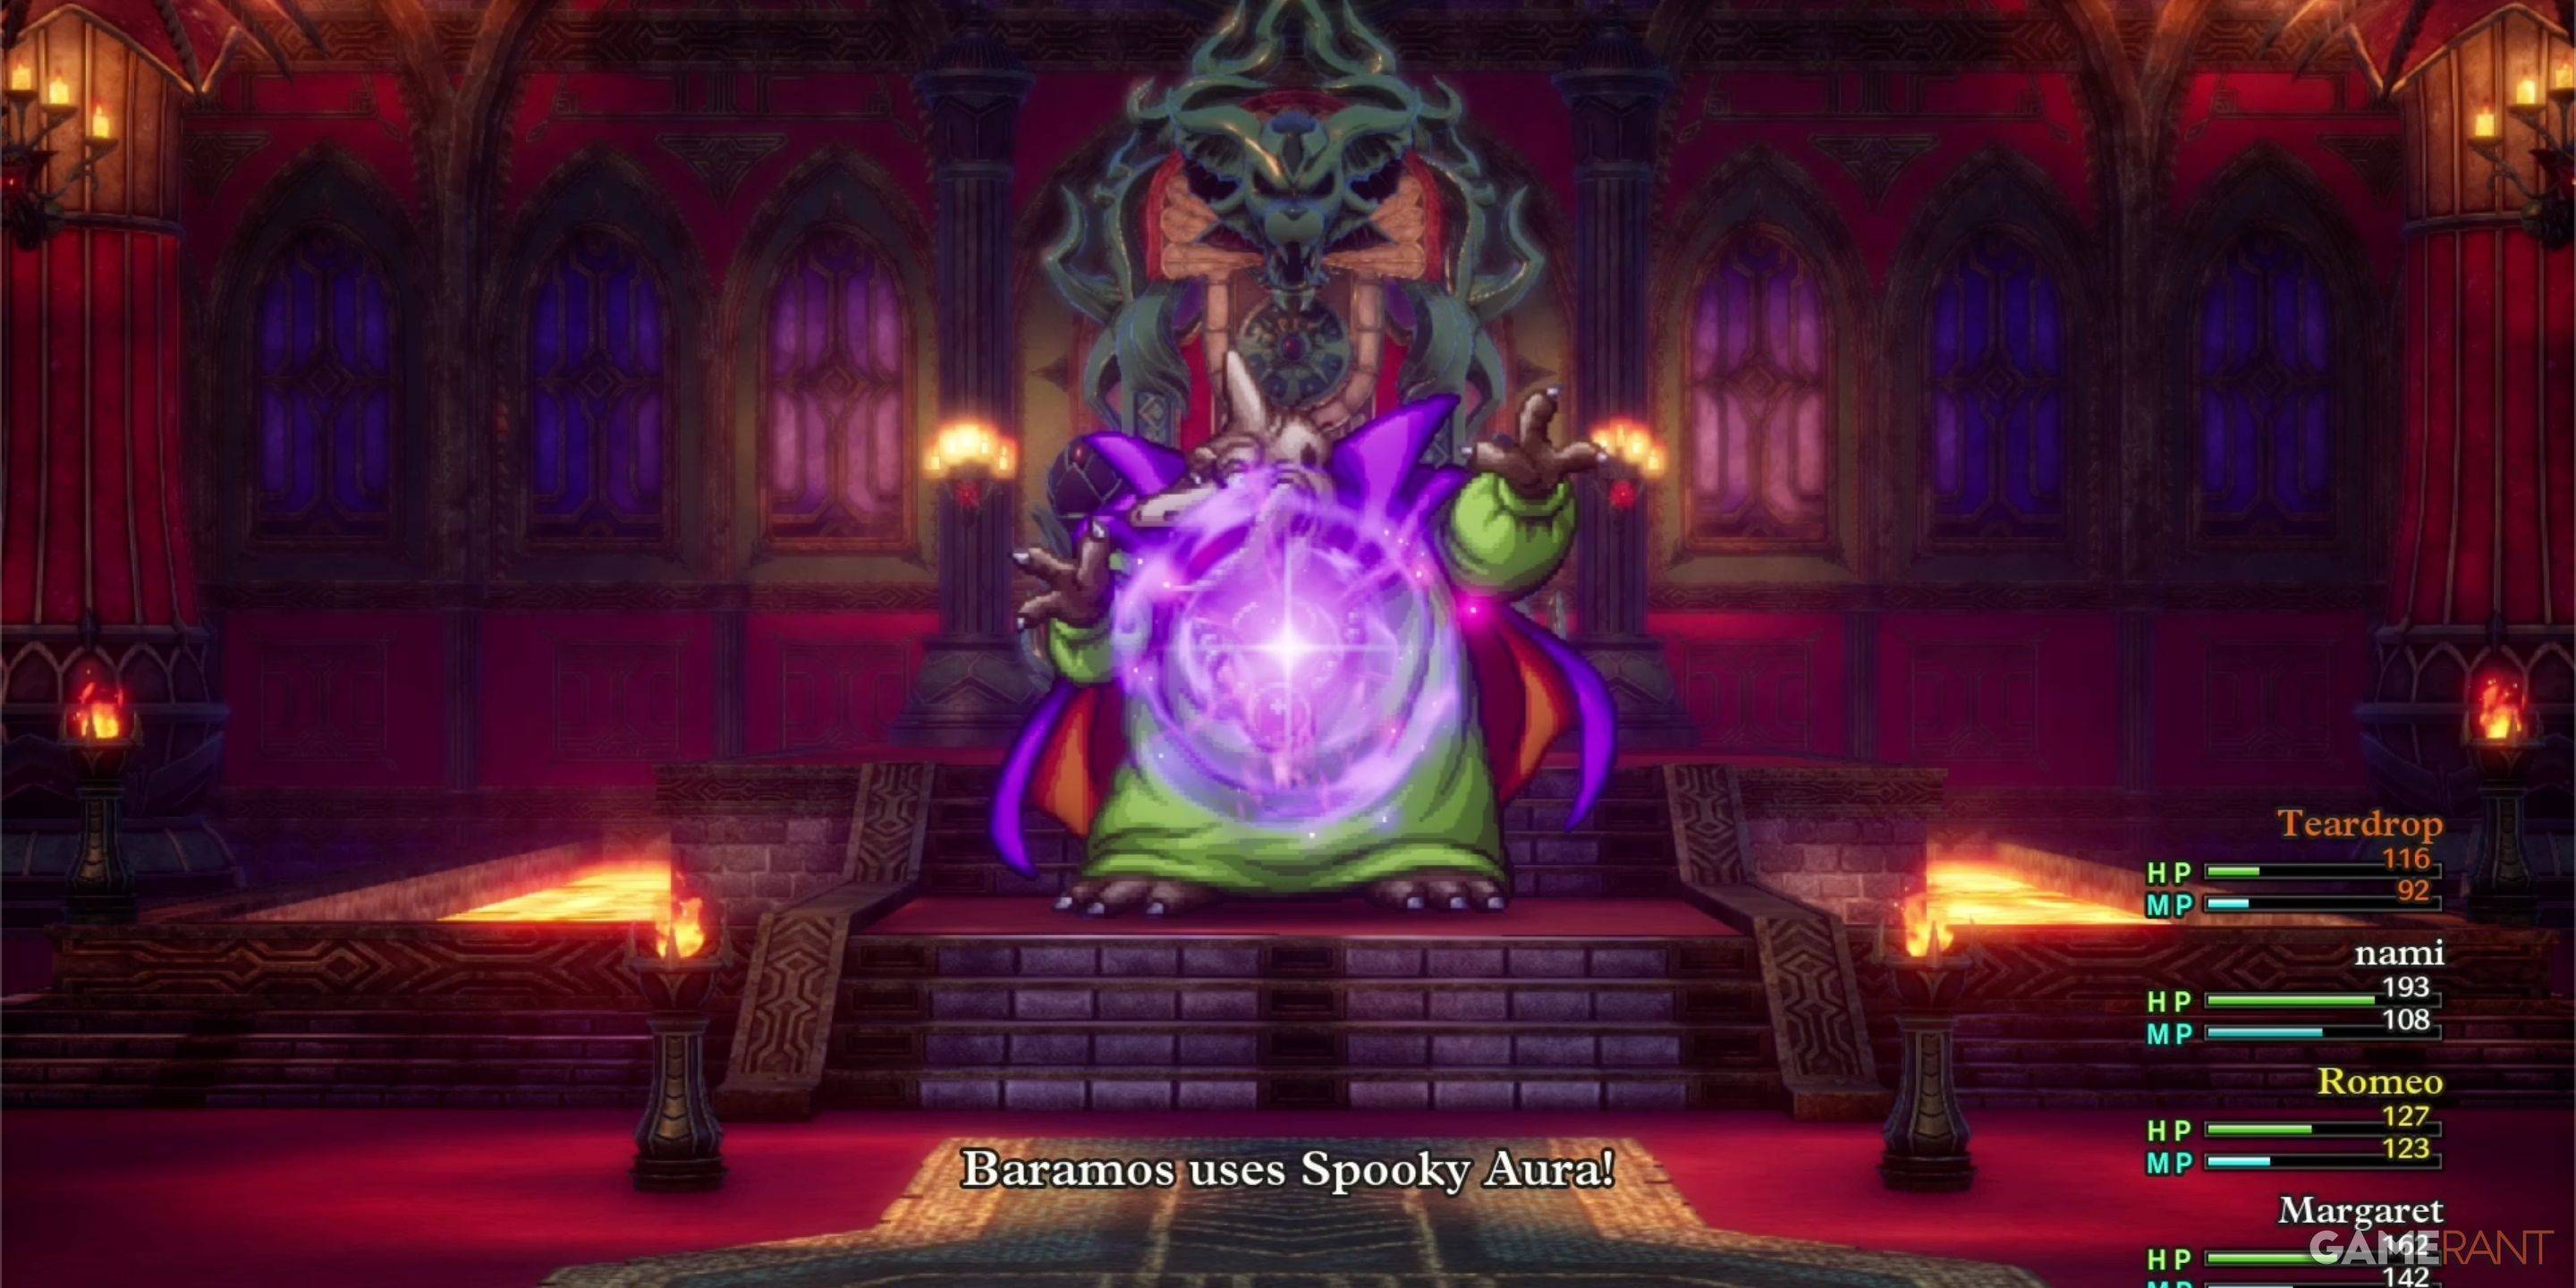
Baramos is a formidable opponent. Strategic planning and appropriate party levels are crucial.
Baramos's Weaknesses:
- Crack (Ice-based spells)
- Whoosh (Wind-based spells)
Utilize high-level spells like Kacrack and Swoosh, focusing on offense while maintaining a dedicated healer. Prioritize survival over speed.
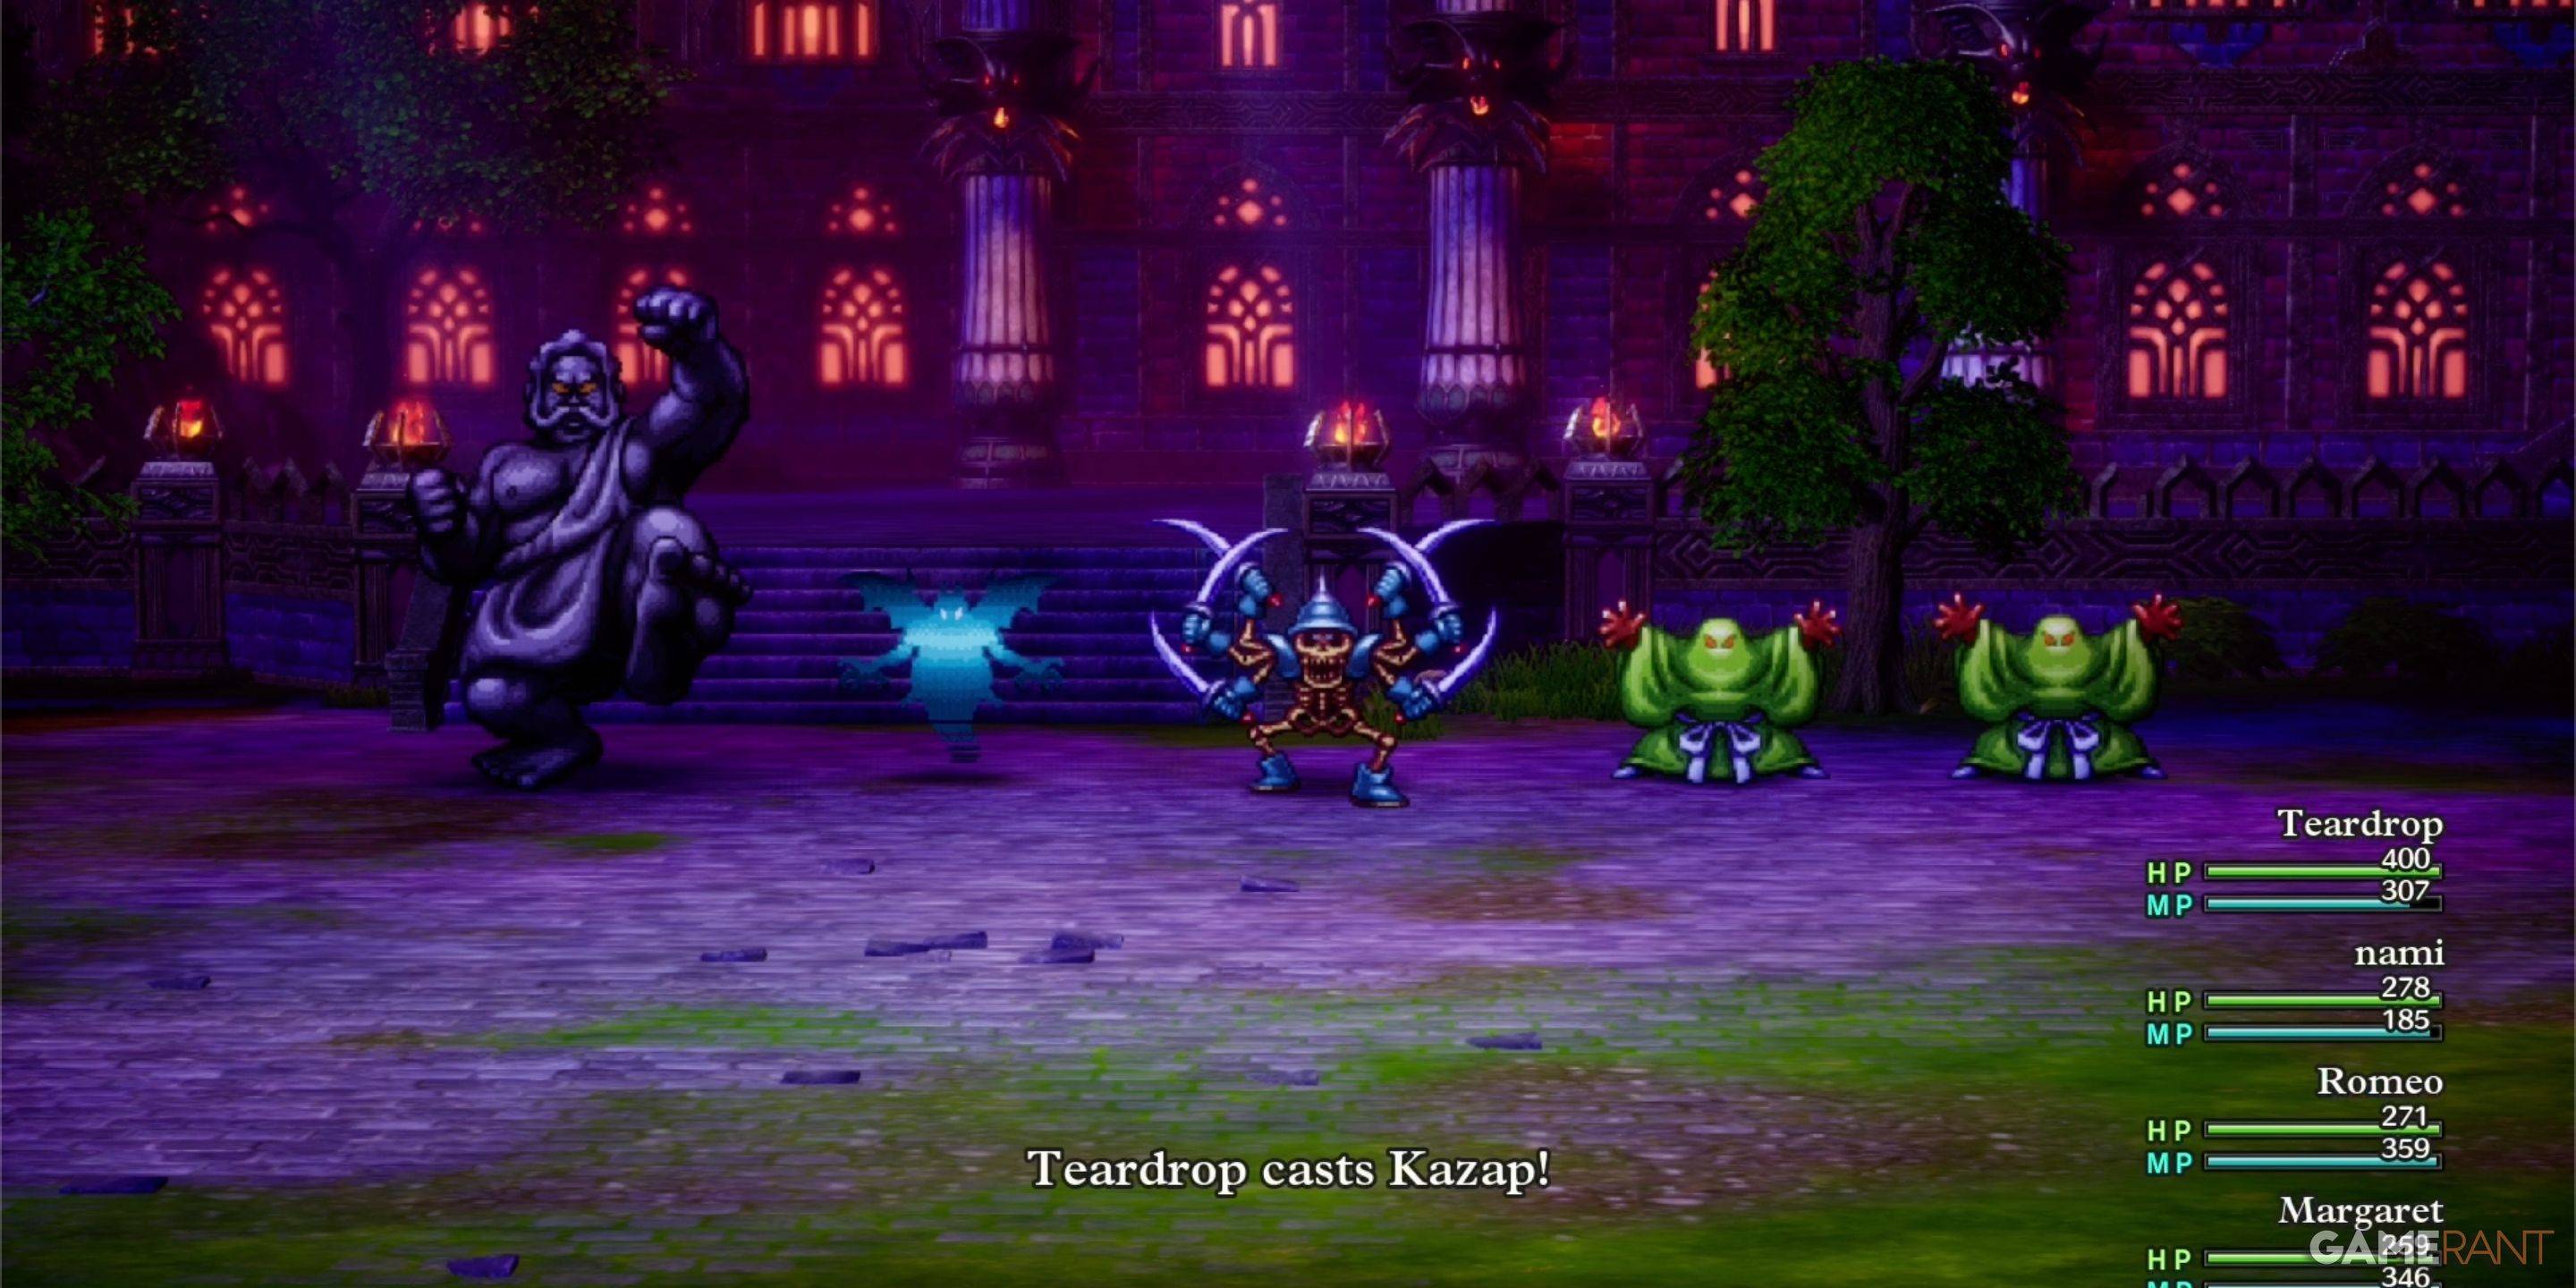
Monsters in Baramos's Lair
| Monster Name | Weakness |
|---|---|
| Armful | Zap |
| Boreal Serpent | TBD |
| Infanticore | TBD |
| Leger-De-Man | TBD |
| Living Statue | None |
| Liquid Metal Slime | None |
| Silhouette | Varies |
This comprehensive guide will equip you to successfully navigate and conquer Baramos's Lair in Dragon Quest 3 Remake. Remember to utilize your party's strengths and exploit Baramos's weaknesses for victory!

-
Soccer Heroes RPG
-
Pregnancy Guide - Baby Tracker
-

ရွှေနားဆင် Myanmar Audio Books
-

uLog - Who Viewed My Profile
-

Child Growth Tracking
-

PedalboardPlanner
-

CartusMobile
-
Rugăciuni puternice ortodoxe
-

Lotto Number Generator China
-

1C Big Keyboard
-

SlotMan - Free Classic Vegas Slot Machine 777
-

IMDb: Movies & TV Shows
-
1

Top Streaming Platforms for Live Sports in 2025
Jun 18,2025
-
2
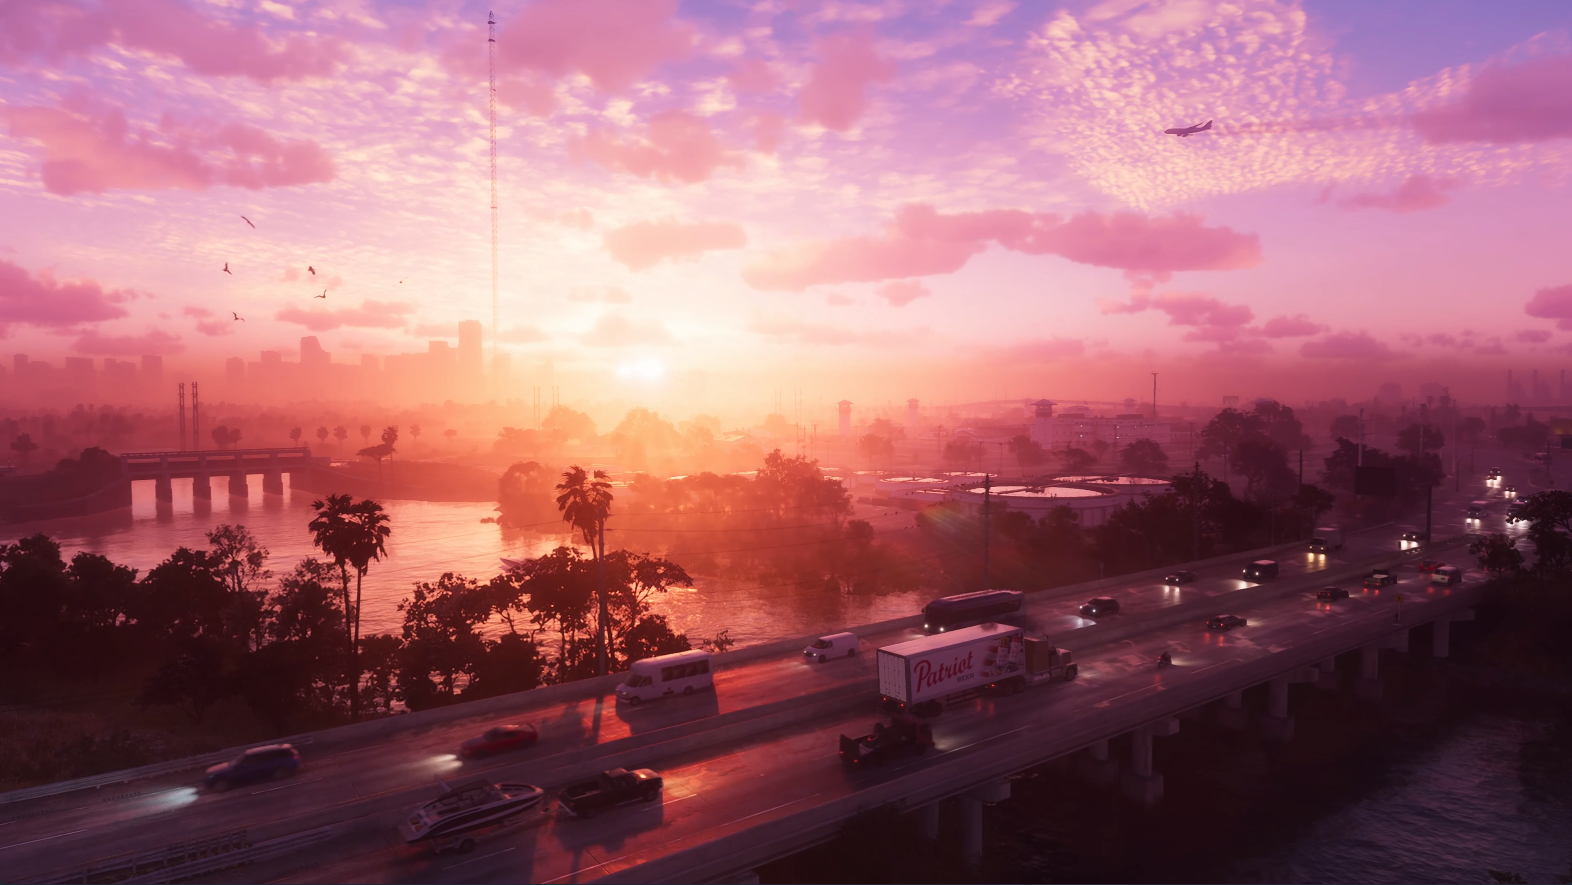
GTA 6 Set for Fall 2025 Release, CEO Confirms
Apr 03,2025
-
3
Roblox: CrossBlox Codes (January 2025)
Mar 04,2025
-
4

First ALGS in Asia Emerges in Japan
Jan 19,2025
-
5
![Roblox Forsaken Characters Tier List [UPDATED] (2025)](https://img.jdzca.com/uploads/18/17380116246797f3e8a8a39.jpg)
Roblox Forsaken Characters Tier List [UPDATED] (2025)
Mar 05,2025
-
6
Introducing the Ultimate Guide to Seamless Character Swapping in Dynasty Warriors: Origins
Feb 25,2025
-
7
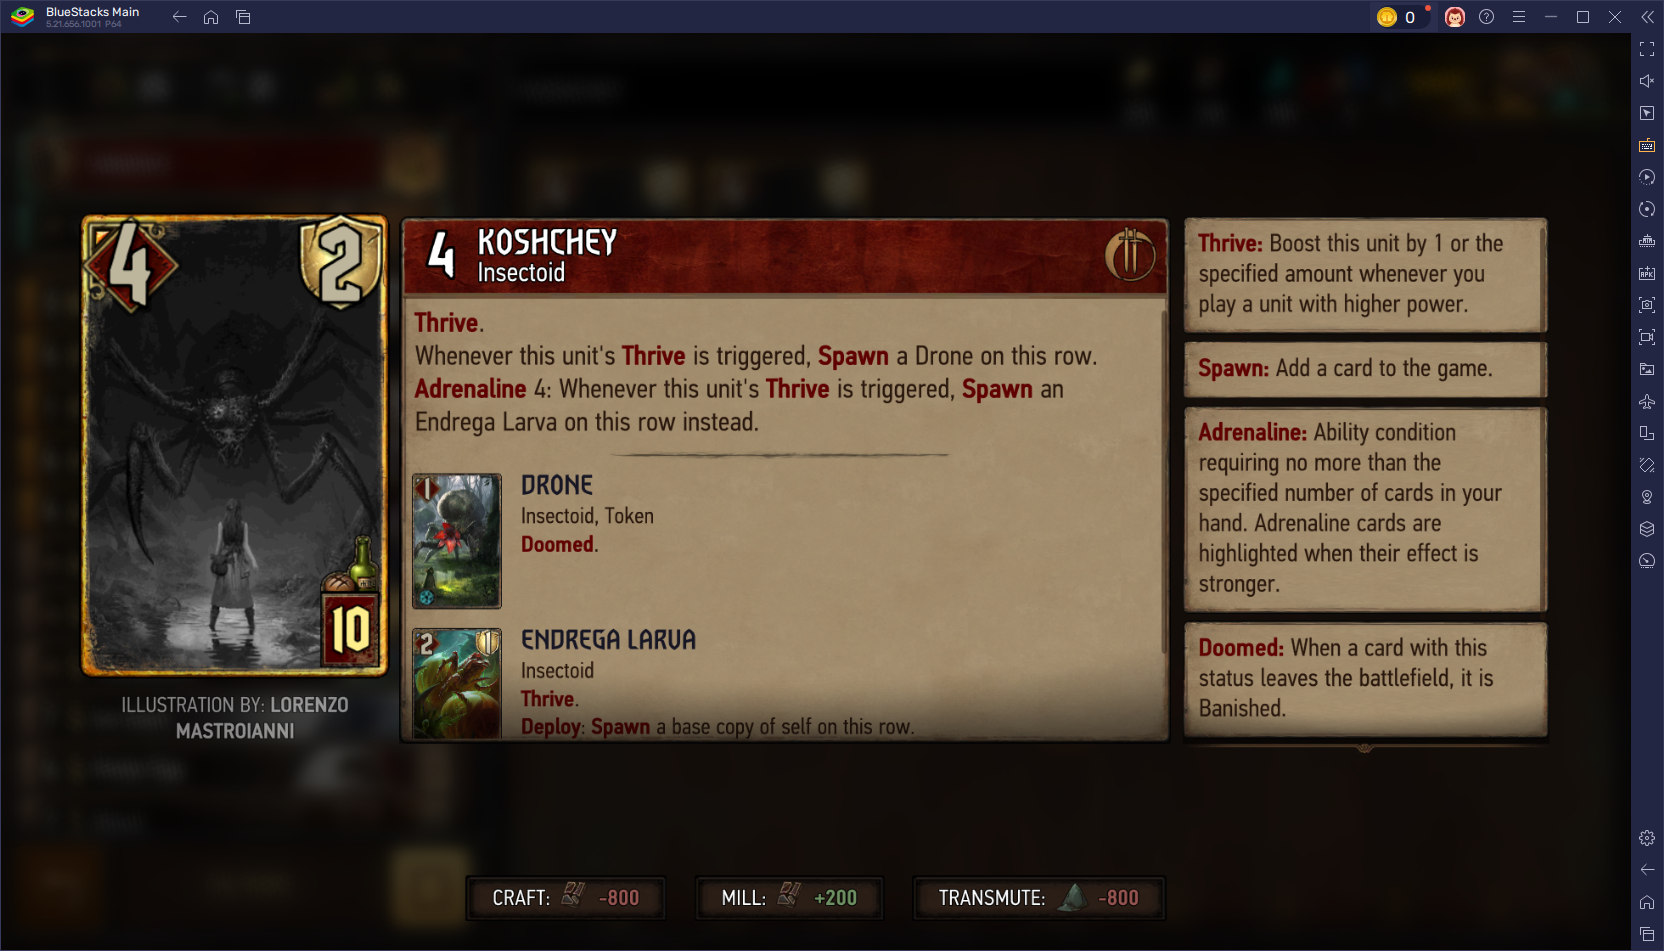
Gwent: Top 5 Witcher Decks (2025 Update)
Mar 13,2025
-
8
Max Hunter Rank in Monster Hunter Wilds: Tips to Increase
Apr 04,2025
-
9
Cute mobs in Minecraft: pink pigs and why they are needed
Mar 06,2025
-
10
Capcom Spotlight Feb 2025 Showcases Monster Hunter Wilds, Onimusha and More
Apr 01,2025
-
Download

Portrait Sketch
Photography / 37.12M
Update: Dec 17,2024
-
Download

Friendship with Benefits
Casual / 150.32M
Update: Dec 13,2024
-
Download

F.I.L.F. 2
Casual / 352.80M
Update: Dec 20,2024
-
4
[NSFW 18+] Sissy Trainer
-
5
Pocket Touch Simulation! for
-
6
슬롯 마카오 카지노 - 정말 재미나는 리얼 슬롯머신
-
7
Chubby Story [v1.4.2] (Localizations)
-
8
Life with a College Girl
-
9
Shuffles by Pinterest
-
10
Hunter Akuna